Calendar
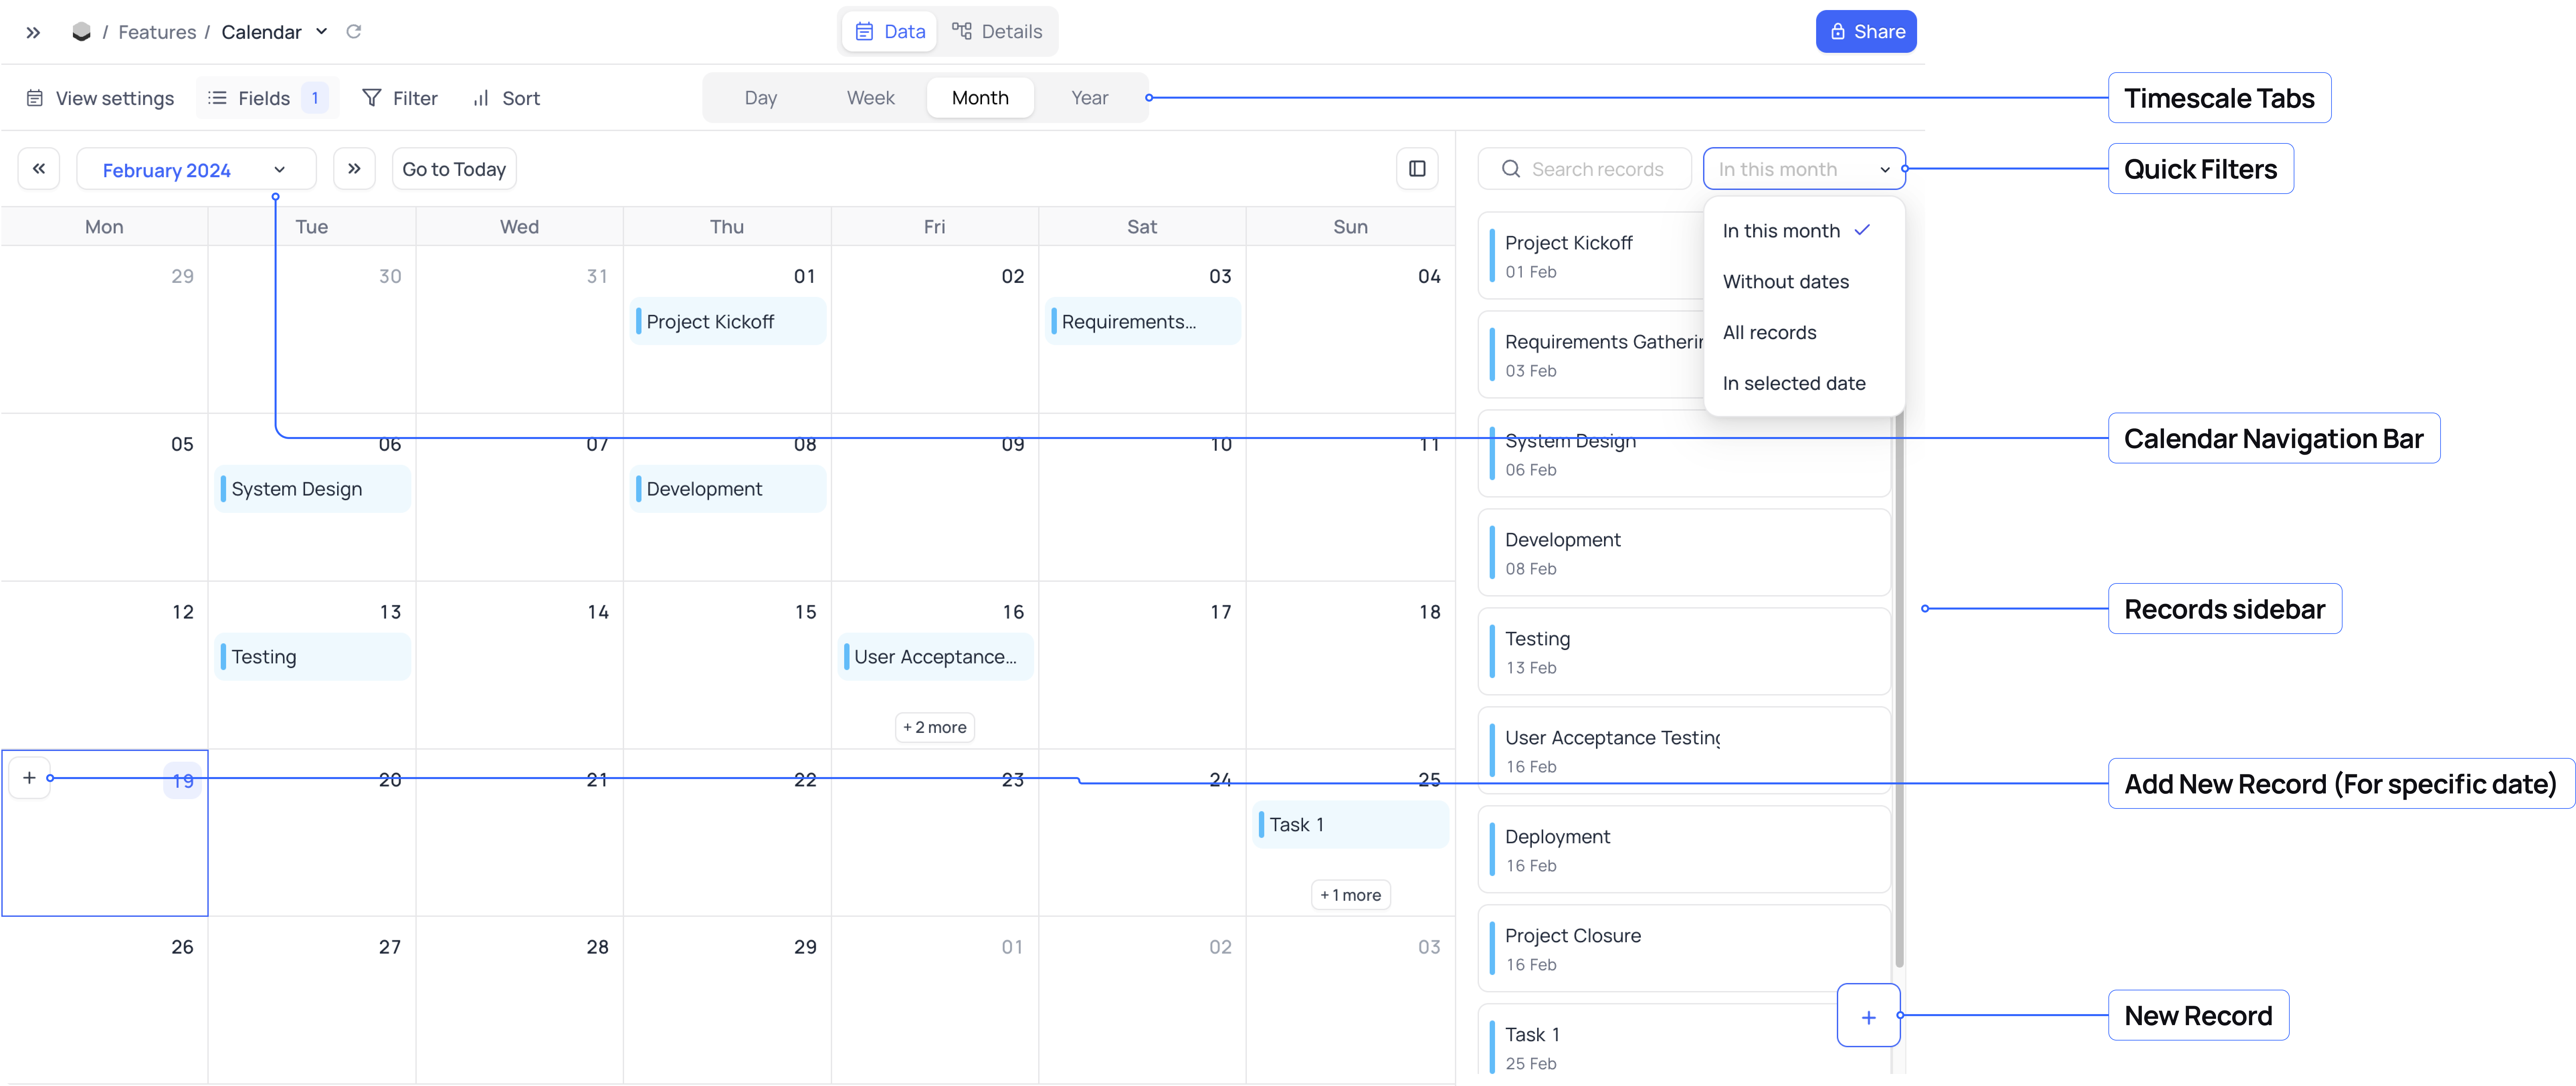
Calendar View allows you to visualise your data in a calendar format. You can easily rearrange the records by dragging and dropping them to different dates. You can also visualise the records in a day, week, month, or year format. This section will cover all the operations that can be performed on the Calendar view.
Calendar View Actions
- Create a New Calendar View
- Rename an Existing Calendar View
- Duplicate a Calendar View
- Remove a Calendar View
- Share a Calendar View
- Lock Calendar View for Edits
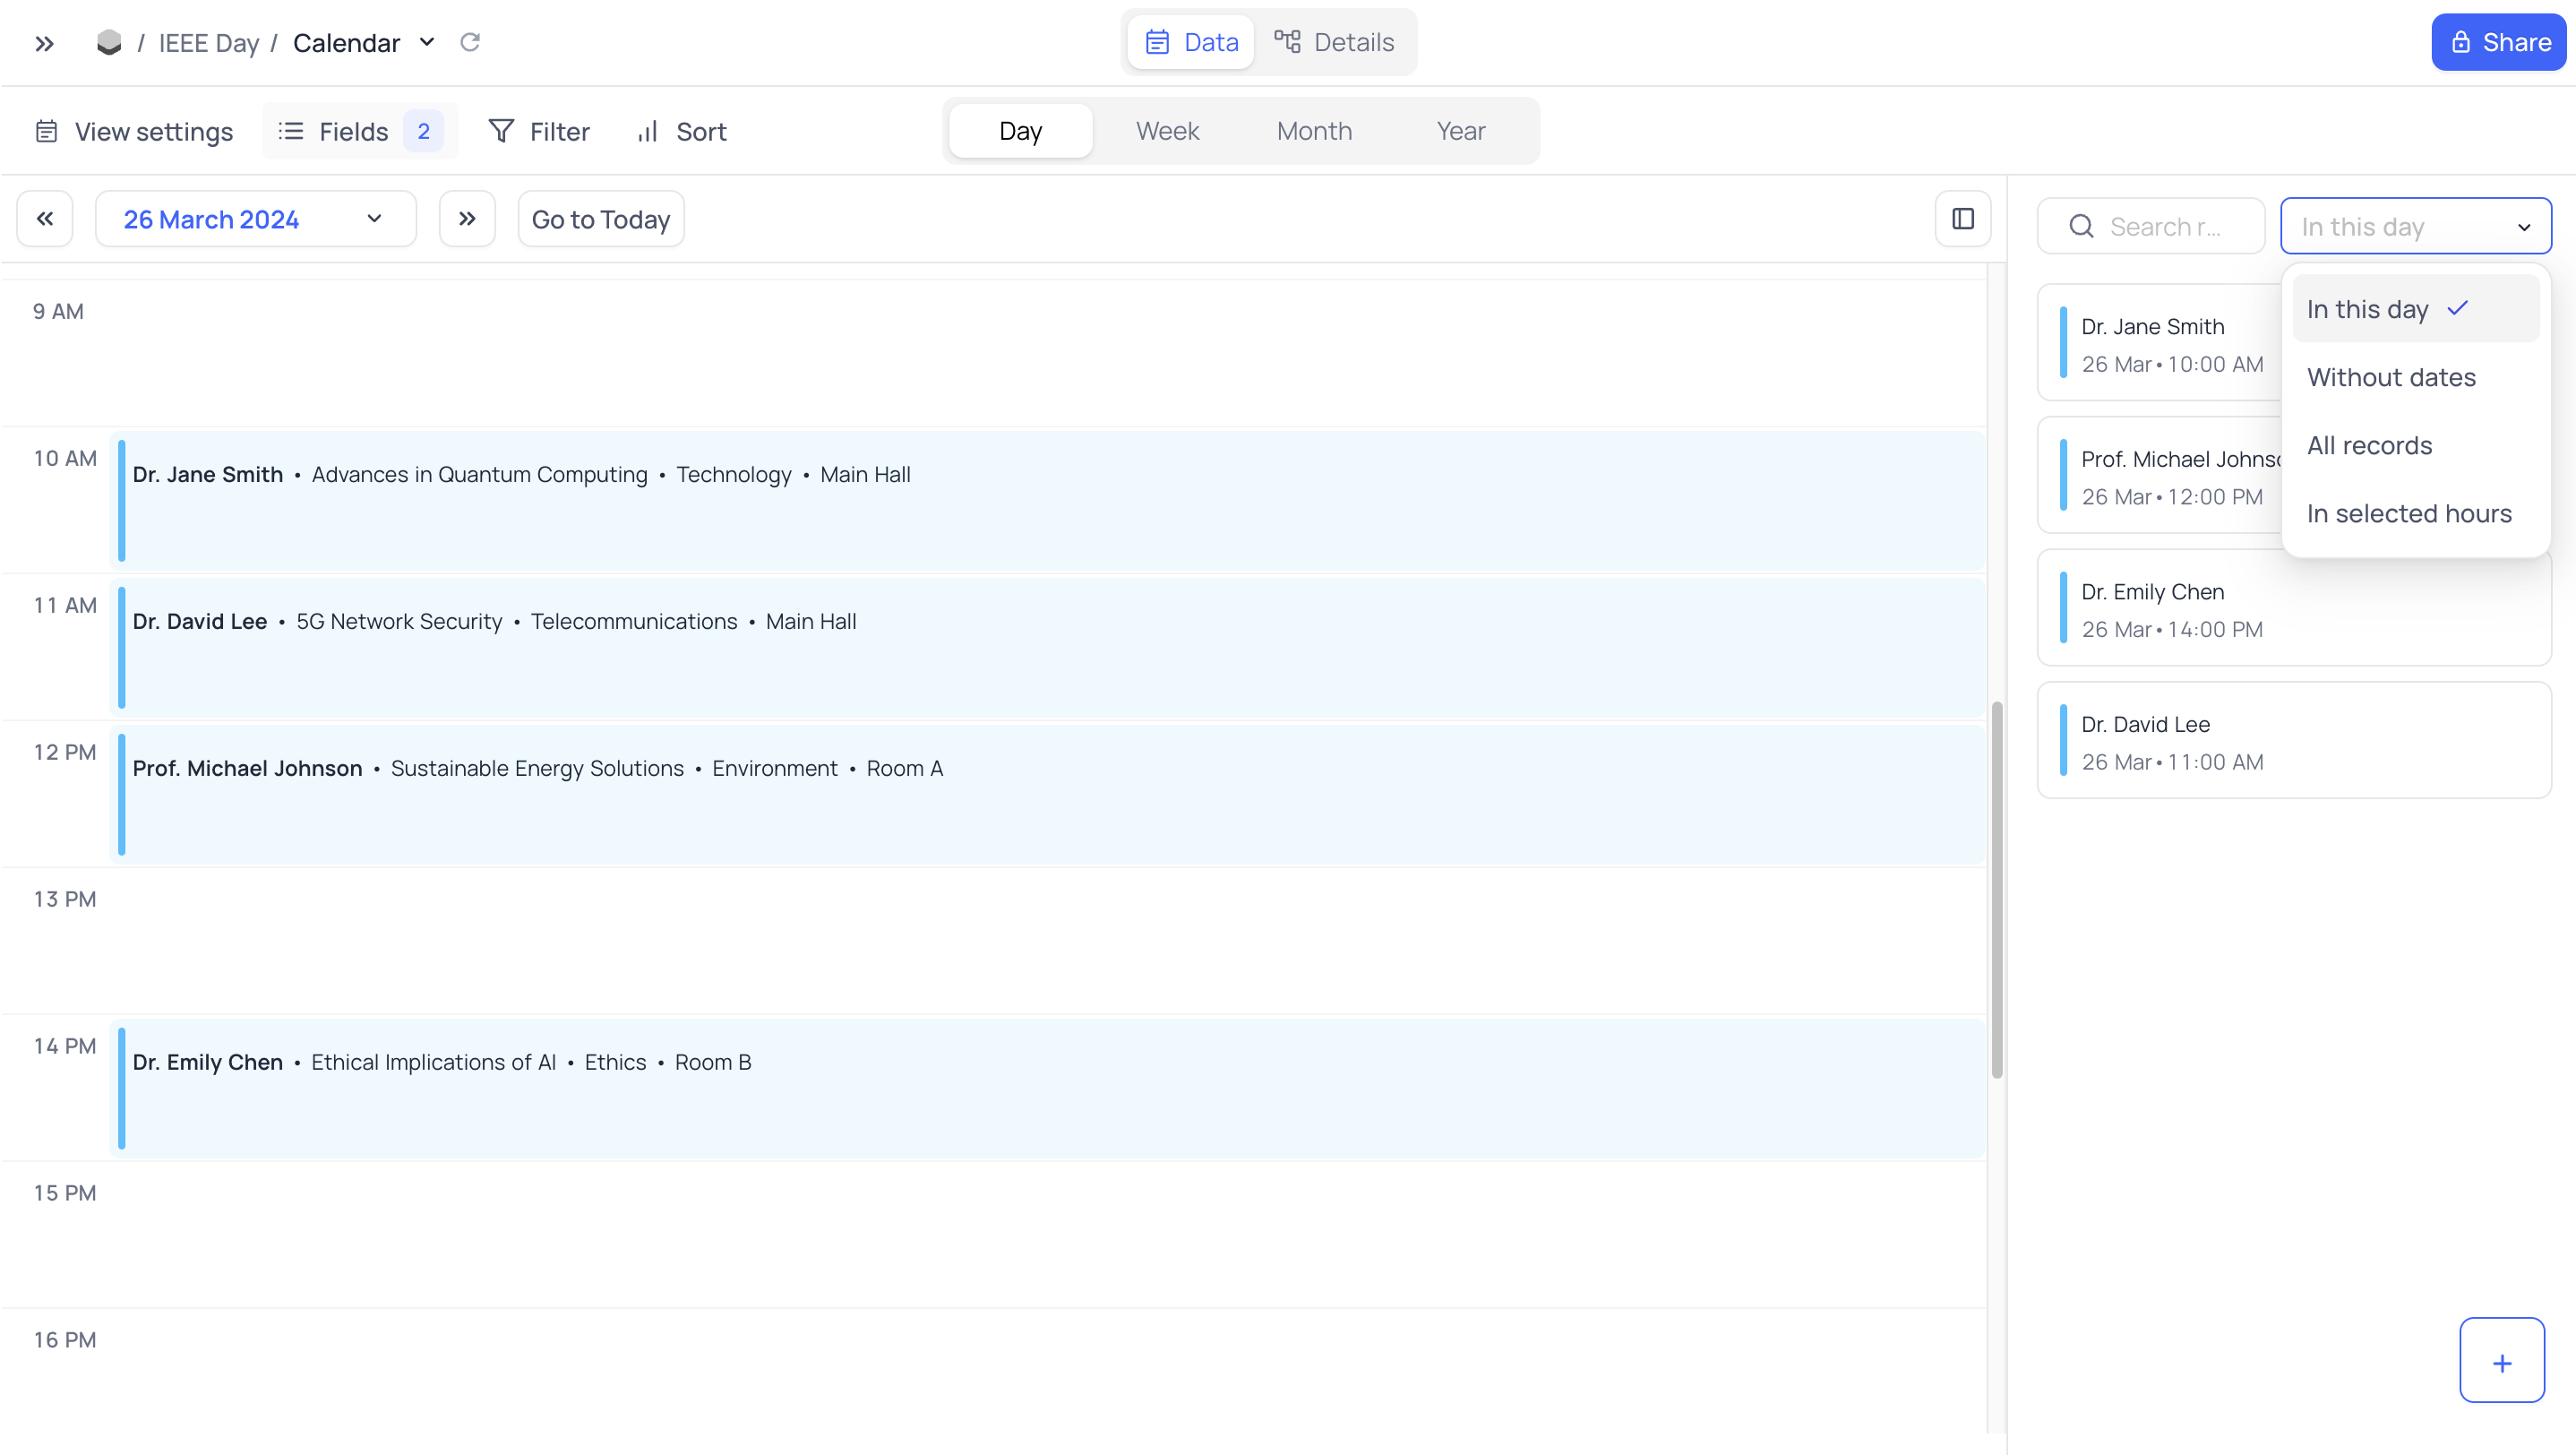
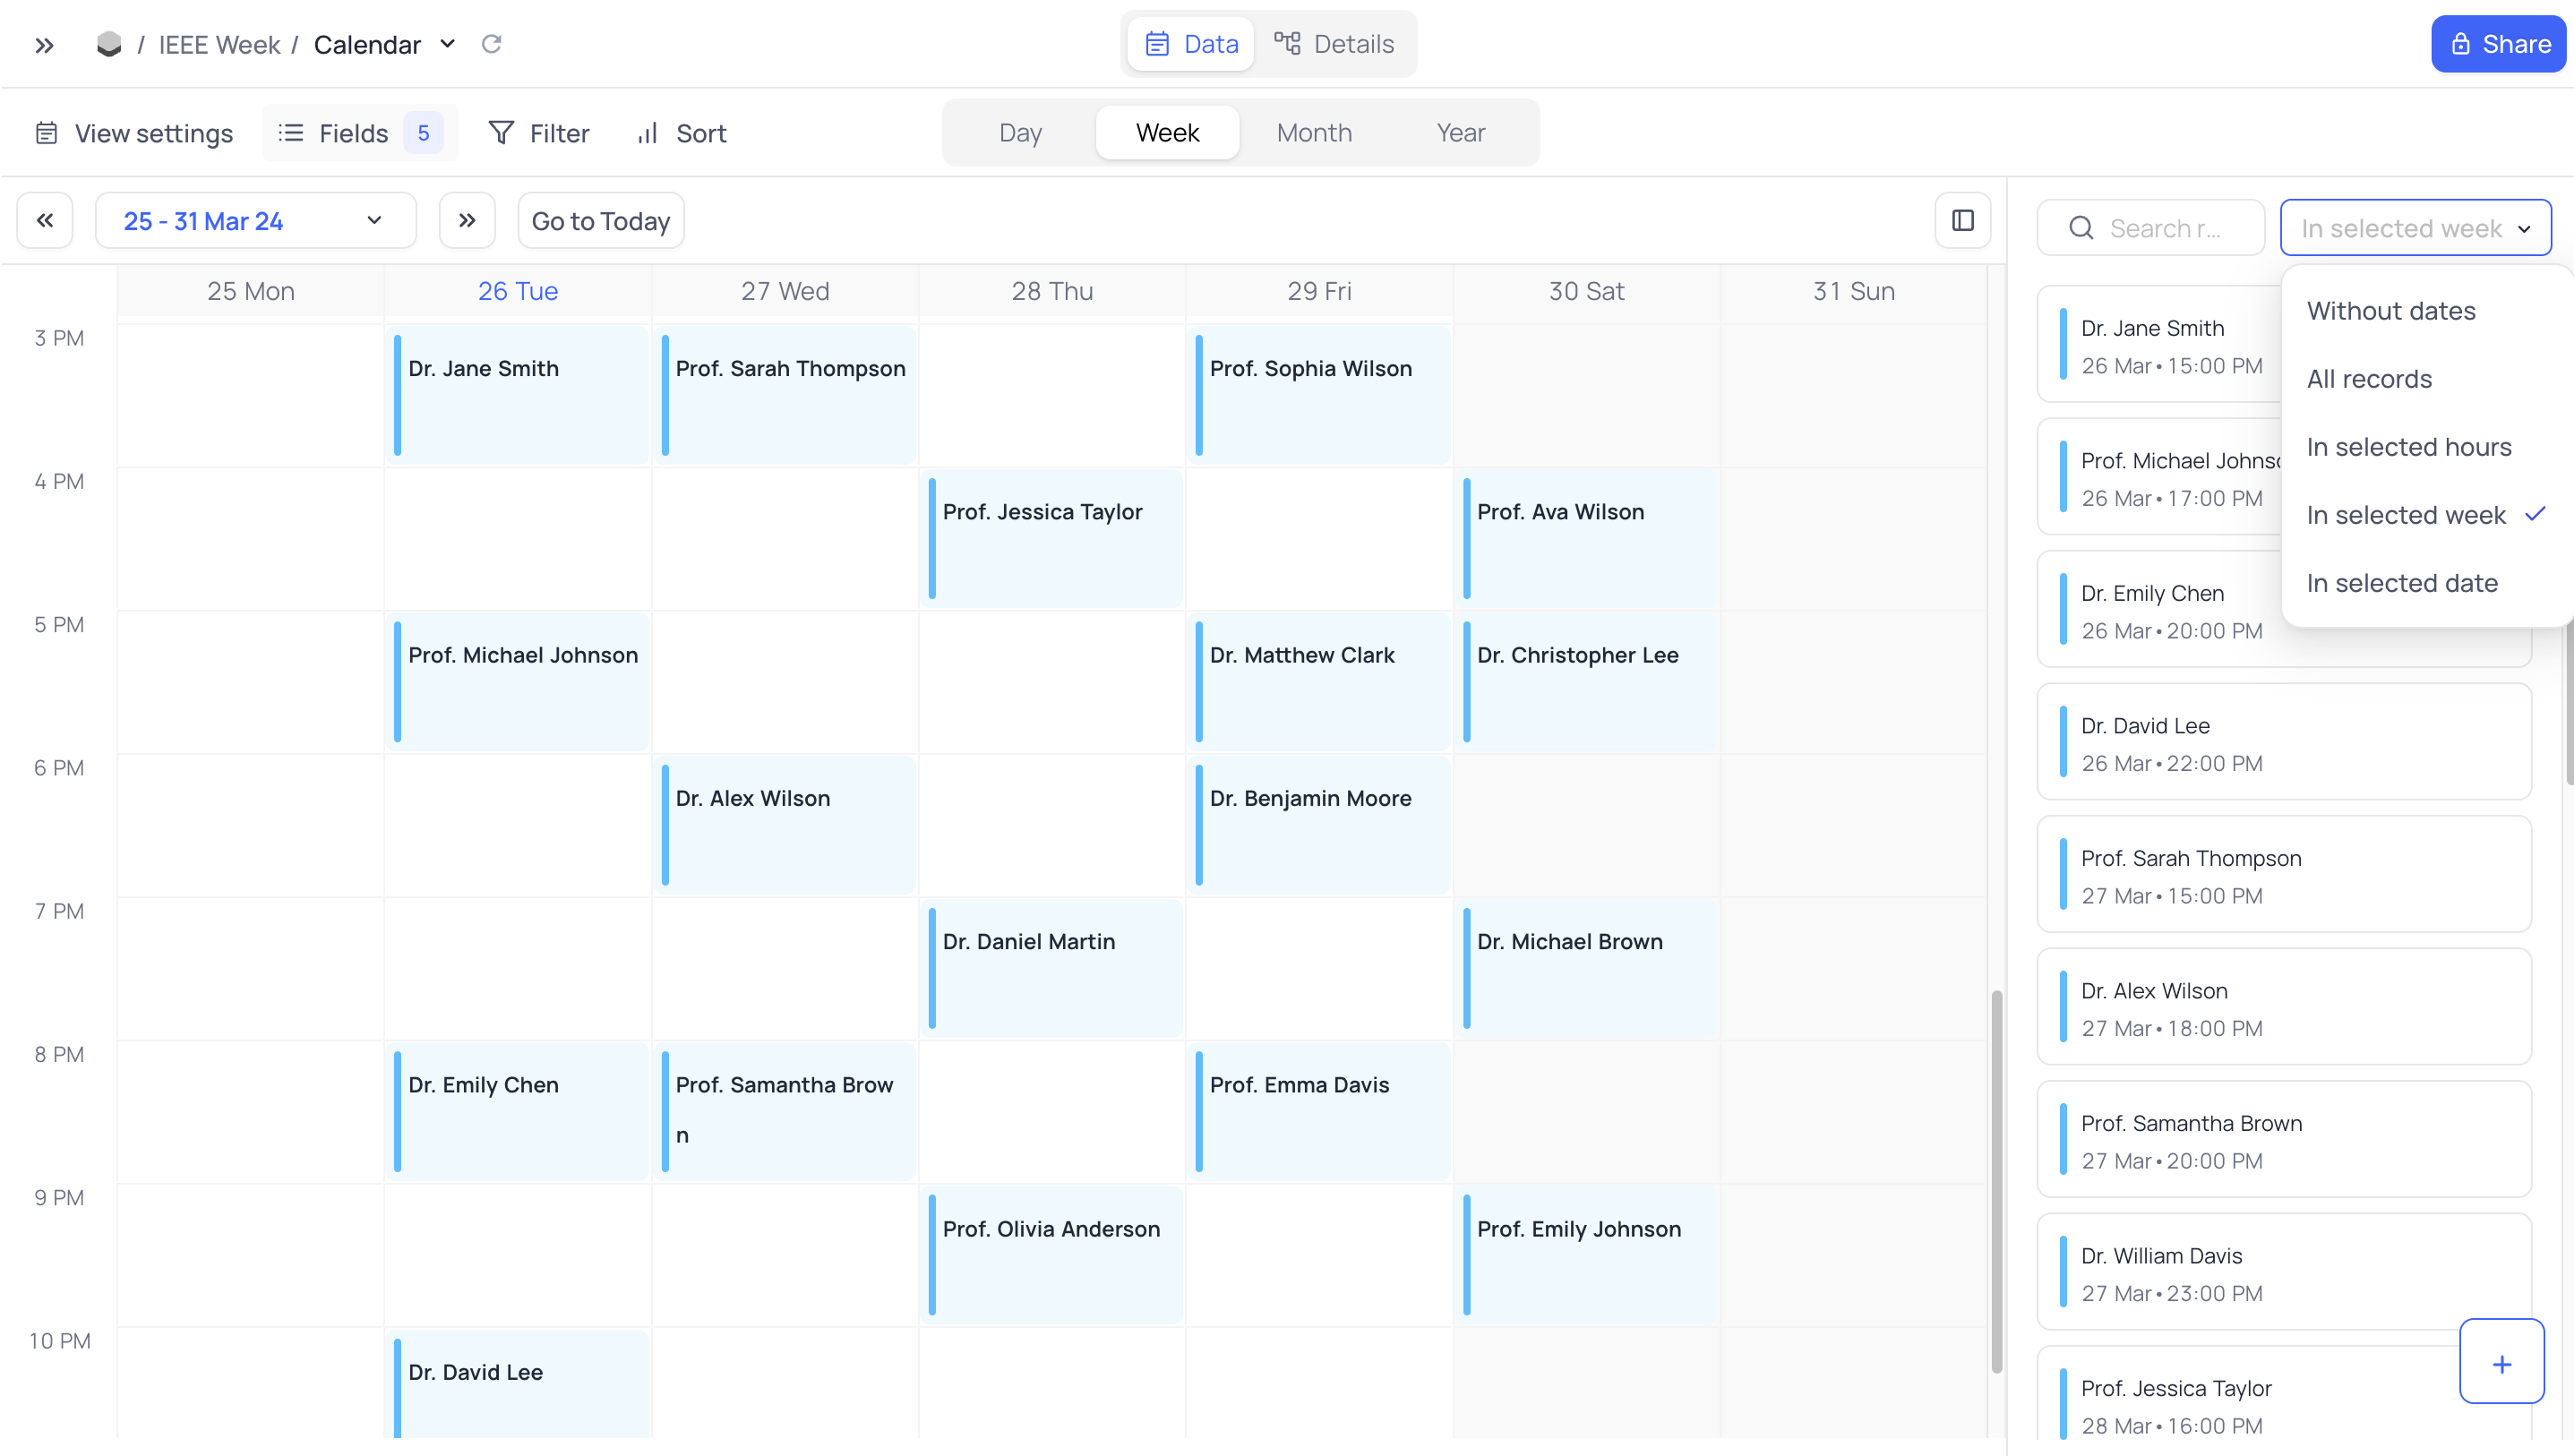
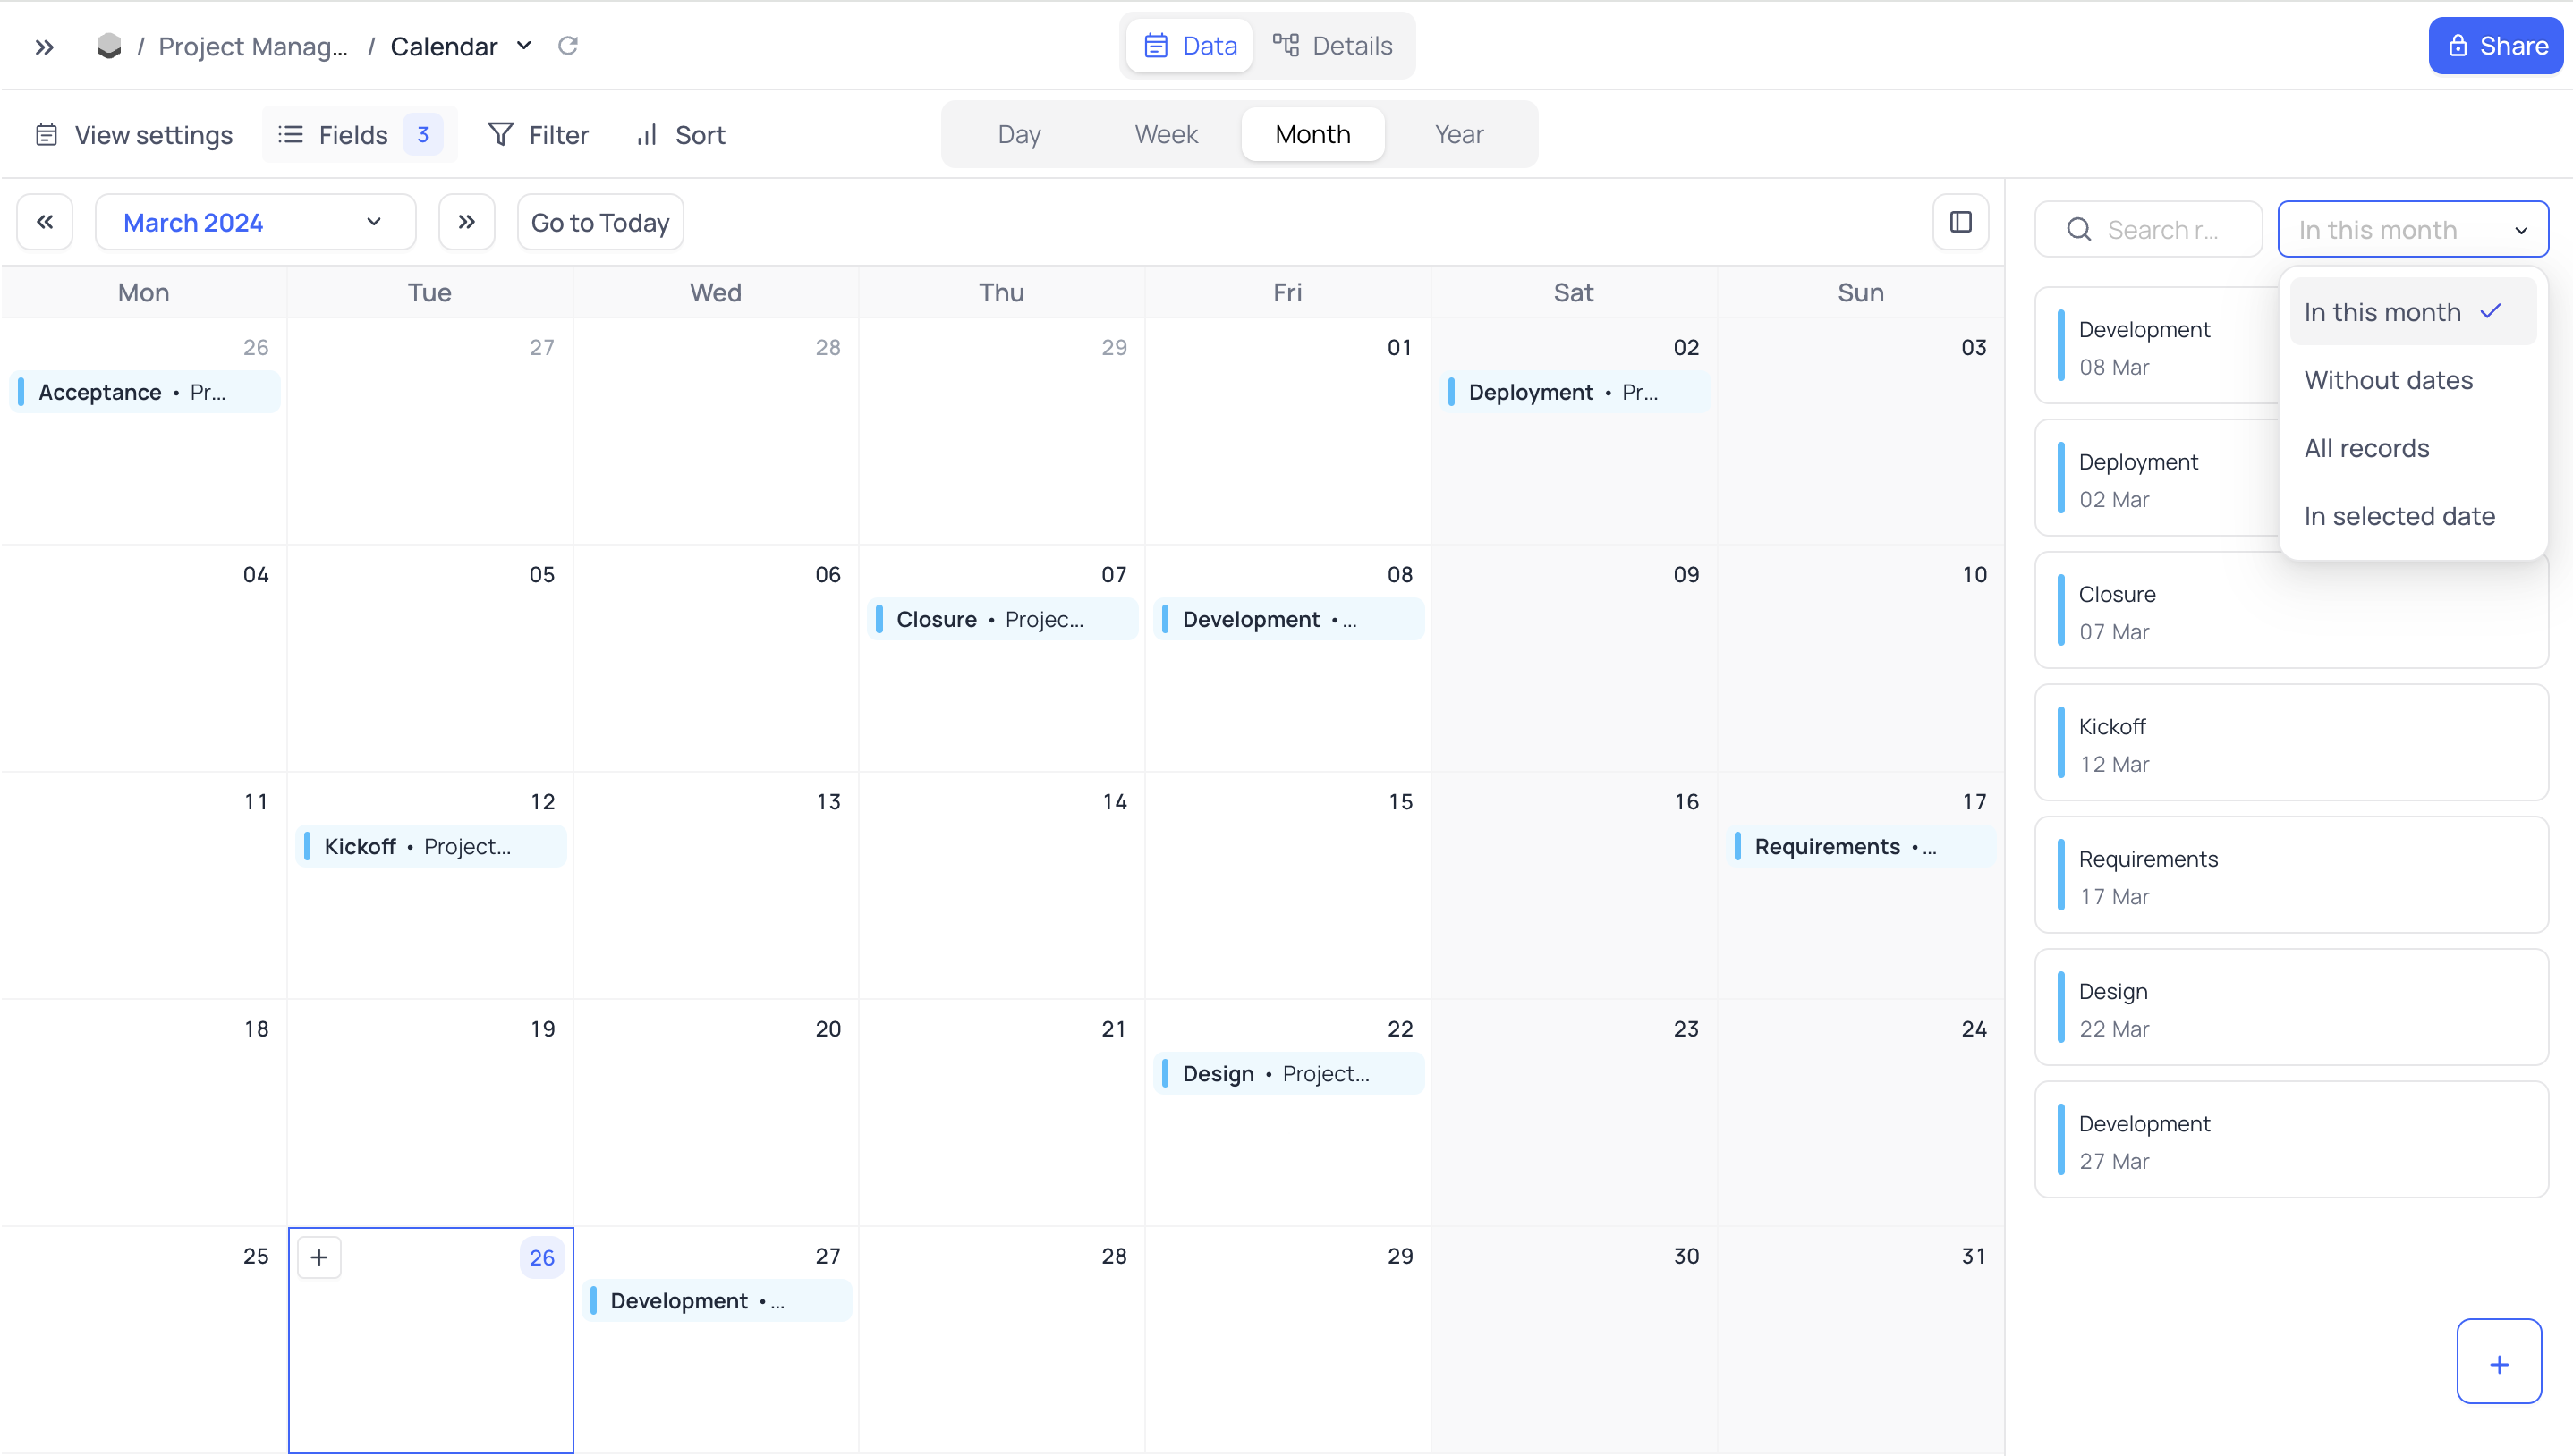
Timescales
For Calendar view, NocoDB supports 4 different timescales:
Day
In day view, you can see the records for a single day. For records with DateTime fields, you can drag and drop the records to different timeslots within the day.
Week
In week view, you can see the records for a single week. You can drag and drop the records to different days within the week. For records with DateTime fields, you can drag and drop the records to different timeslots within the day.
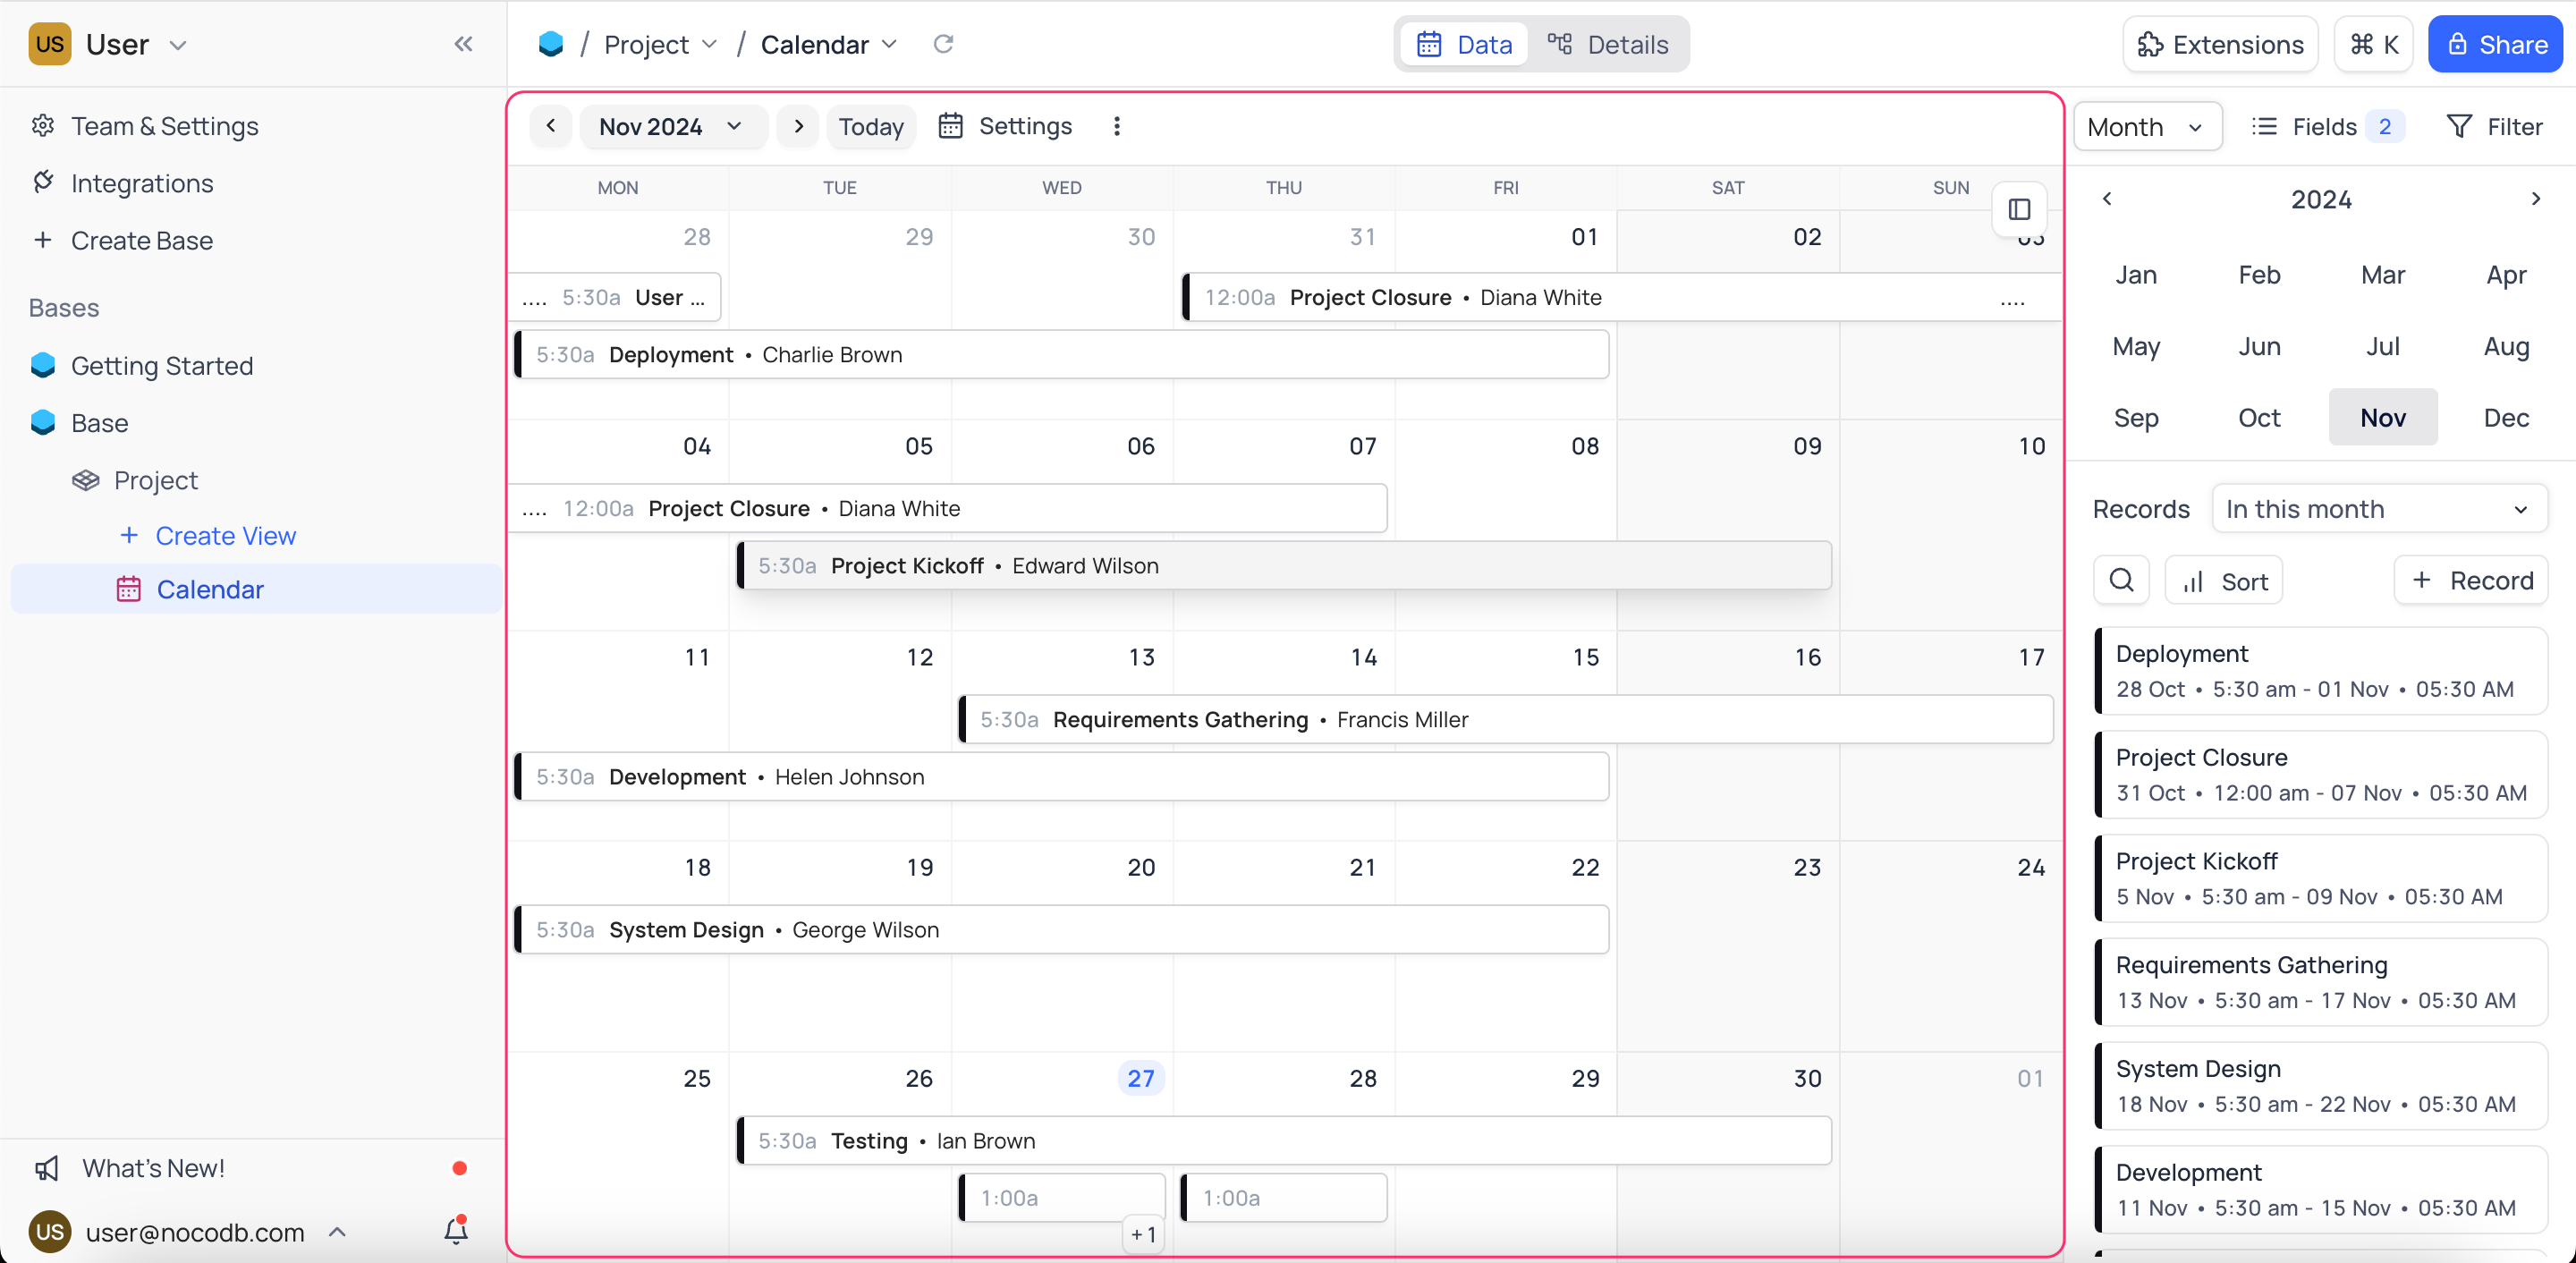
Month
In month view, you can see the records for an entire month. You can drag and drop the records to different days within the month.
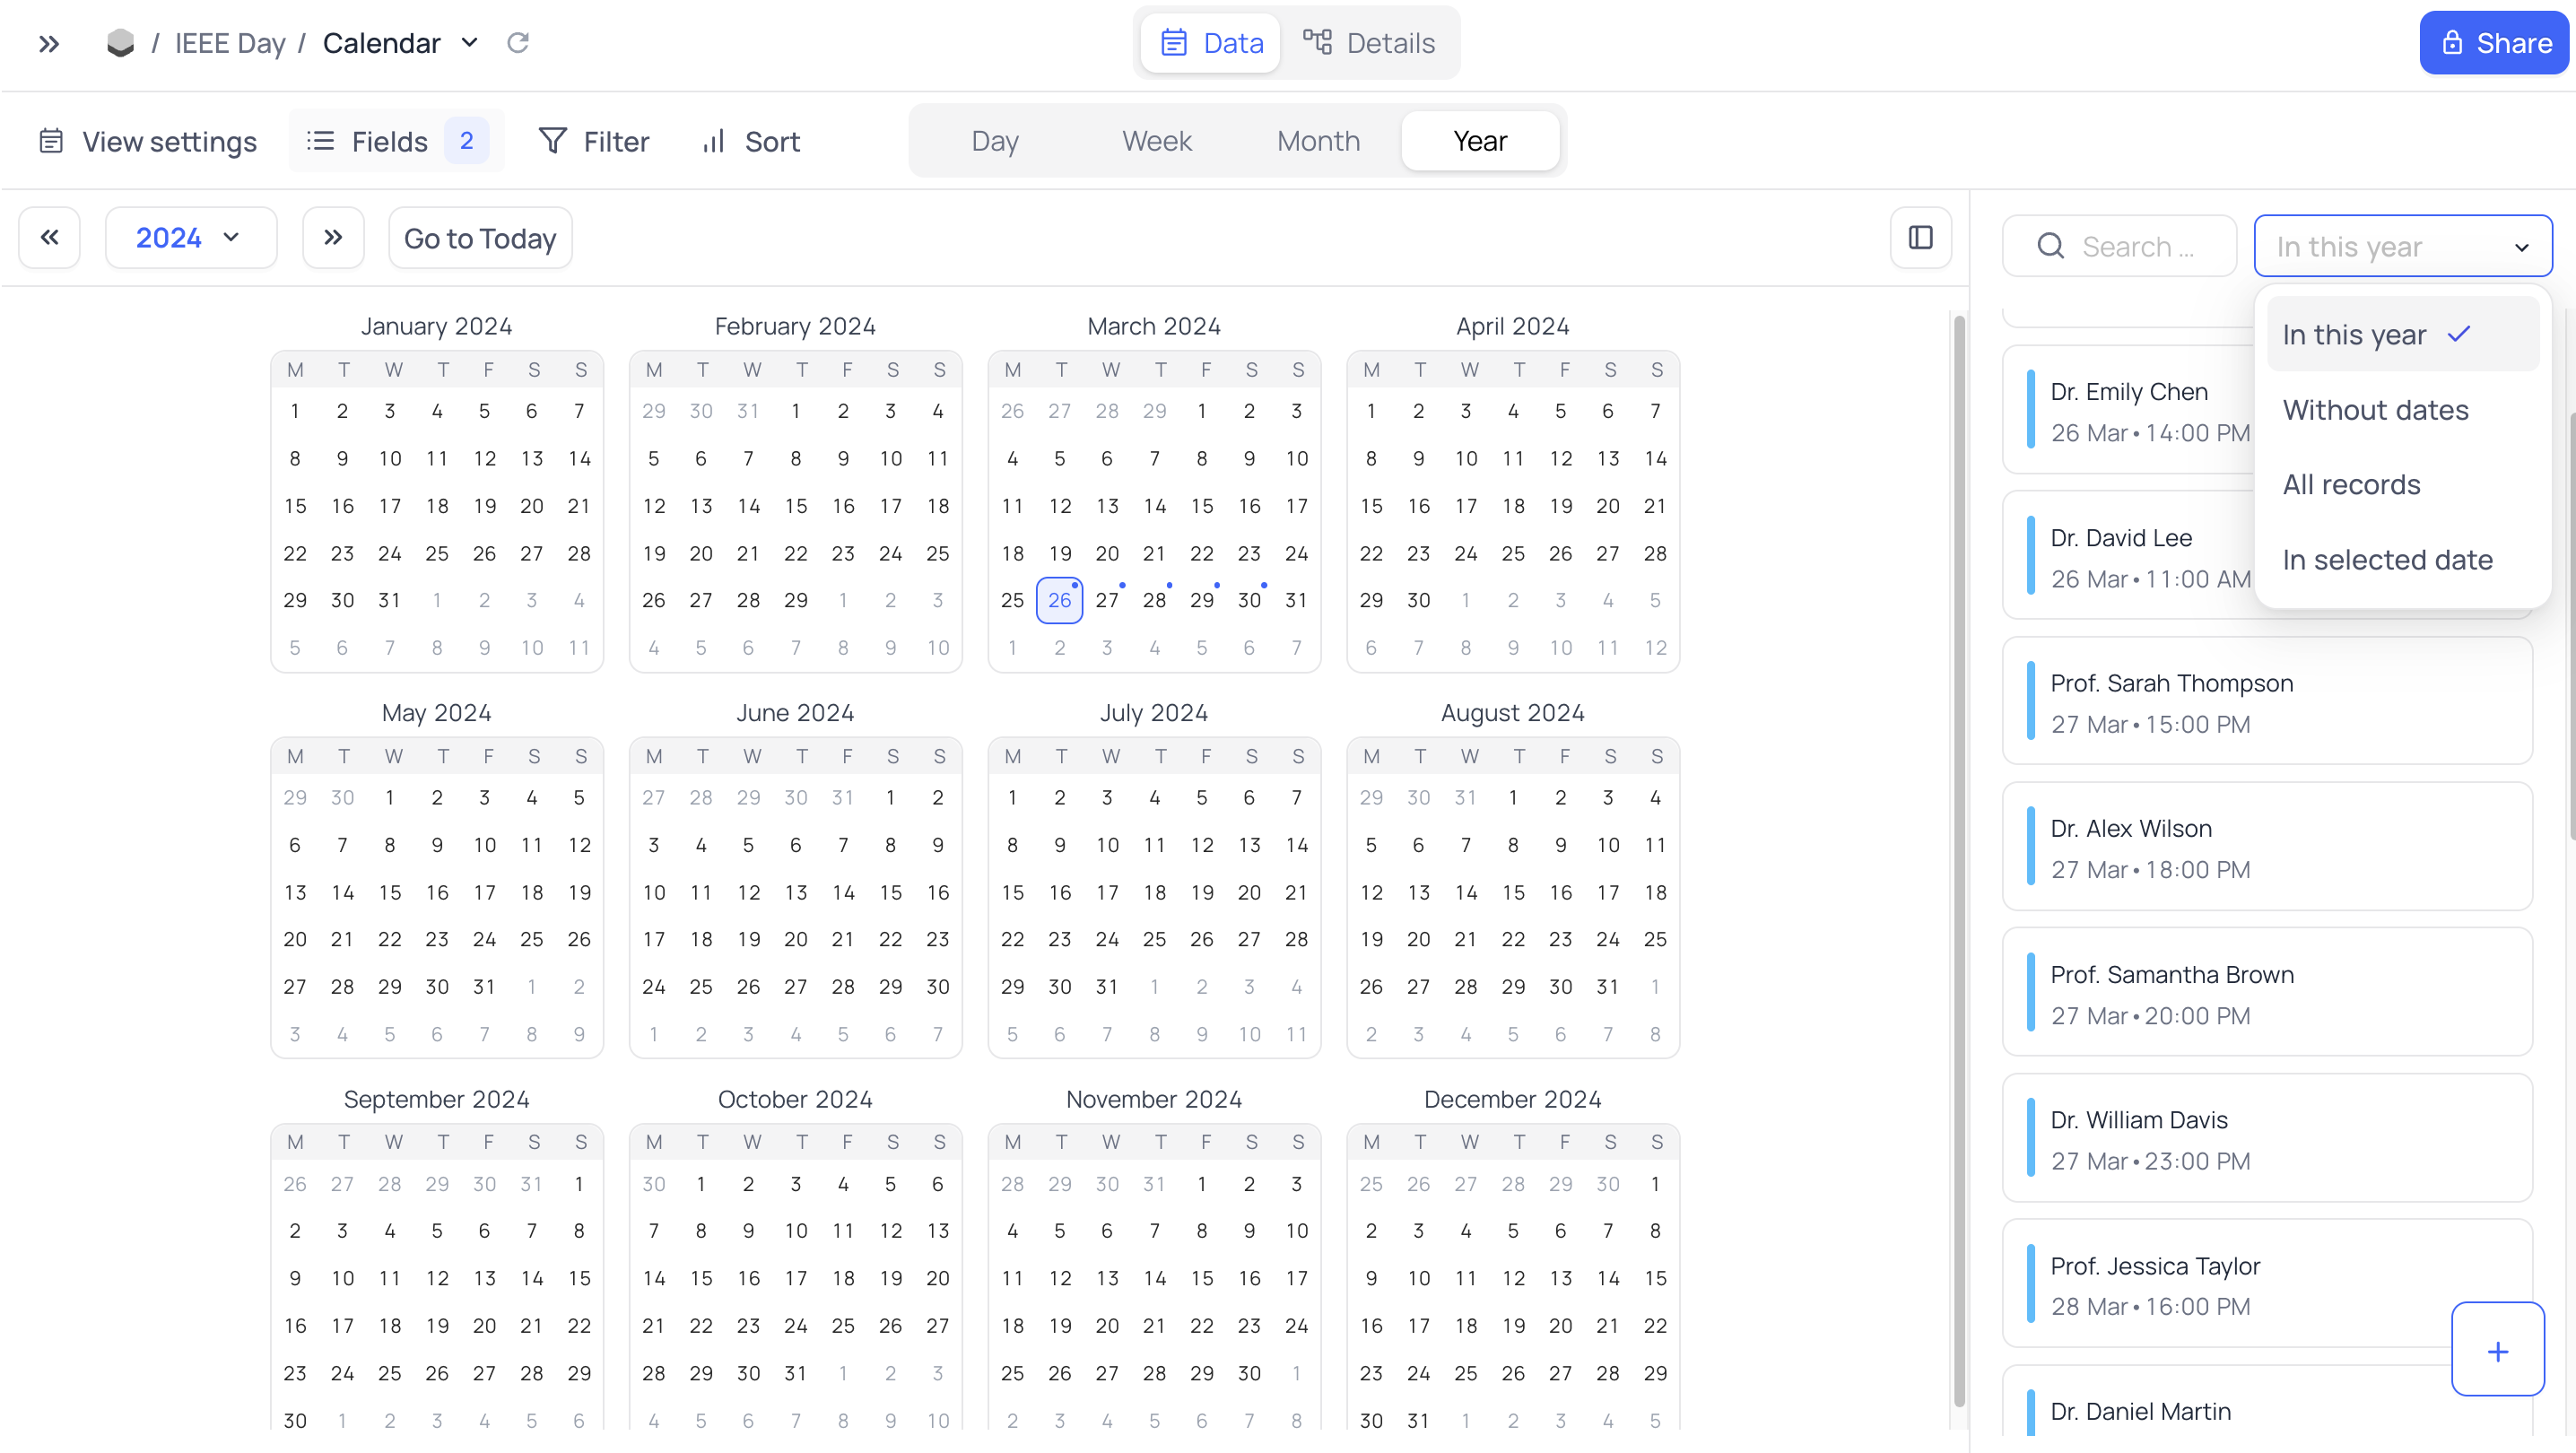
Year
Year view allows you to see a birds-eye view of the records for the entire year. Blue badge on the date indicates that there are records on that date. You can click on the date to see the records for that date.
Calendar View Operations
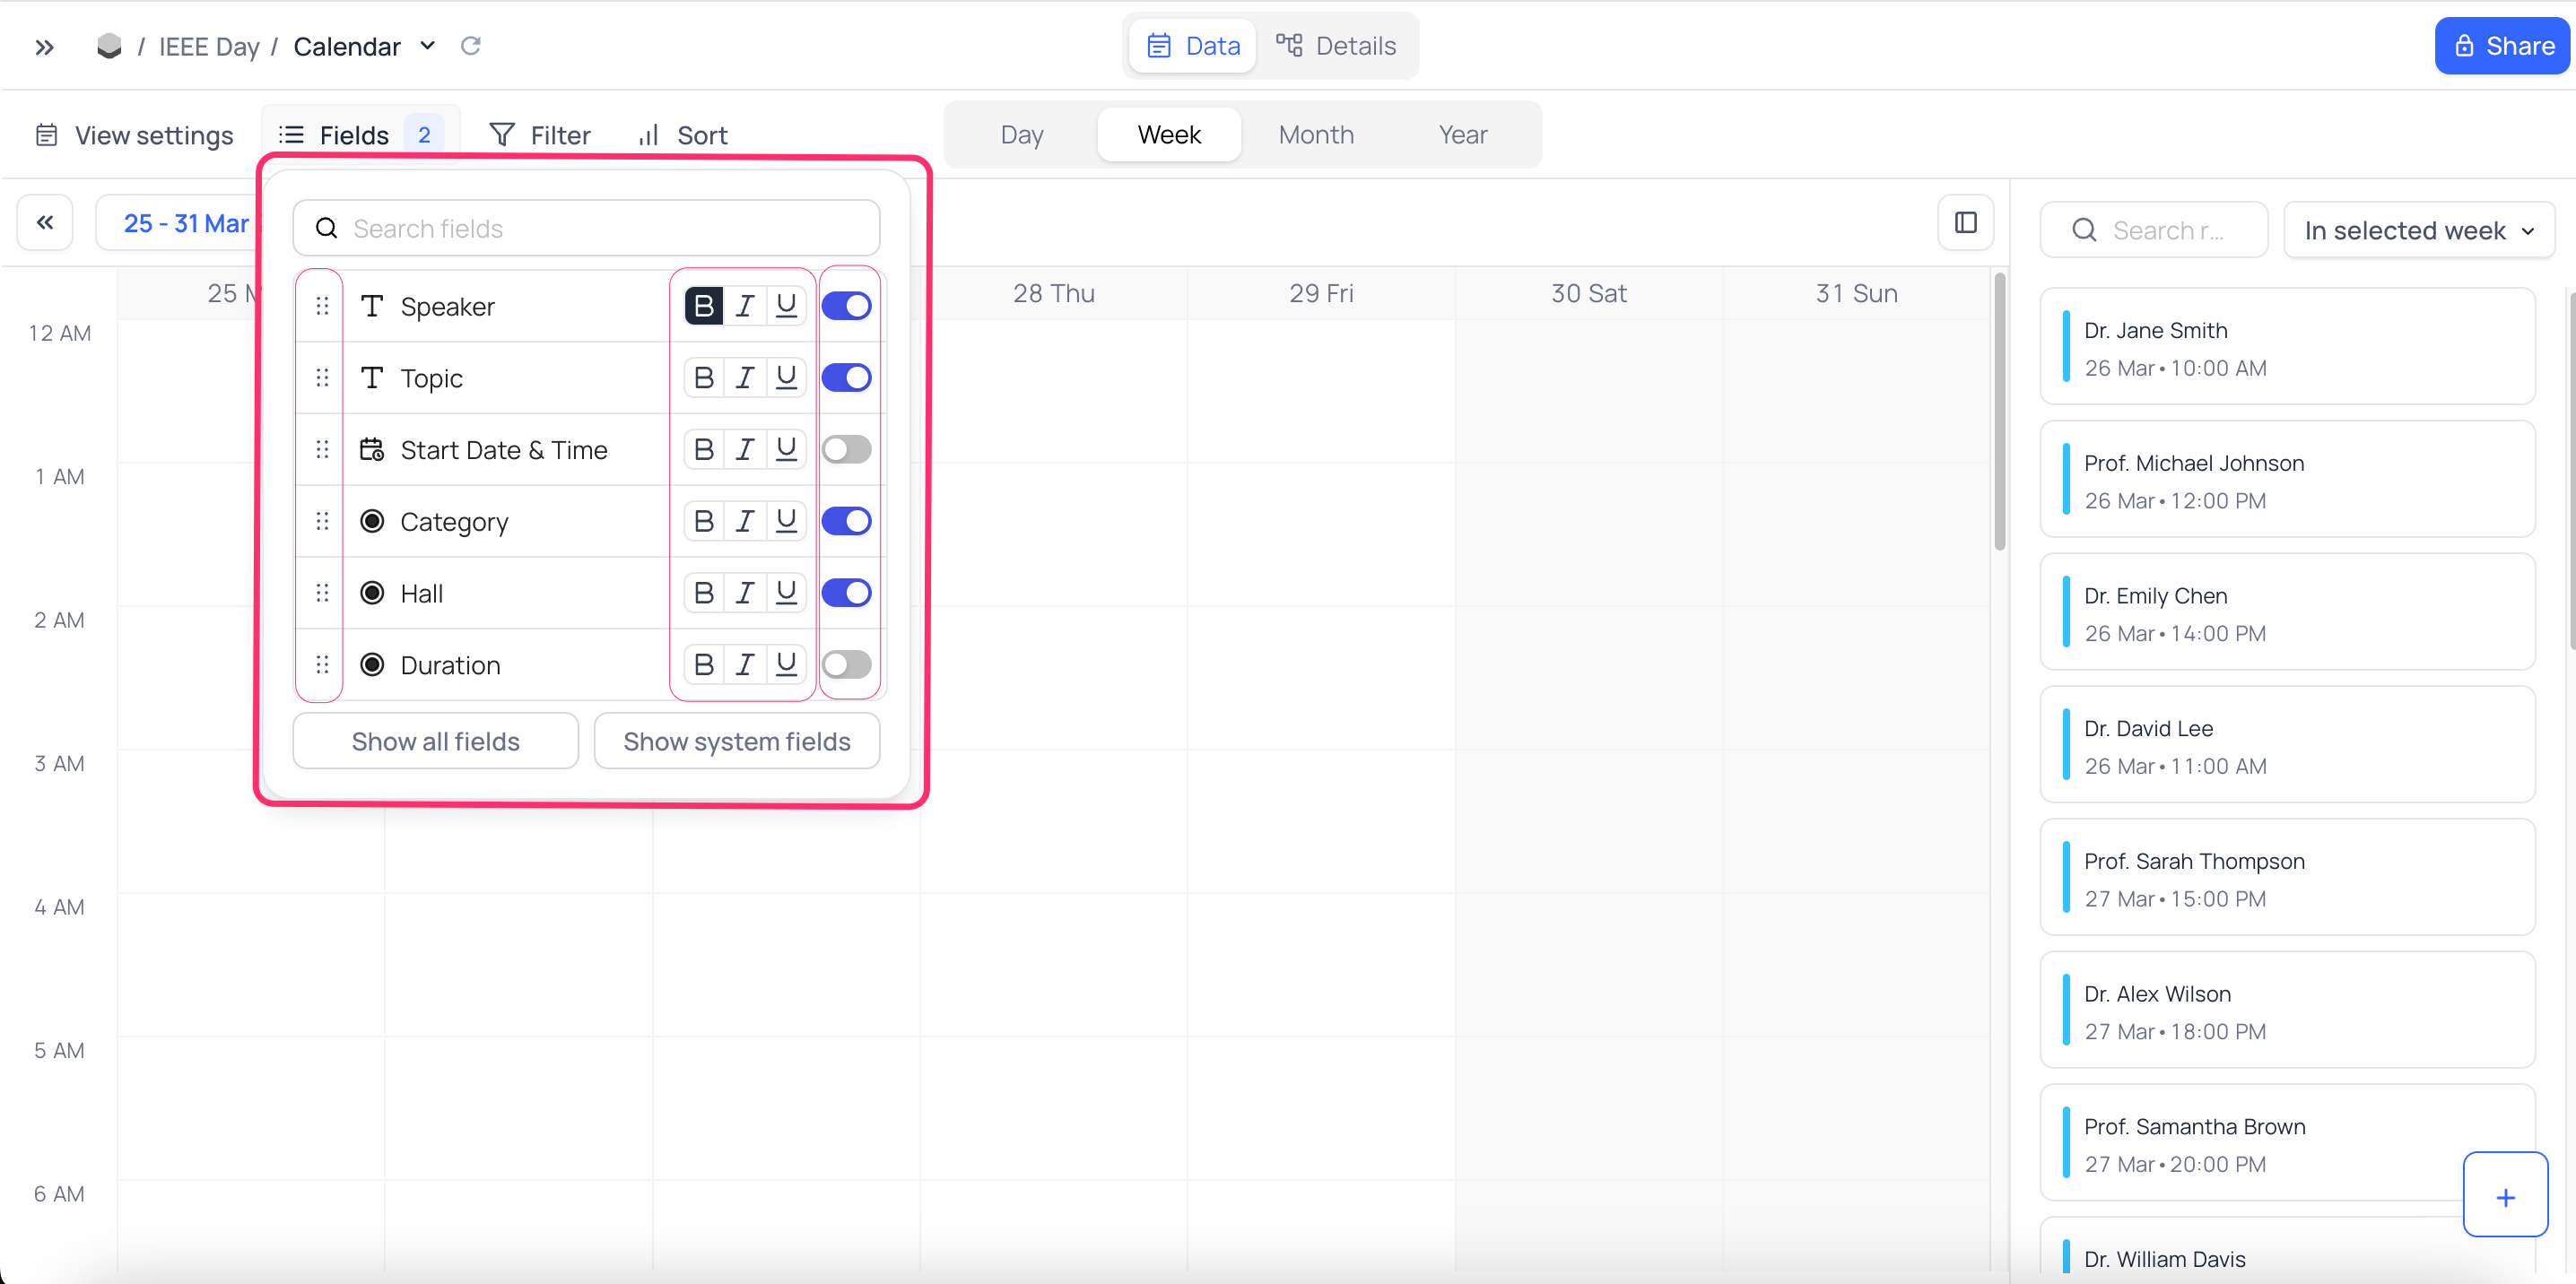
Customize Record Label
You can customize the record label that appears on the calendar. To do this, click on the Fields menu on the toolbar. In the dropdown that appears
- Use toggle to enable or disable the fields that you want to display on the calendar.
- Use reorder to change the order of the fields that you want to display on the calendar.
- Use format menu options to customize the display of the fields on the calendar. You can choose to format the field as Bold, Italicise or Underline.
Add New Records
To add a new record to the calendar, click on the + icon to the bottom right of the calendar. Alternatively, you can also double-click on the white space in the calendar to add a new record. In the form that appears, fill in the details and click on Save.
Expand Record Details
To view the details of a record, click on the record. This will expand the record and show all the details of the record.
Edit Record Details
Use drag and drop to move the record to a different date or time. To edit any other details of a record, click on the record to expand it. Edit the details of the record. Make the necessary changes and click on Save.
Delete Record
To delete a record, click on the record to expand it. Click on the Delete button from the record context menu. Confirm the deletion by clicking on Delete in the confirmation dialog.
Configuring Date Range
The date range for the calendar view is supported only in the Cloud version of NocoDB.
In NocoDB, you can configure the date range display in the calendar view by selecting Start and End date fields. To specify the date range while setting up the calendar view, click on + End Date and choose the desired date field to serve as the end date. This displays the records in the calendar view as a range block between the start and end date.
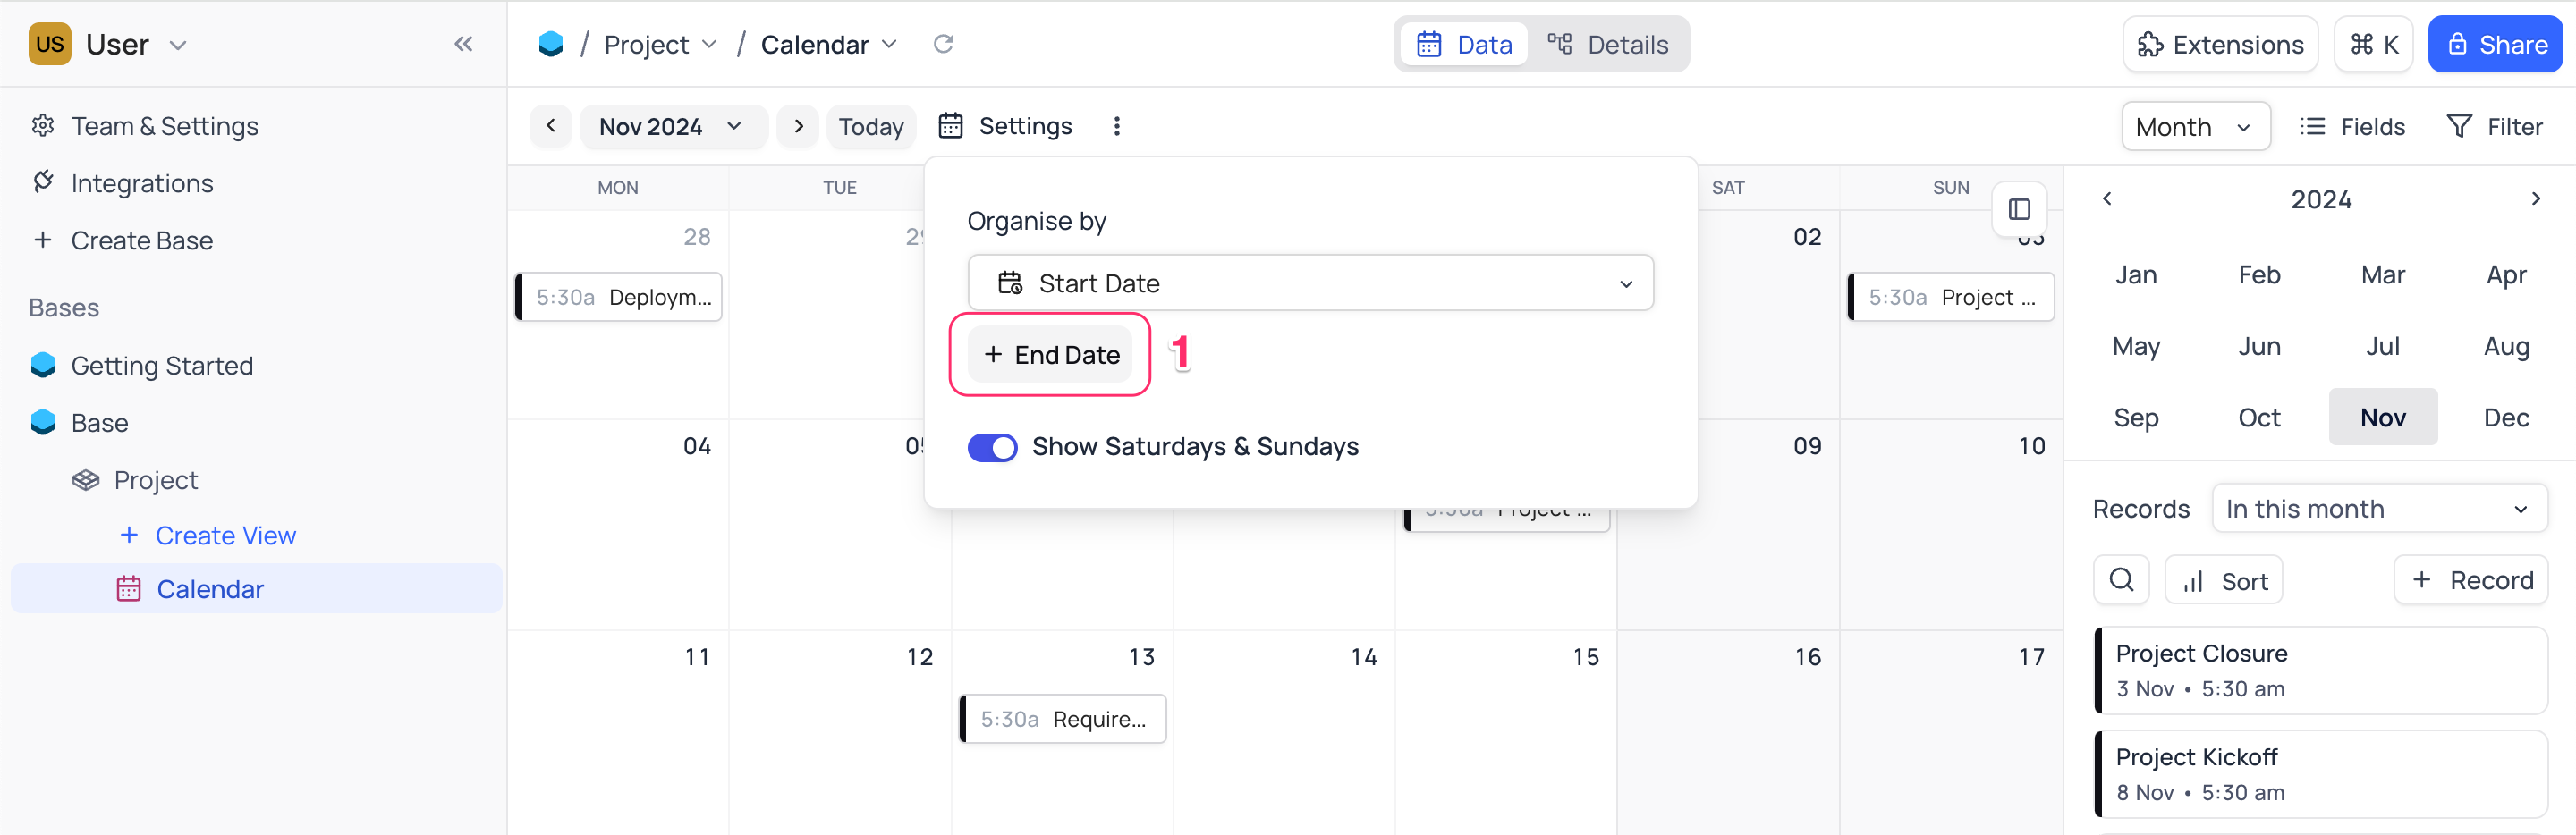
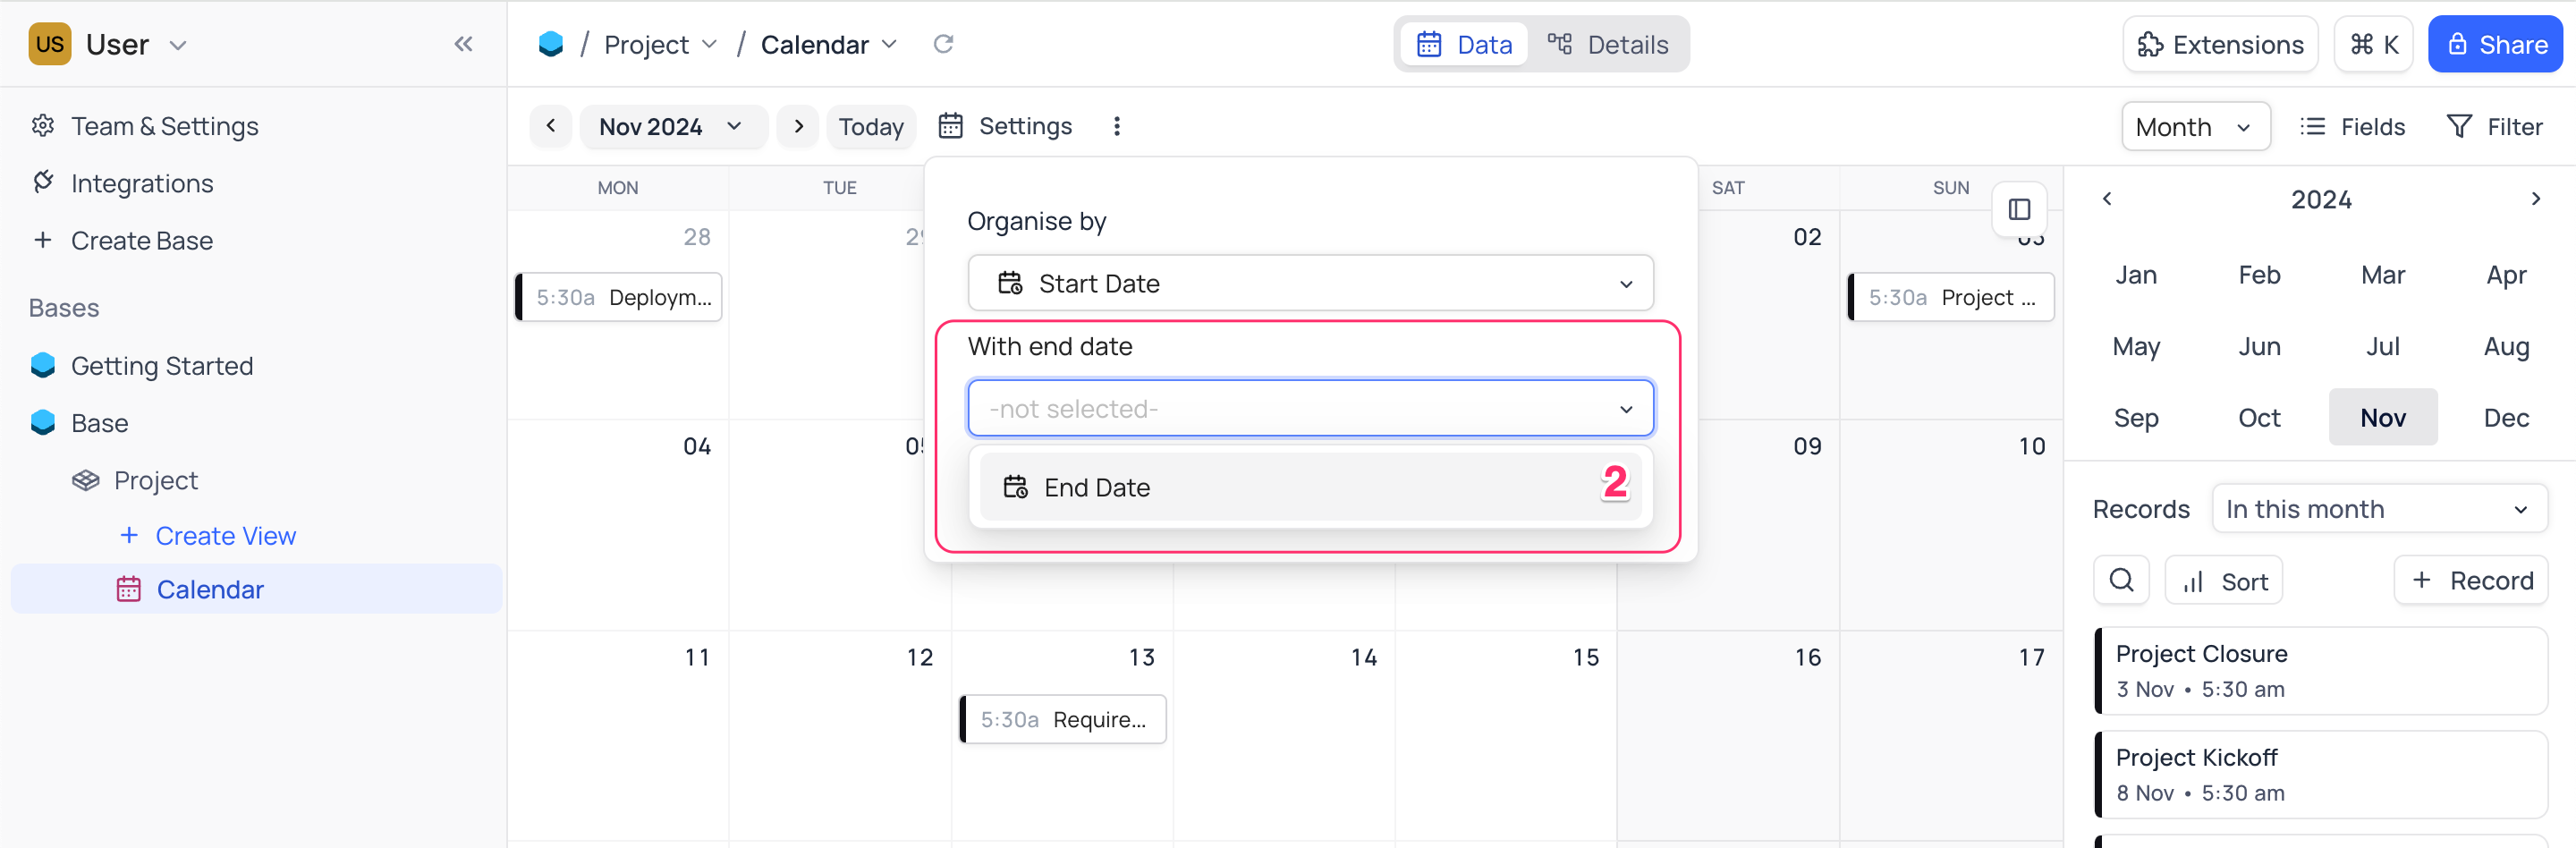
The date range configuration is currently supported only for the Date field type. Support for DateTime field type will be added in the future.
Alternatively, you can also configure the date range display functionality during view creation. To do this, click on + Add Field and choose the desired date field to serve as the end date.
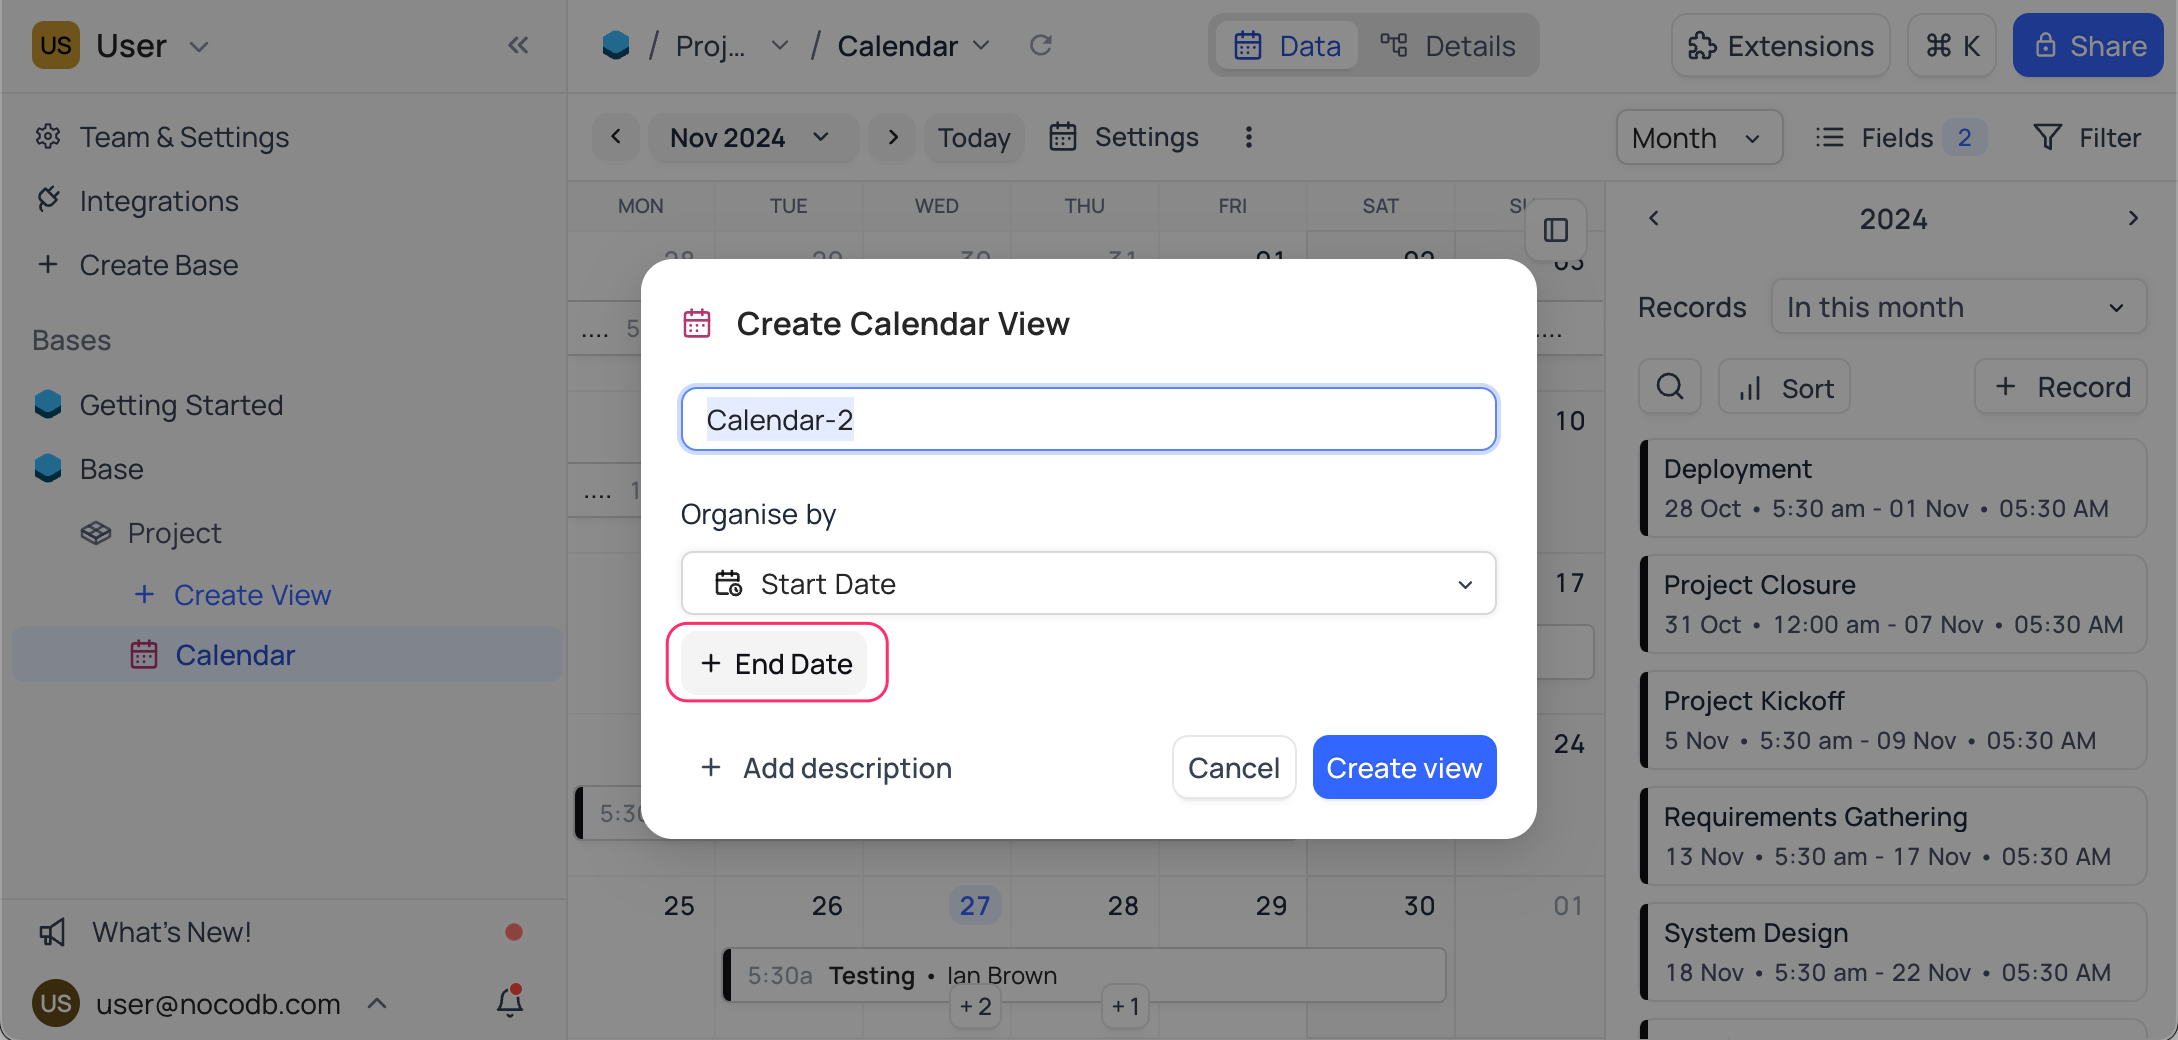
Once the date range display is enabled, you can drag drop the records to change the start and end dates of the records. You can also resize the records to change the duration of the records.