Import Airtable to NocoDB
NocoDB offers a streamlined process for seamlessly transferring your Airtable database to various database management systems, including MySQL, Postgres and SQLite, in just a matter of minutes. This feature is particularly useful for users who wish to migrate their Airtable database to a more robust and scalable database management system.
Import from Airtable is in beta version. See Importing Airtable To NocoDB for the migration notes.
To proceed, you must have valid Airtable Credentials. Ensure you have access to the following information from your Airtable account:
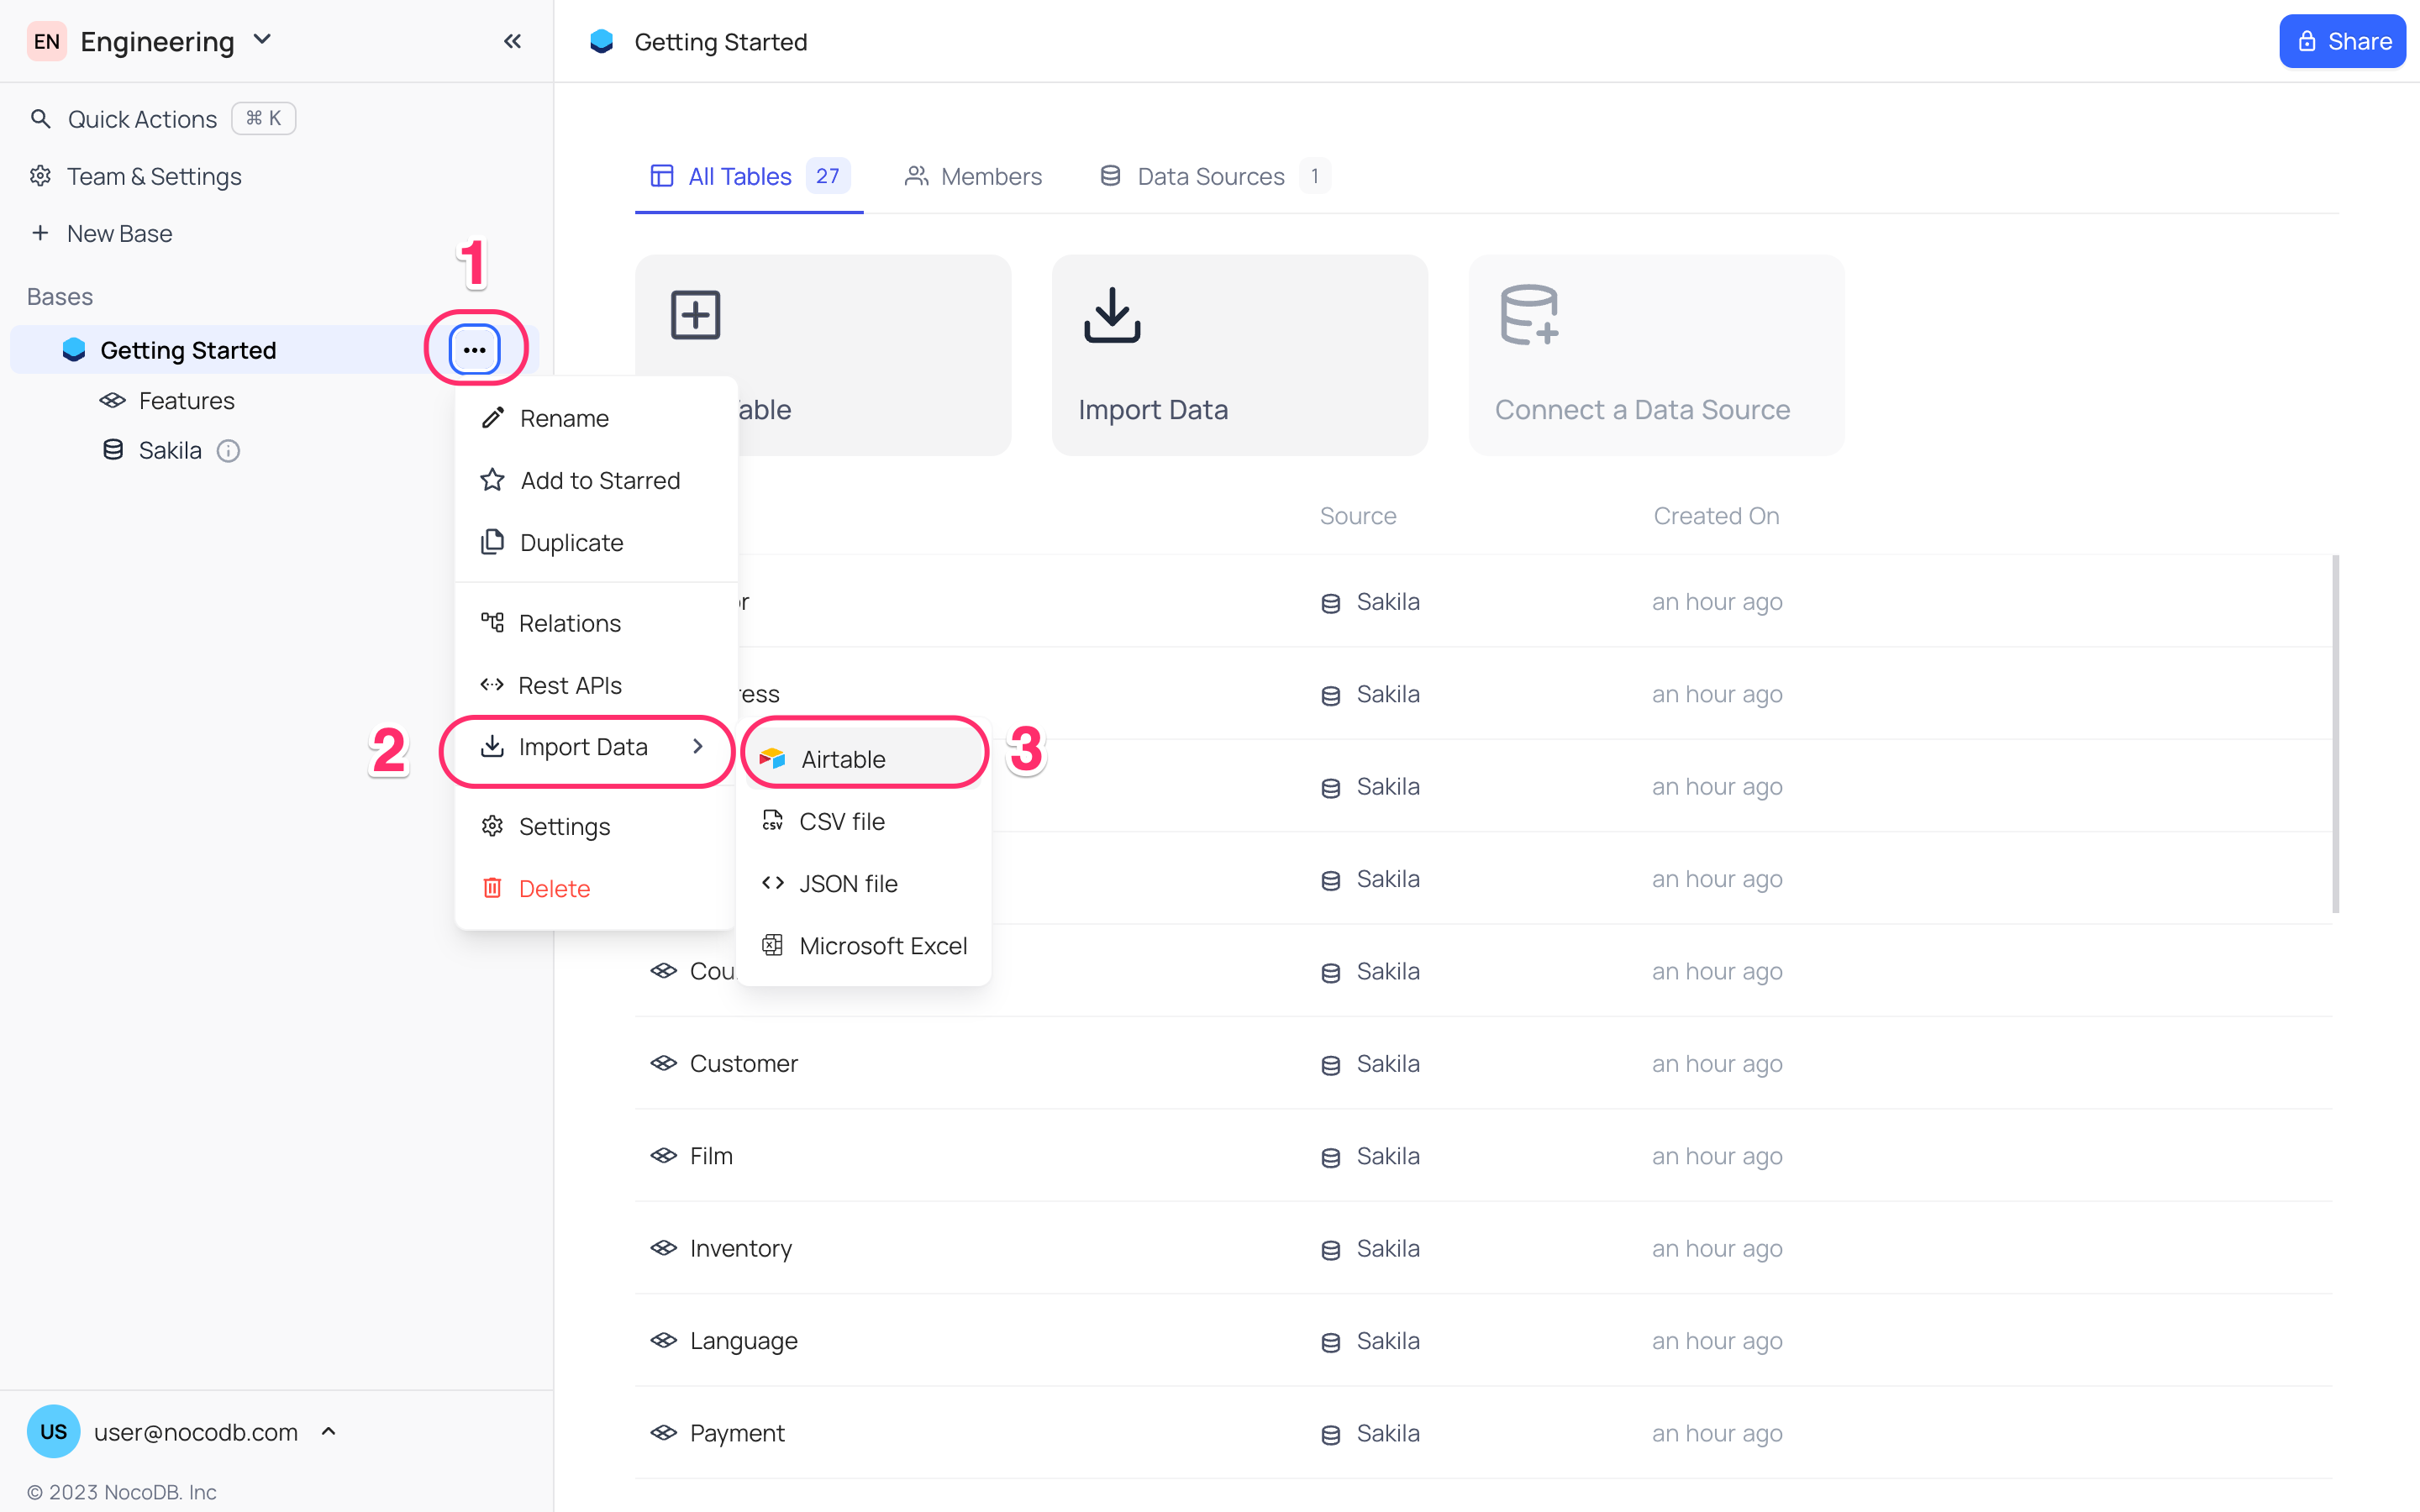
Open the Import from Airtable modal to begin the import process
- Hover over the base name in the left sidebar, click on the
...icon to open base context menu - Select
Import Datafrom the base context menu - Select
Airtable
Alternatively, you can also access this modal from the Base dashboard
-
Go to your Base dashboard, click on
Import Data -
Select
Airtable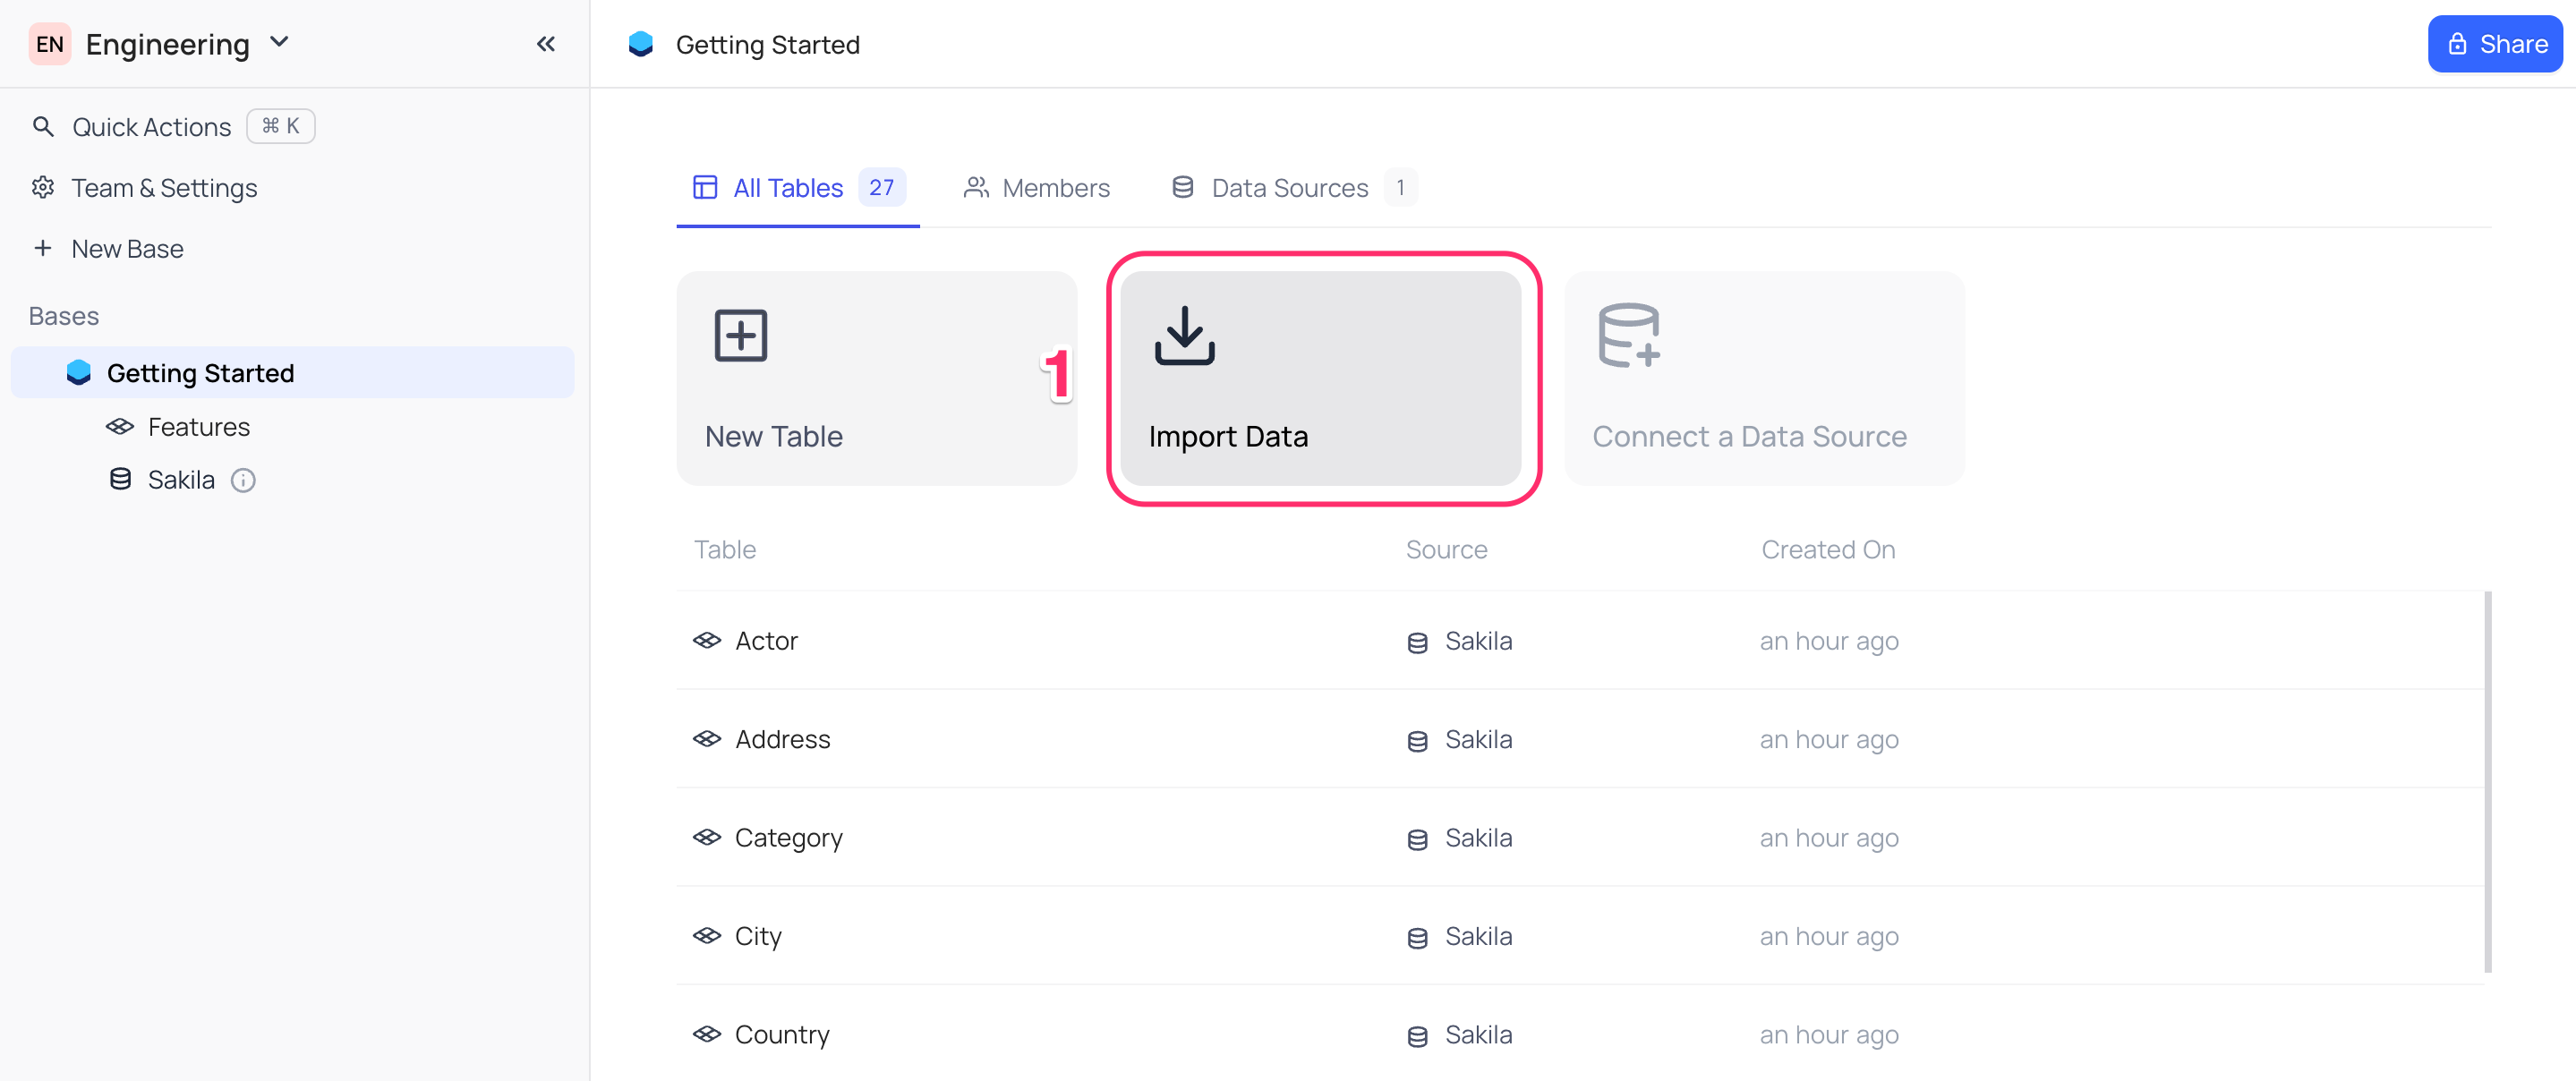
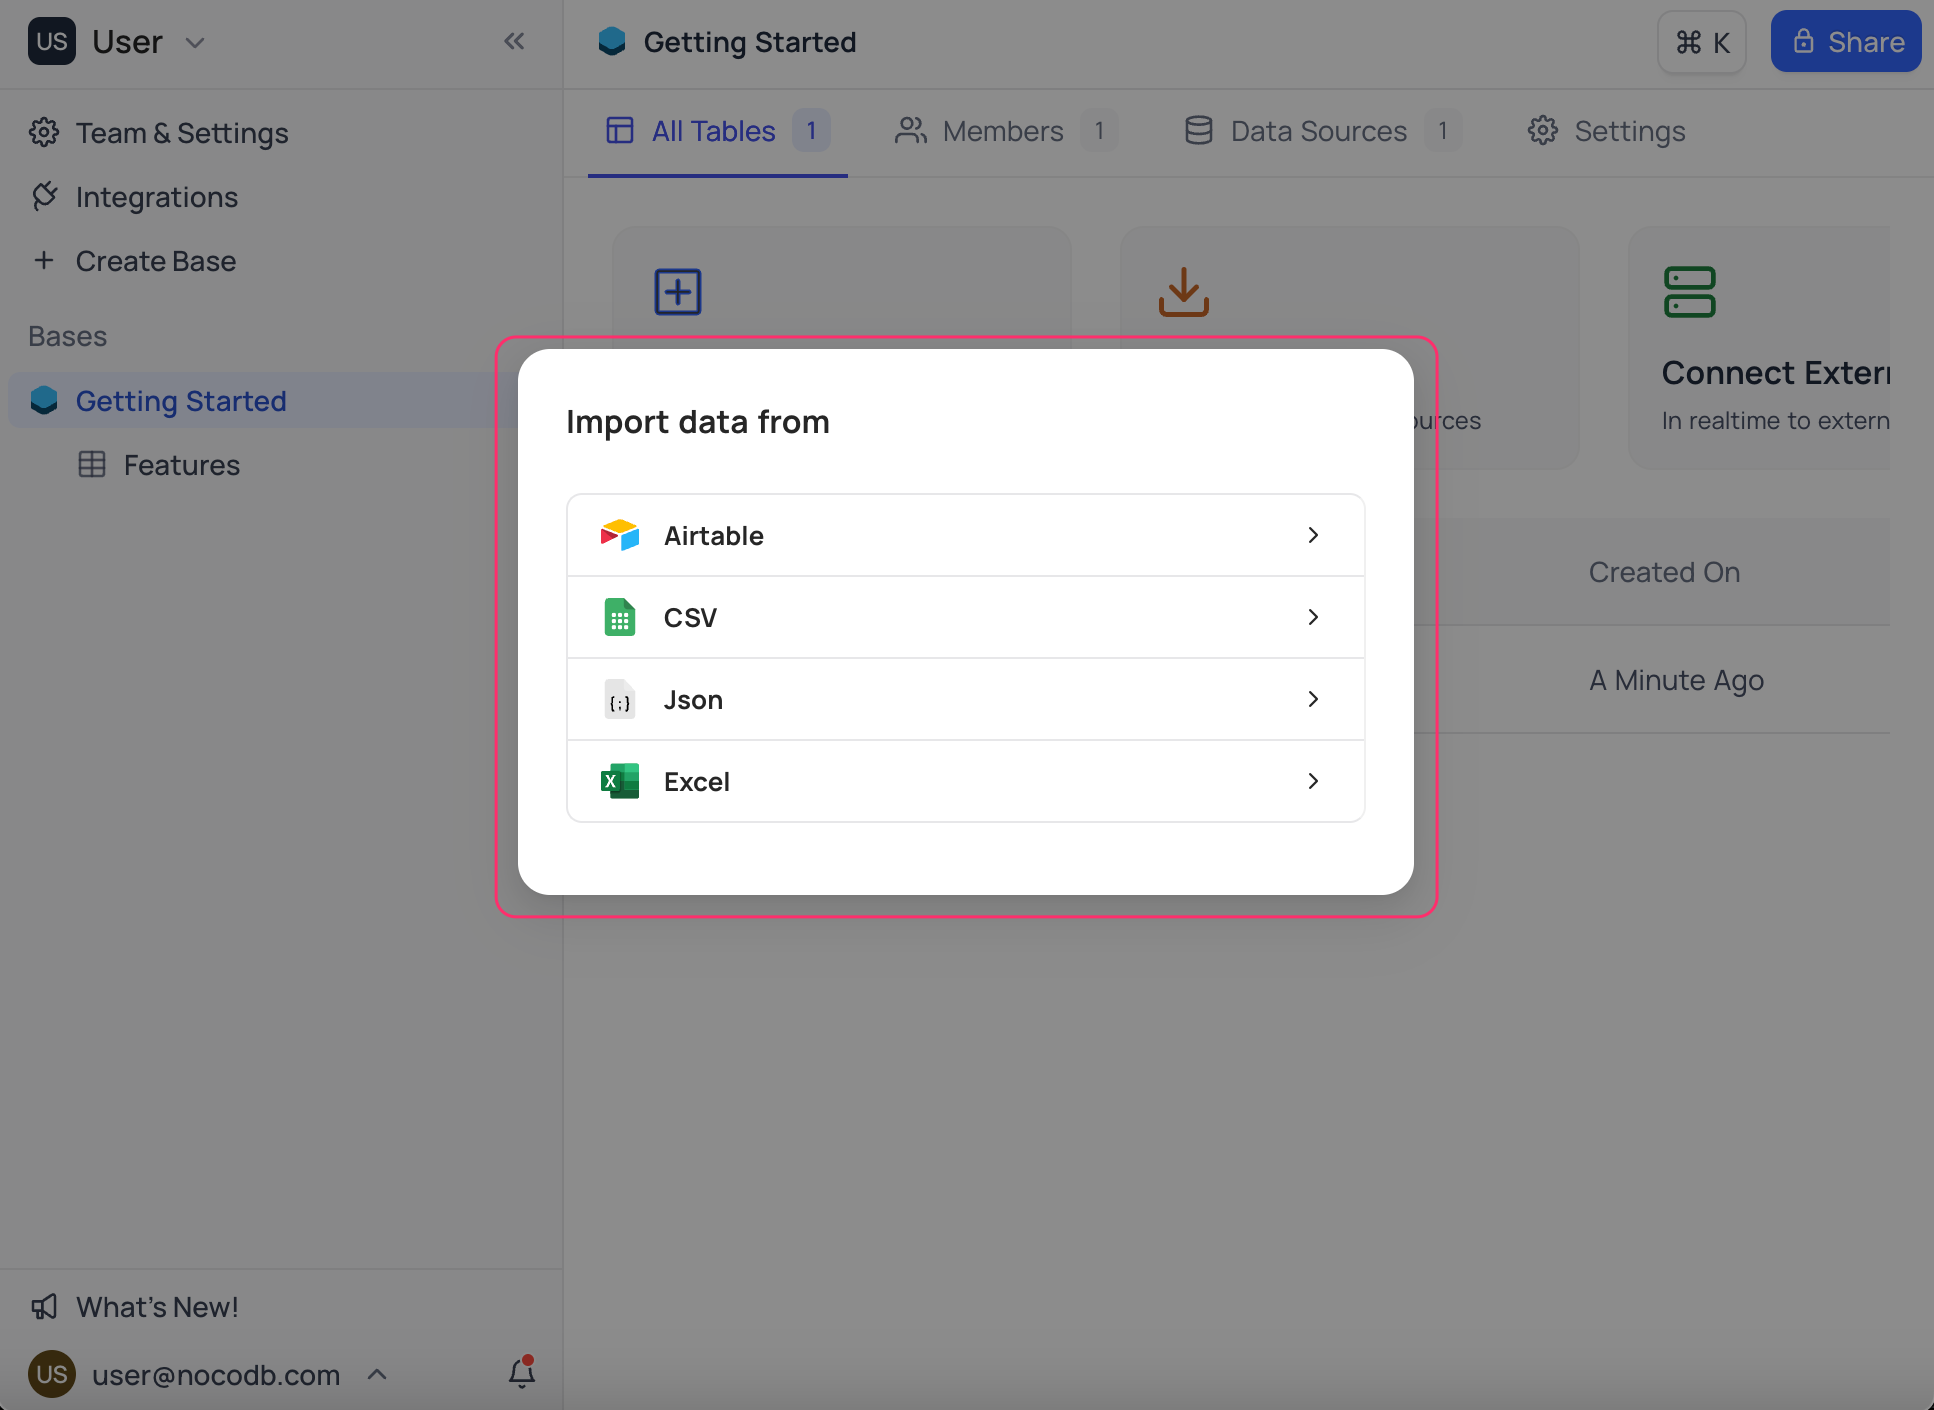
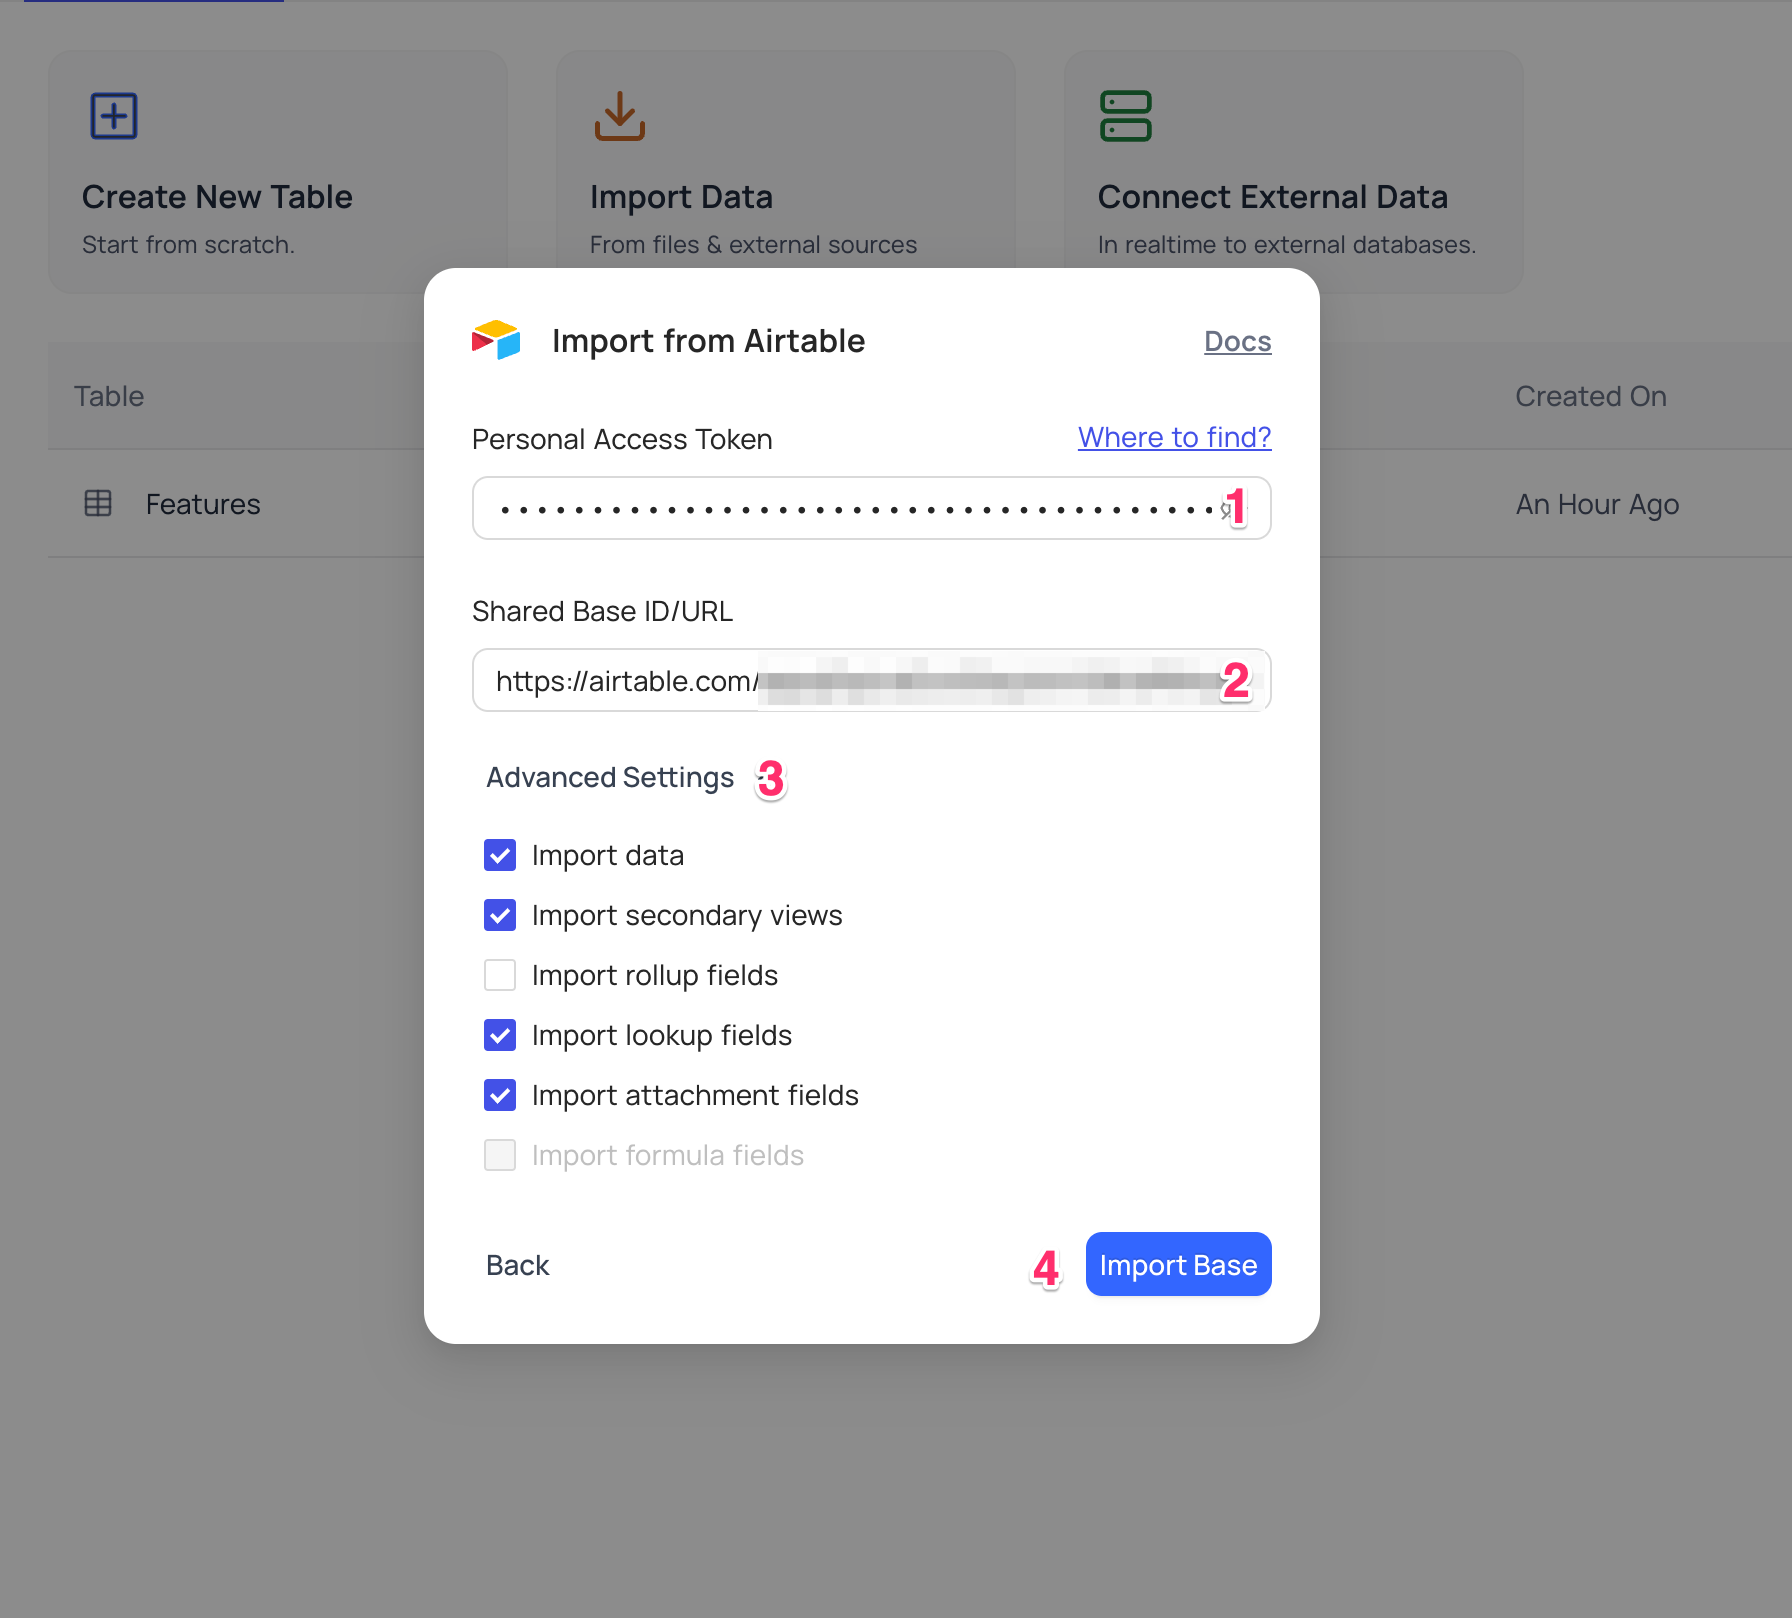
Continue with the following steps on Import from Airtable modal to complete the import process:
- Input Personal Access Token
- Input shared Base ID / URL
- Use Advanced settings to configure import options (Optional)
- Click
Import Base
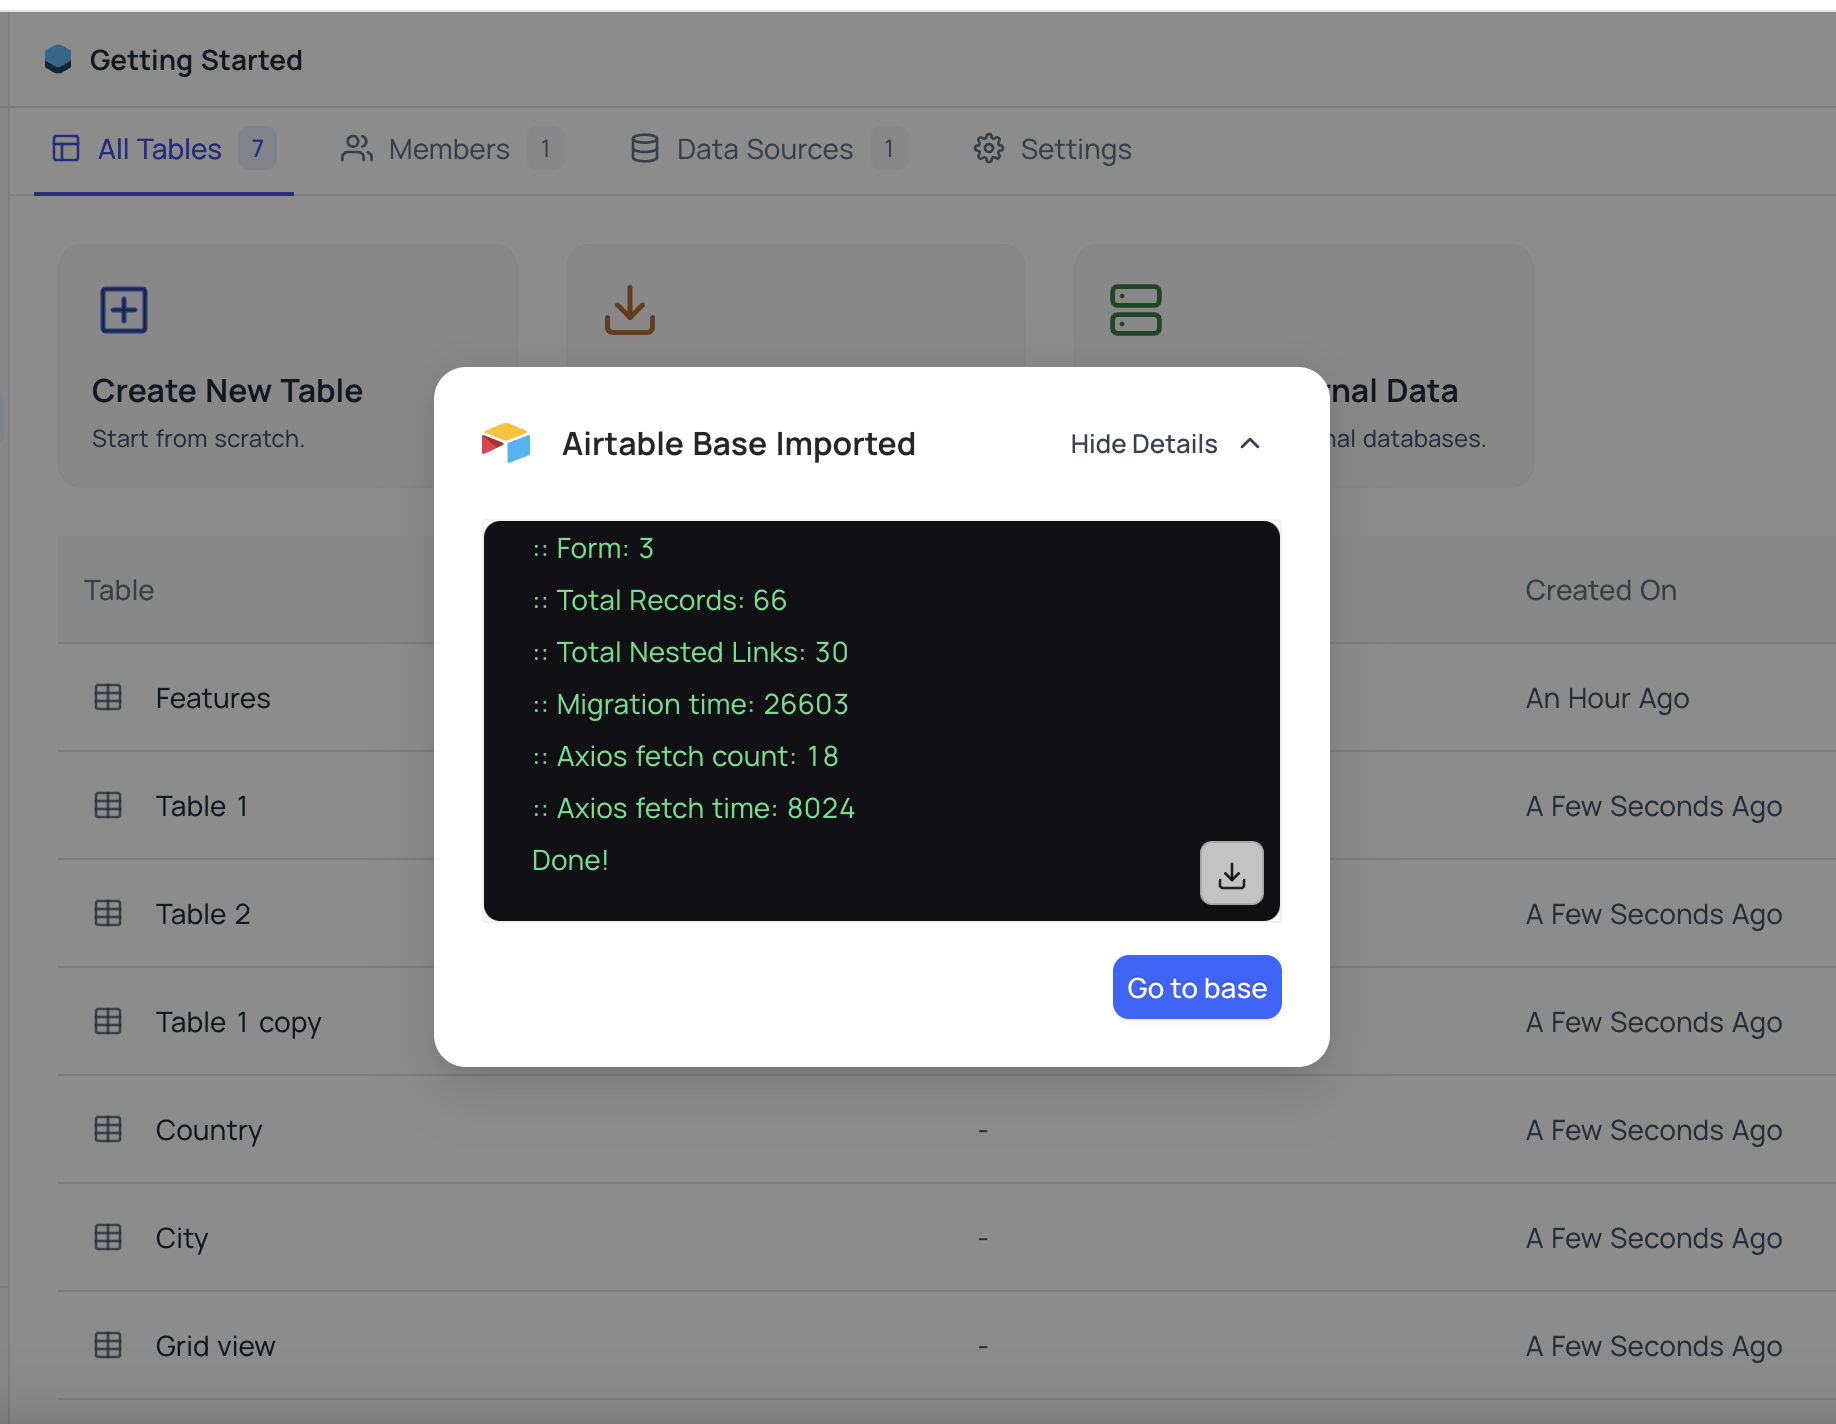
Wait until Go to base button is activated on the modal. Import details are captured in log window.
Advanced settings
- Import Data: If you disable this option, only tables and views will be created (schema), excluding actual data records.
- Import Secondary Views: If you disable this option, only the primary grid view for each table will be imported, omitting any secondary views.
- Import Rollup Fields: If you disable this option, you can skip the import of Rollup fields.
- Import Lookup Fields: If you disable this option, you can skip the import of Lookup fields.
- Import Attachments Fields: If you disable this option, you can skip the import of Attachment fields, which typically store file attachments associated with records.
- Import Formula Fields: Please be aware that import of formula fields from Airtable is currently not supported.
Get Airtable Credentials
Create Personal Access Token
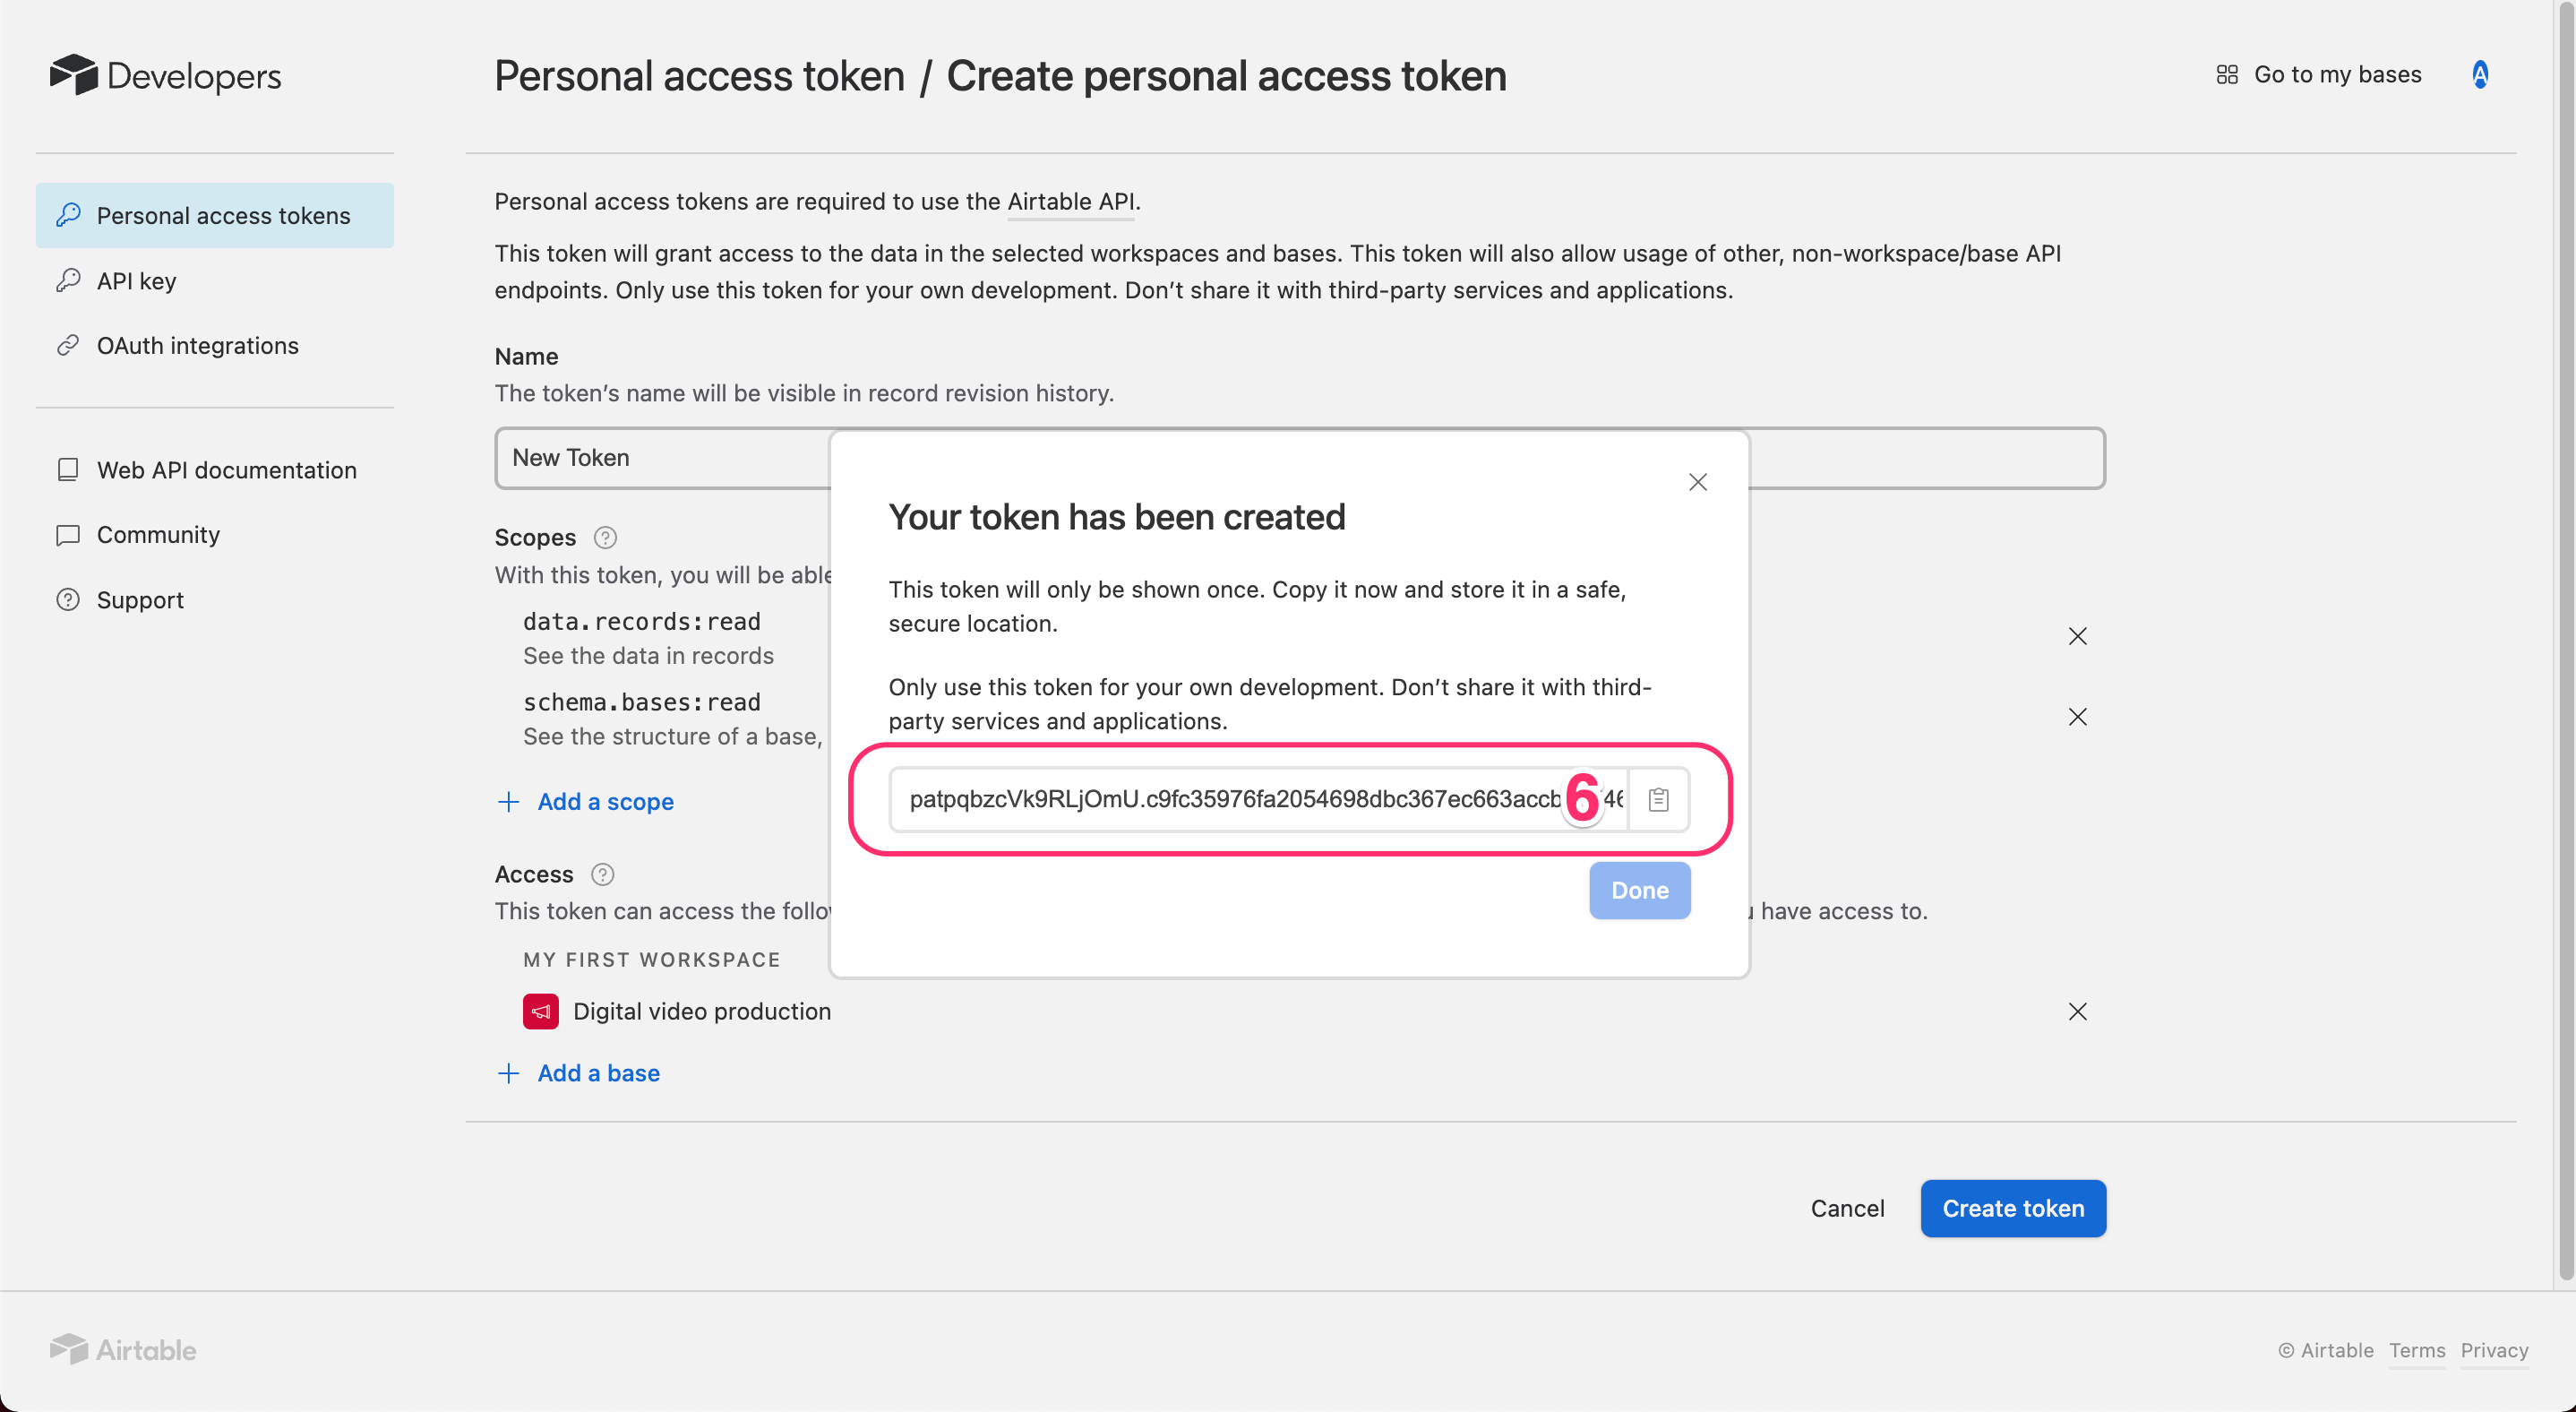
Here are the steps to generate an Airtable Personal Access Token:
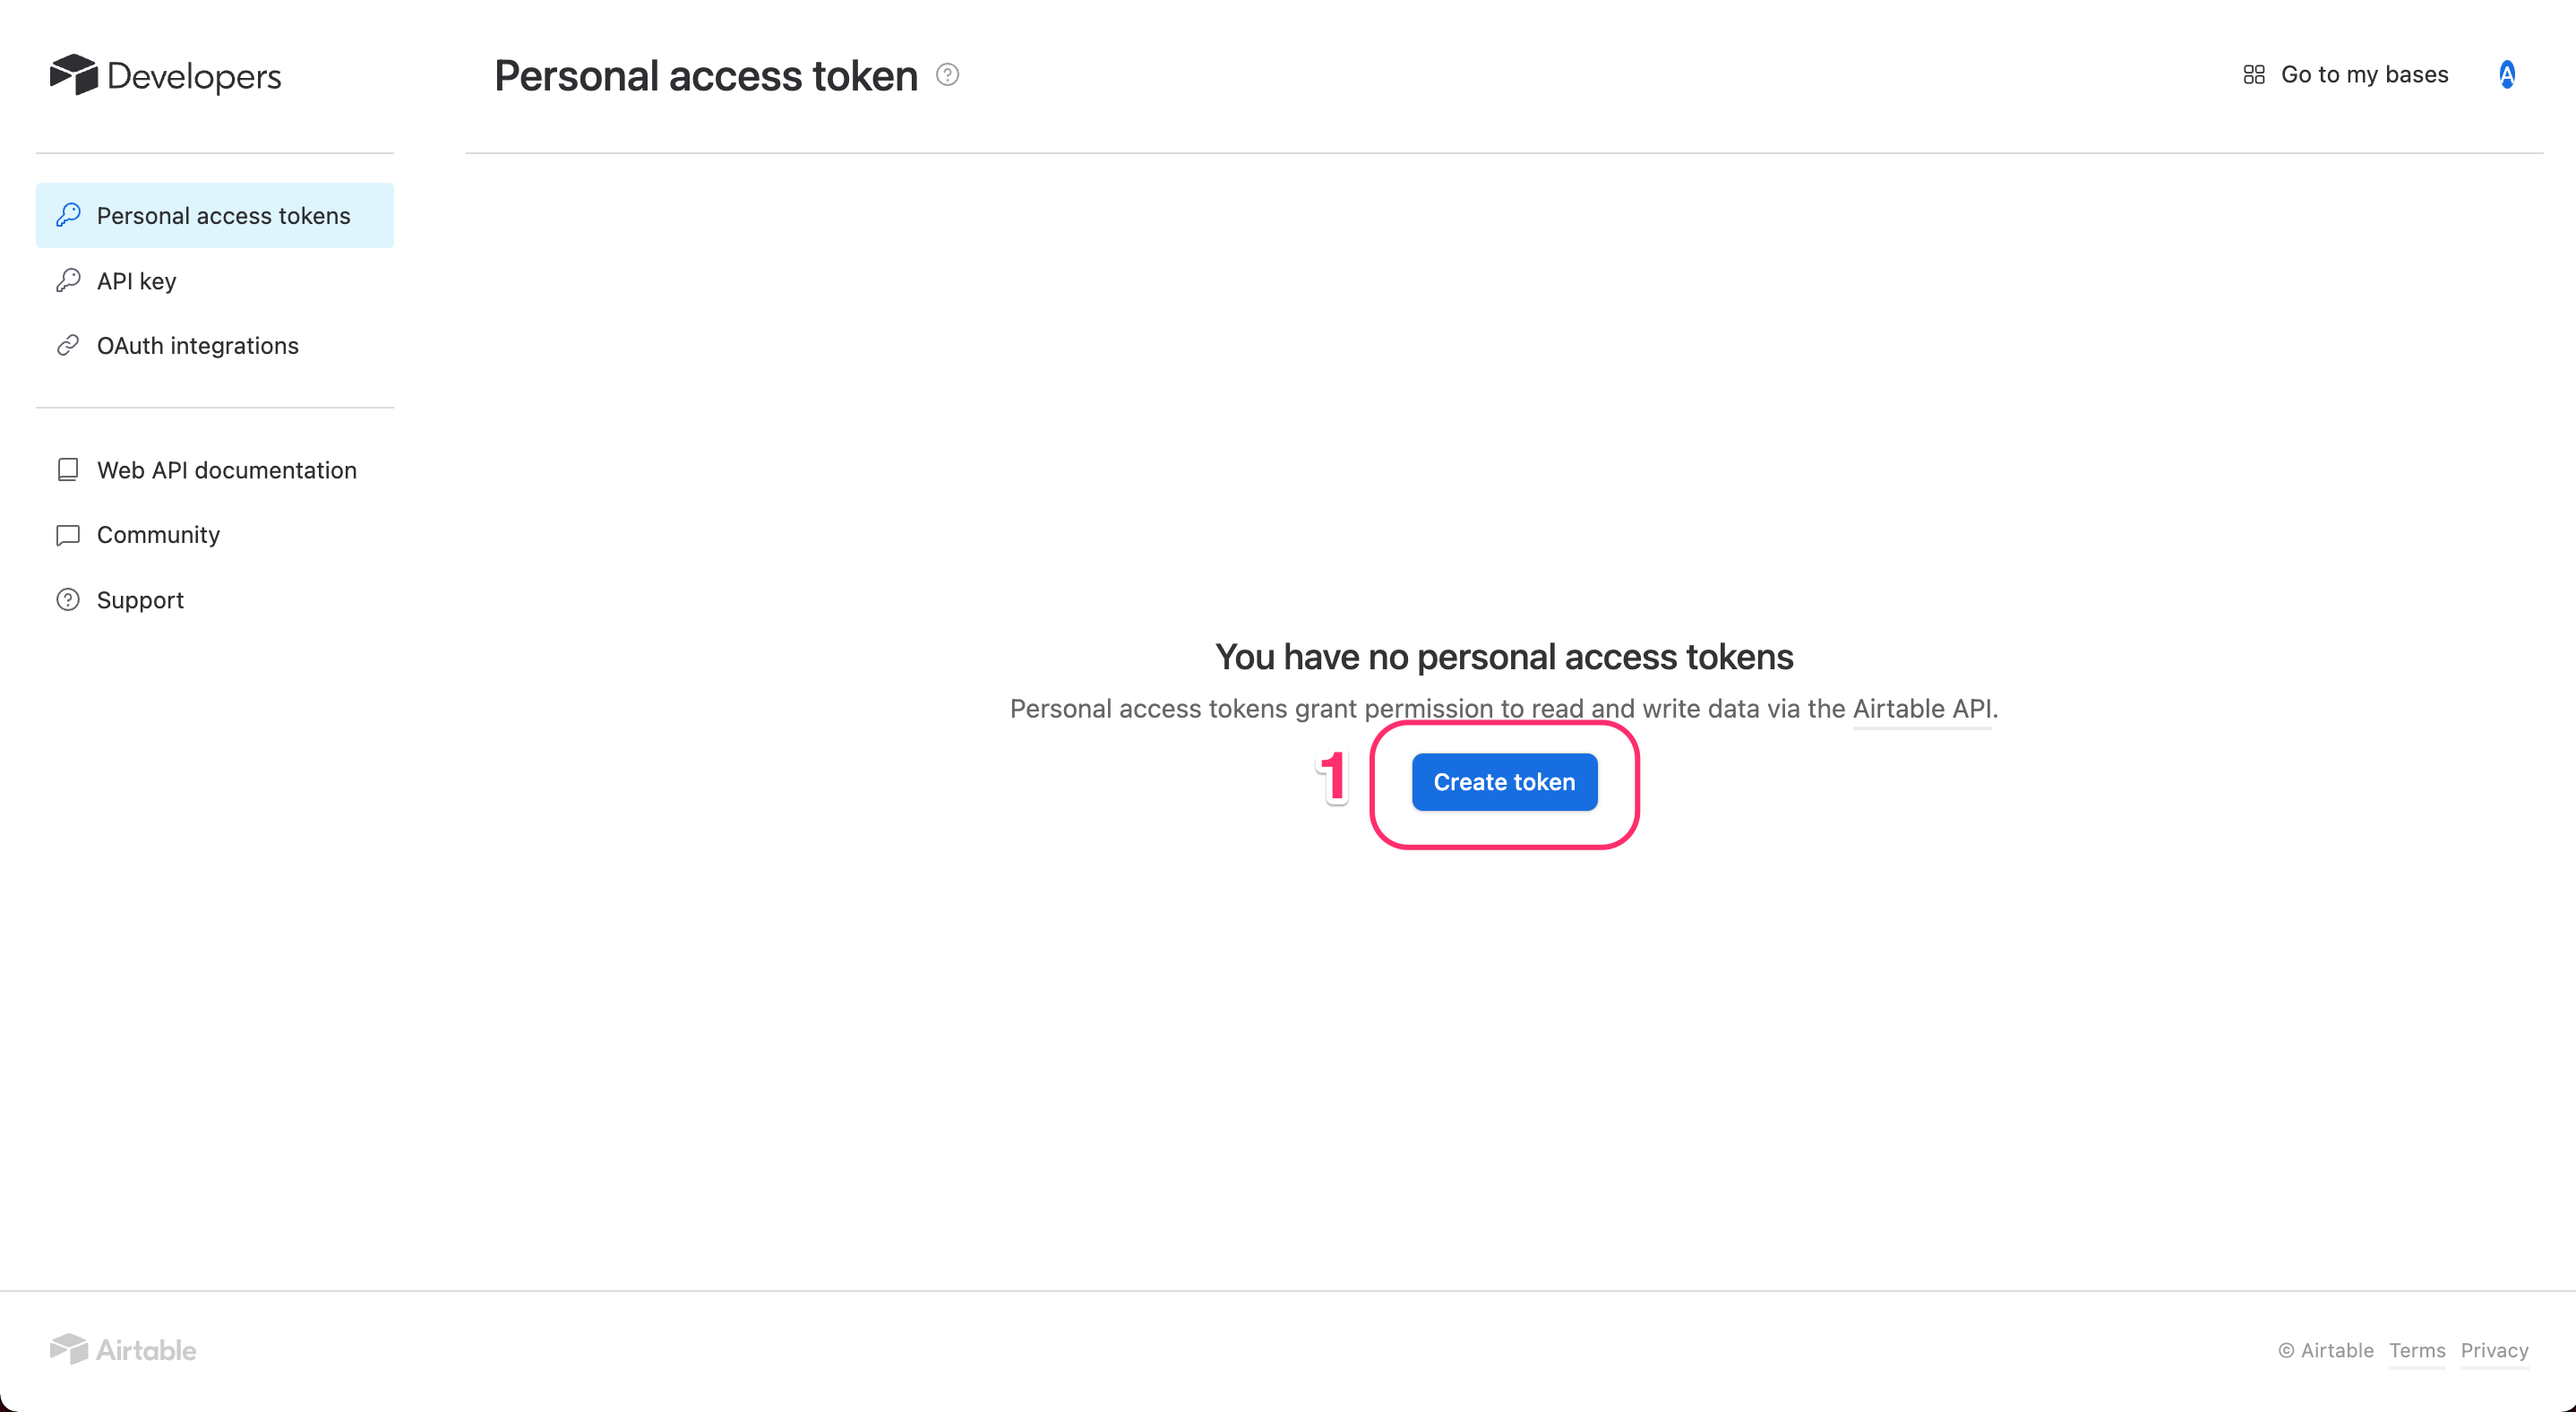
- Visit the Airtable Create Tokens page and click the "Create token" button.
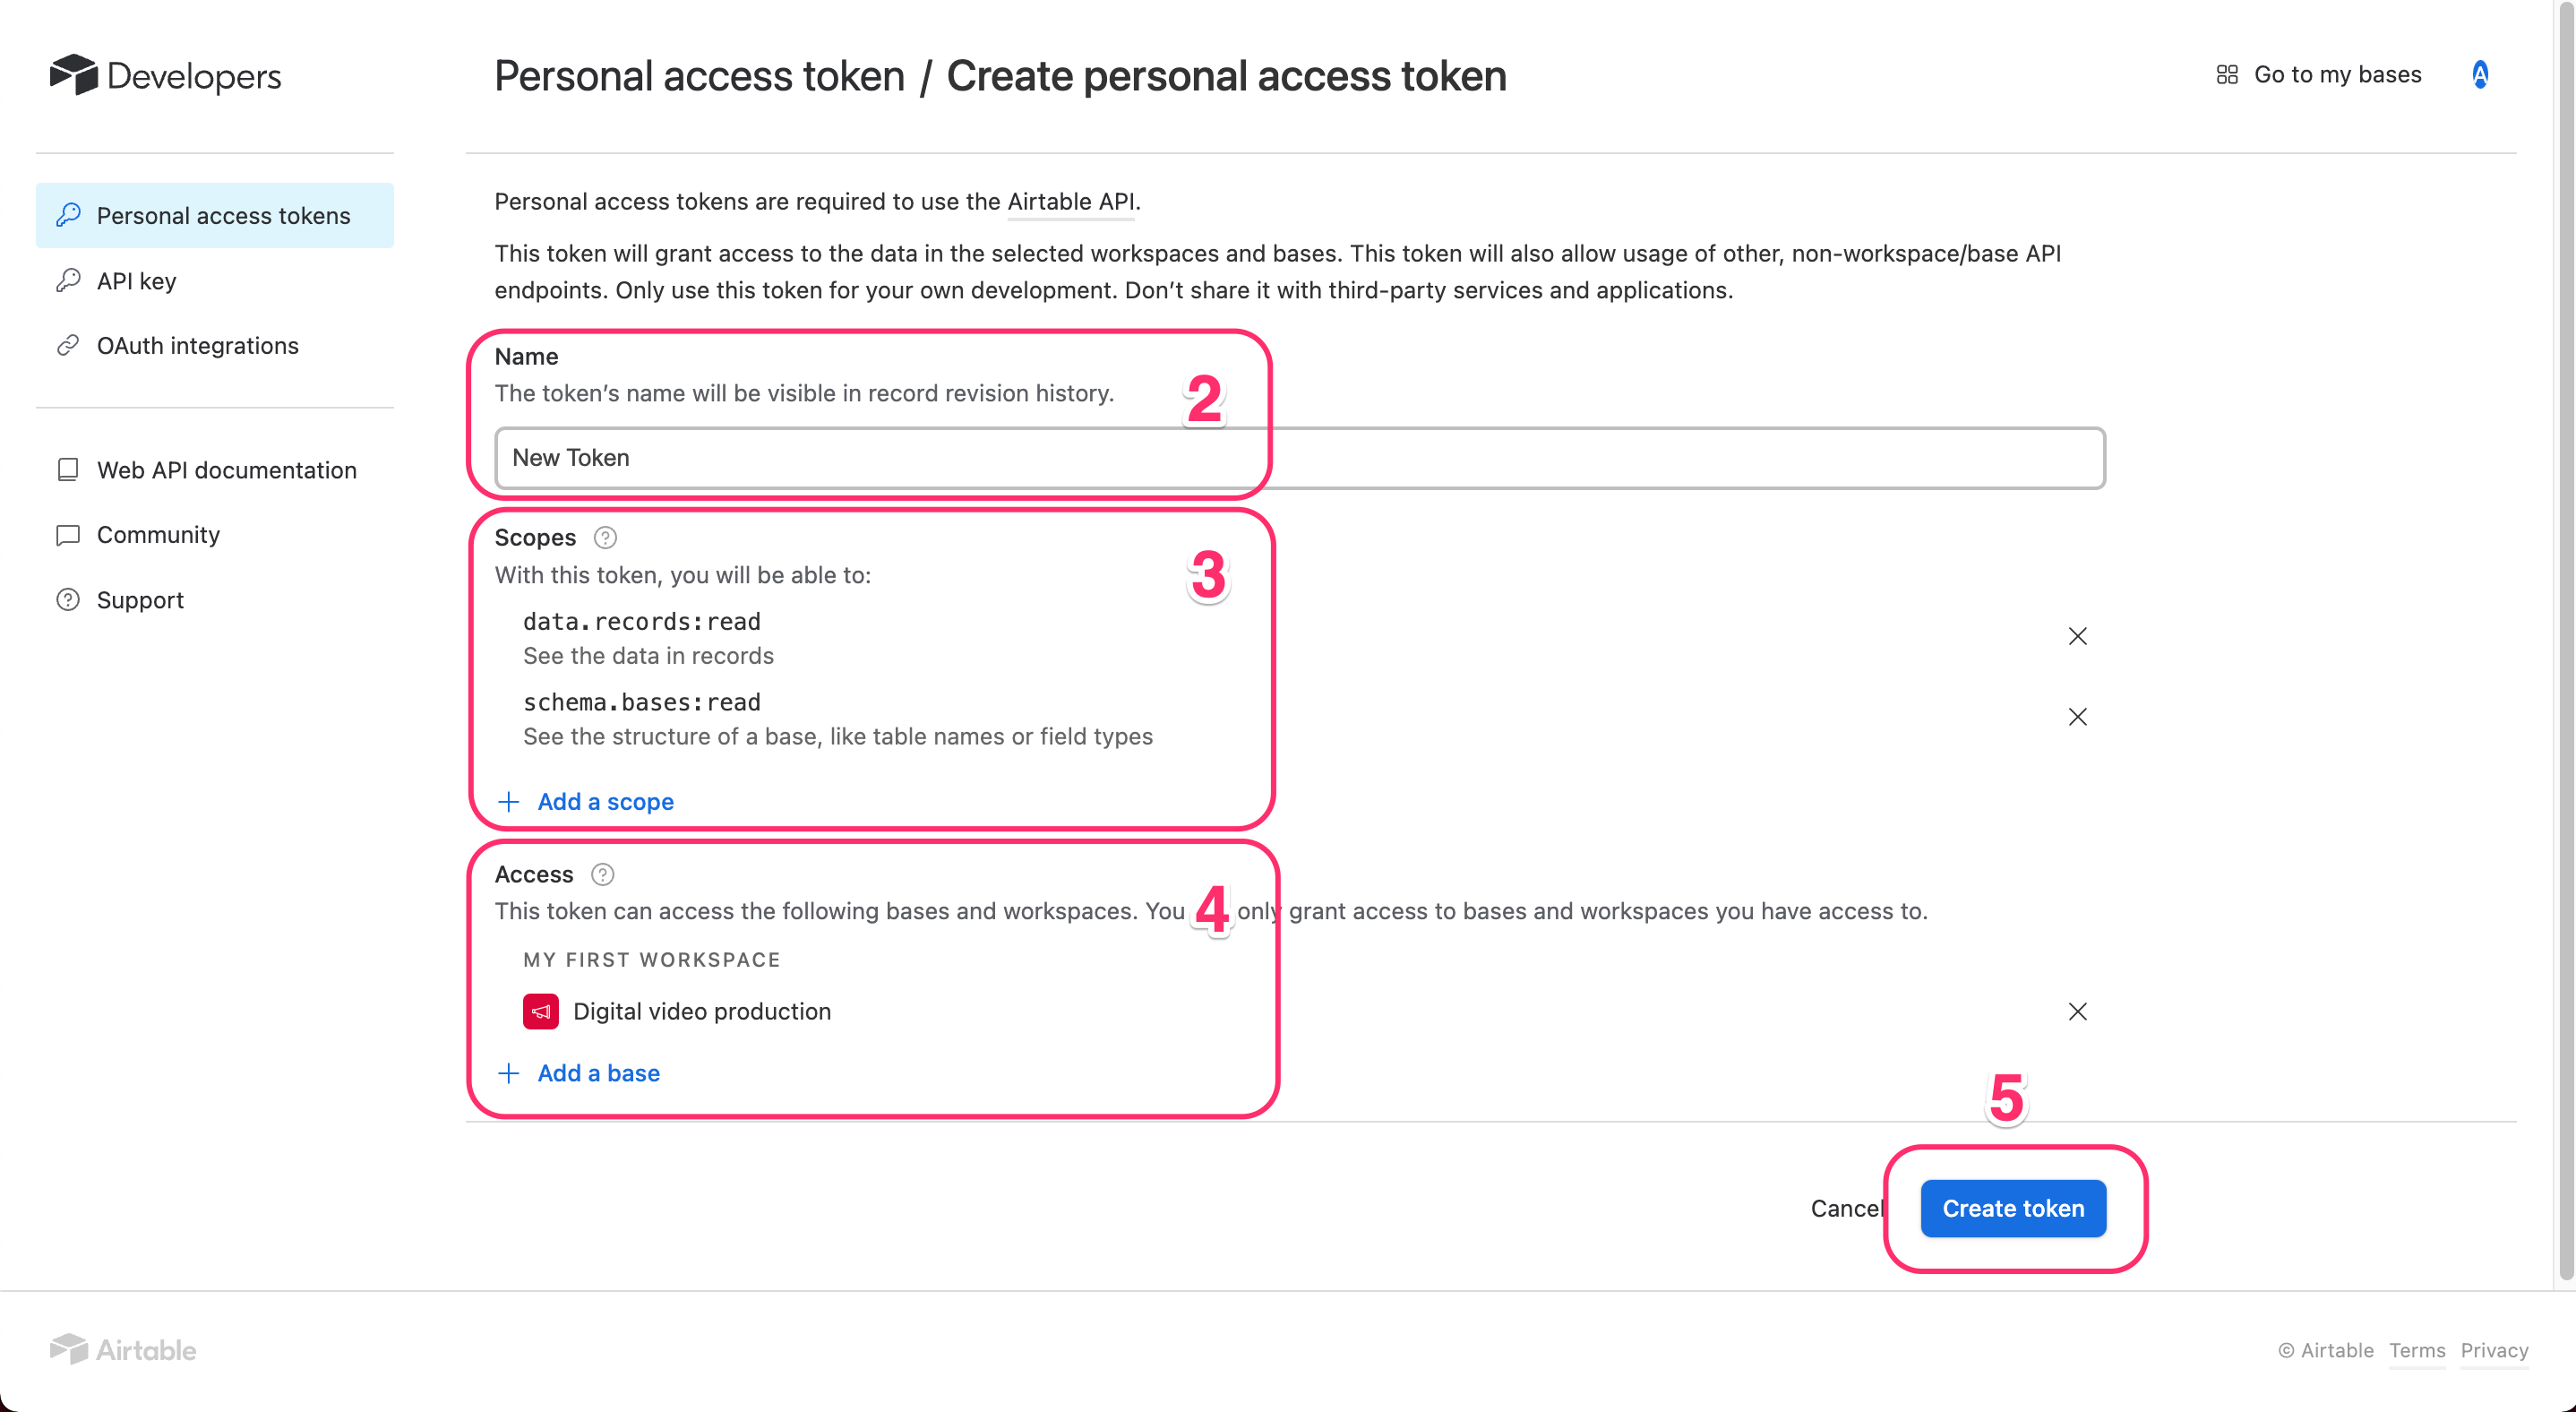
- Provide a meaningful name for your token in the
Token namefield. - Choose the necessary access scopes, with a minimum requirement of
data.records:read. - Select the specific Base you wish to access with this token.
- Confirm your choices by clicking the
Create tokenbutton. - Copy the newly generated
Personal Access Tokenfor your use.
For detailed information, you can refer to the Airtable Personal Access Token guide.
Retrieve Share Base ID / URL
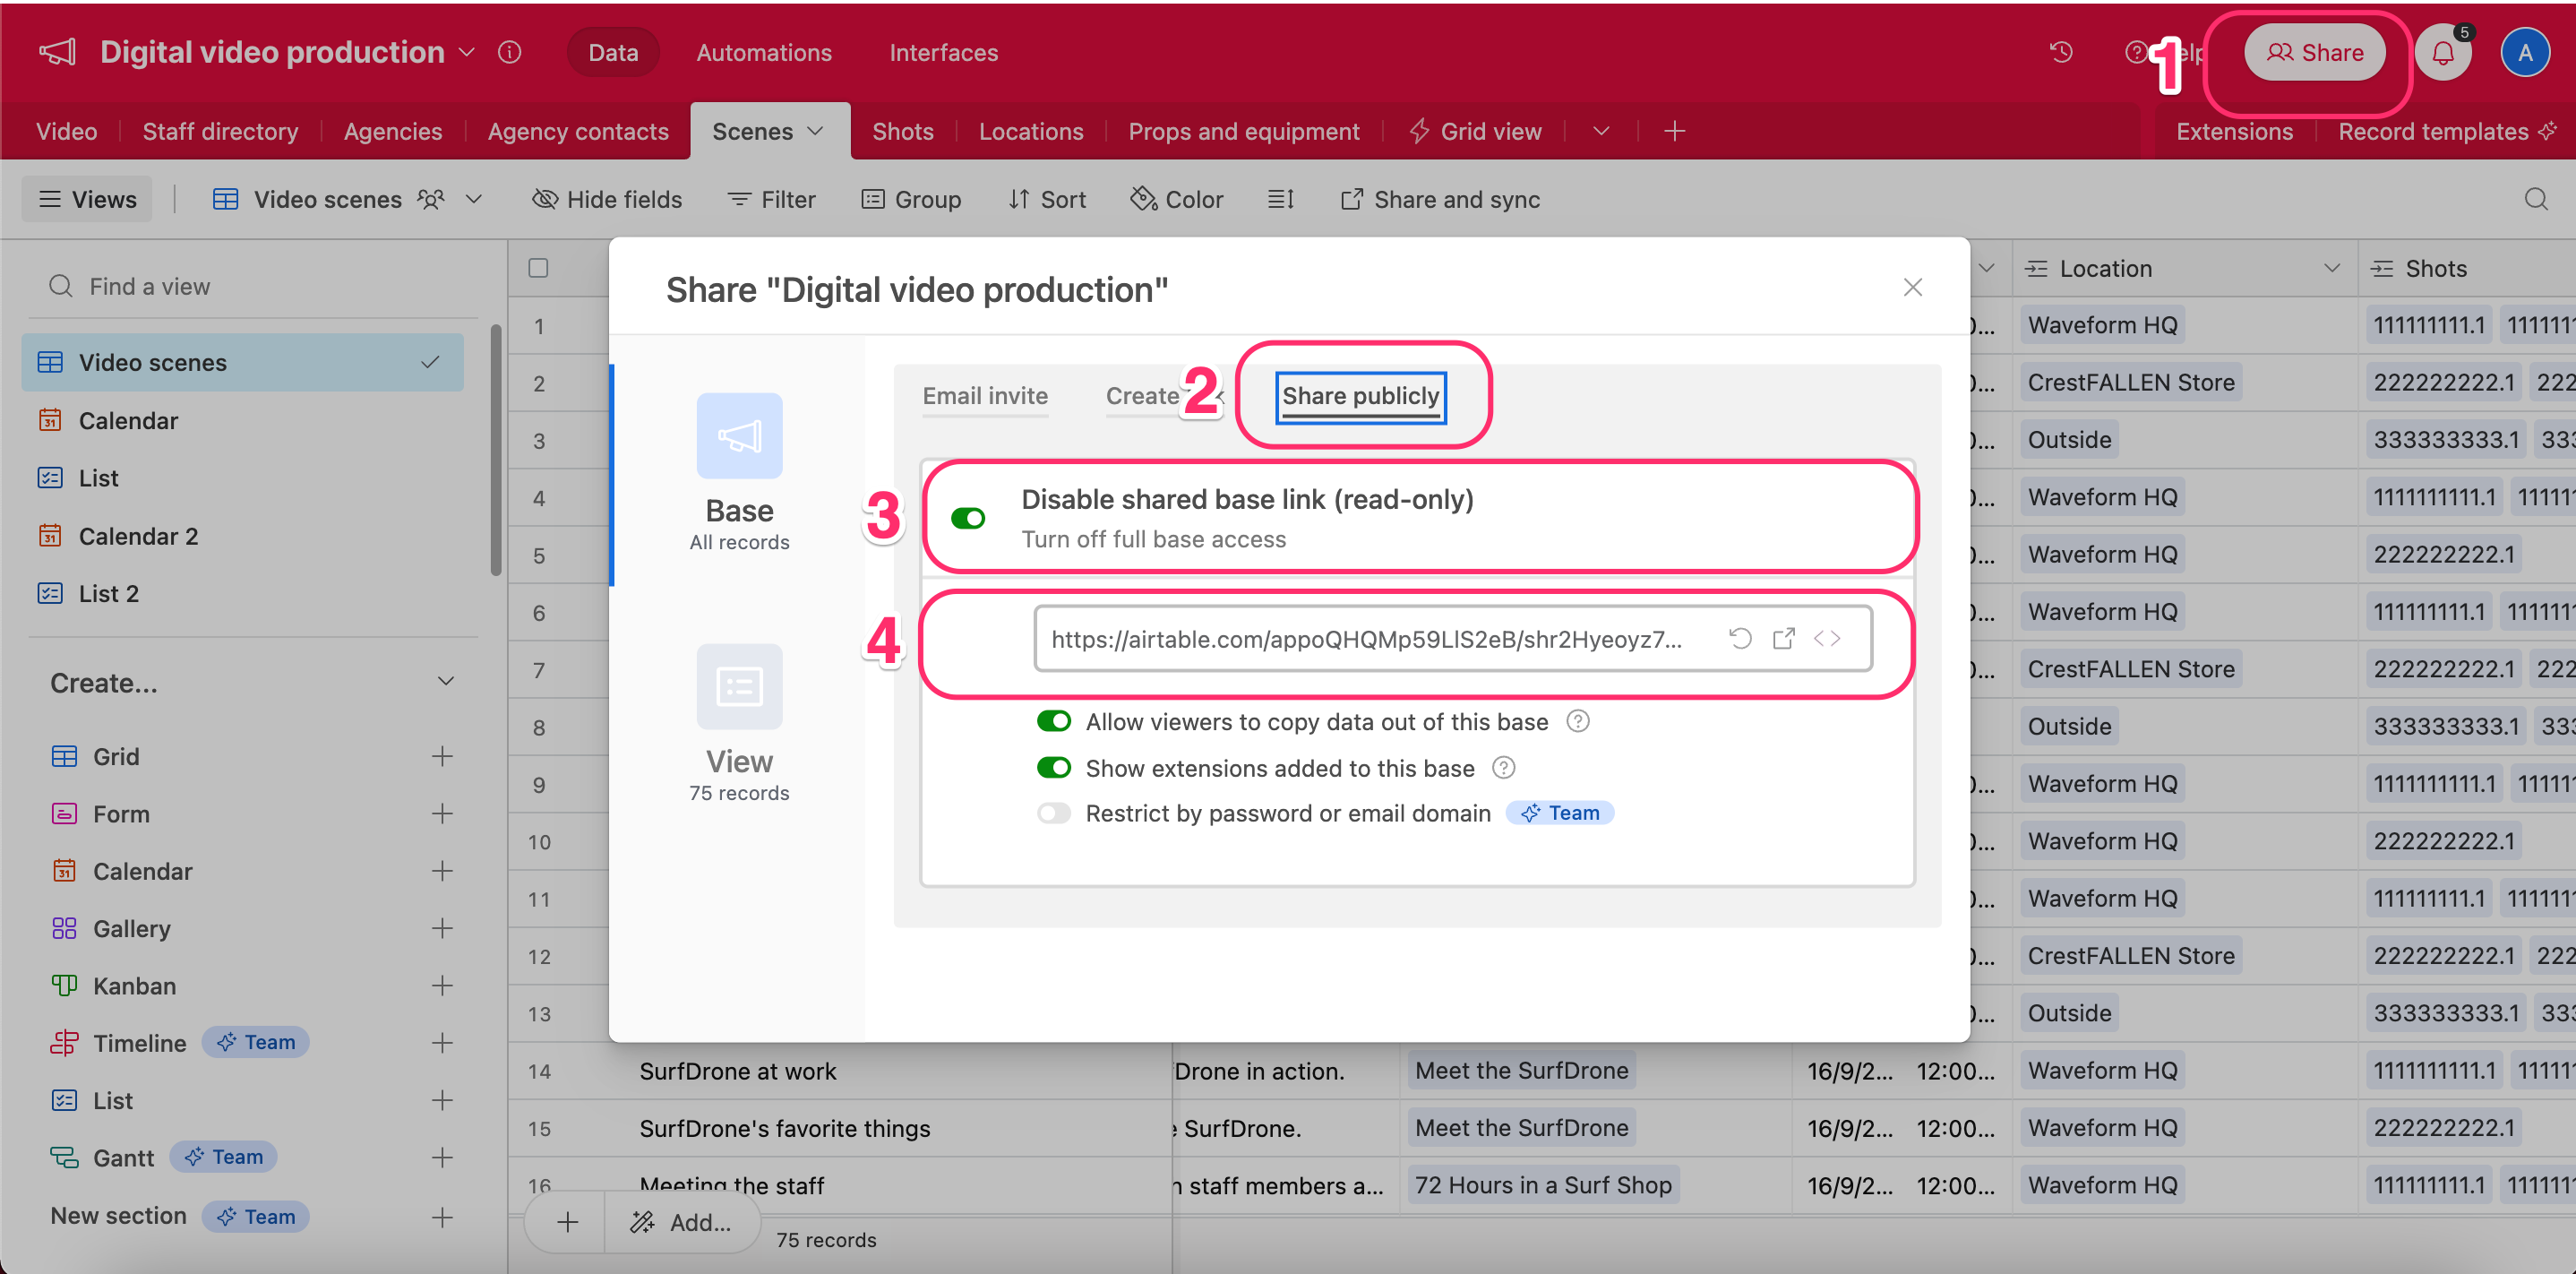
See here for detailed procedures.
- Open
Sharemenu in your Project / Base - Open tab
Share Publicly - Enable
Turn on full base access - Copy generated shared base URL
