Expanded record
Overview
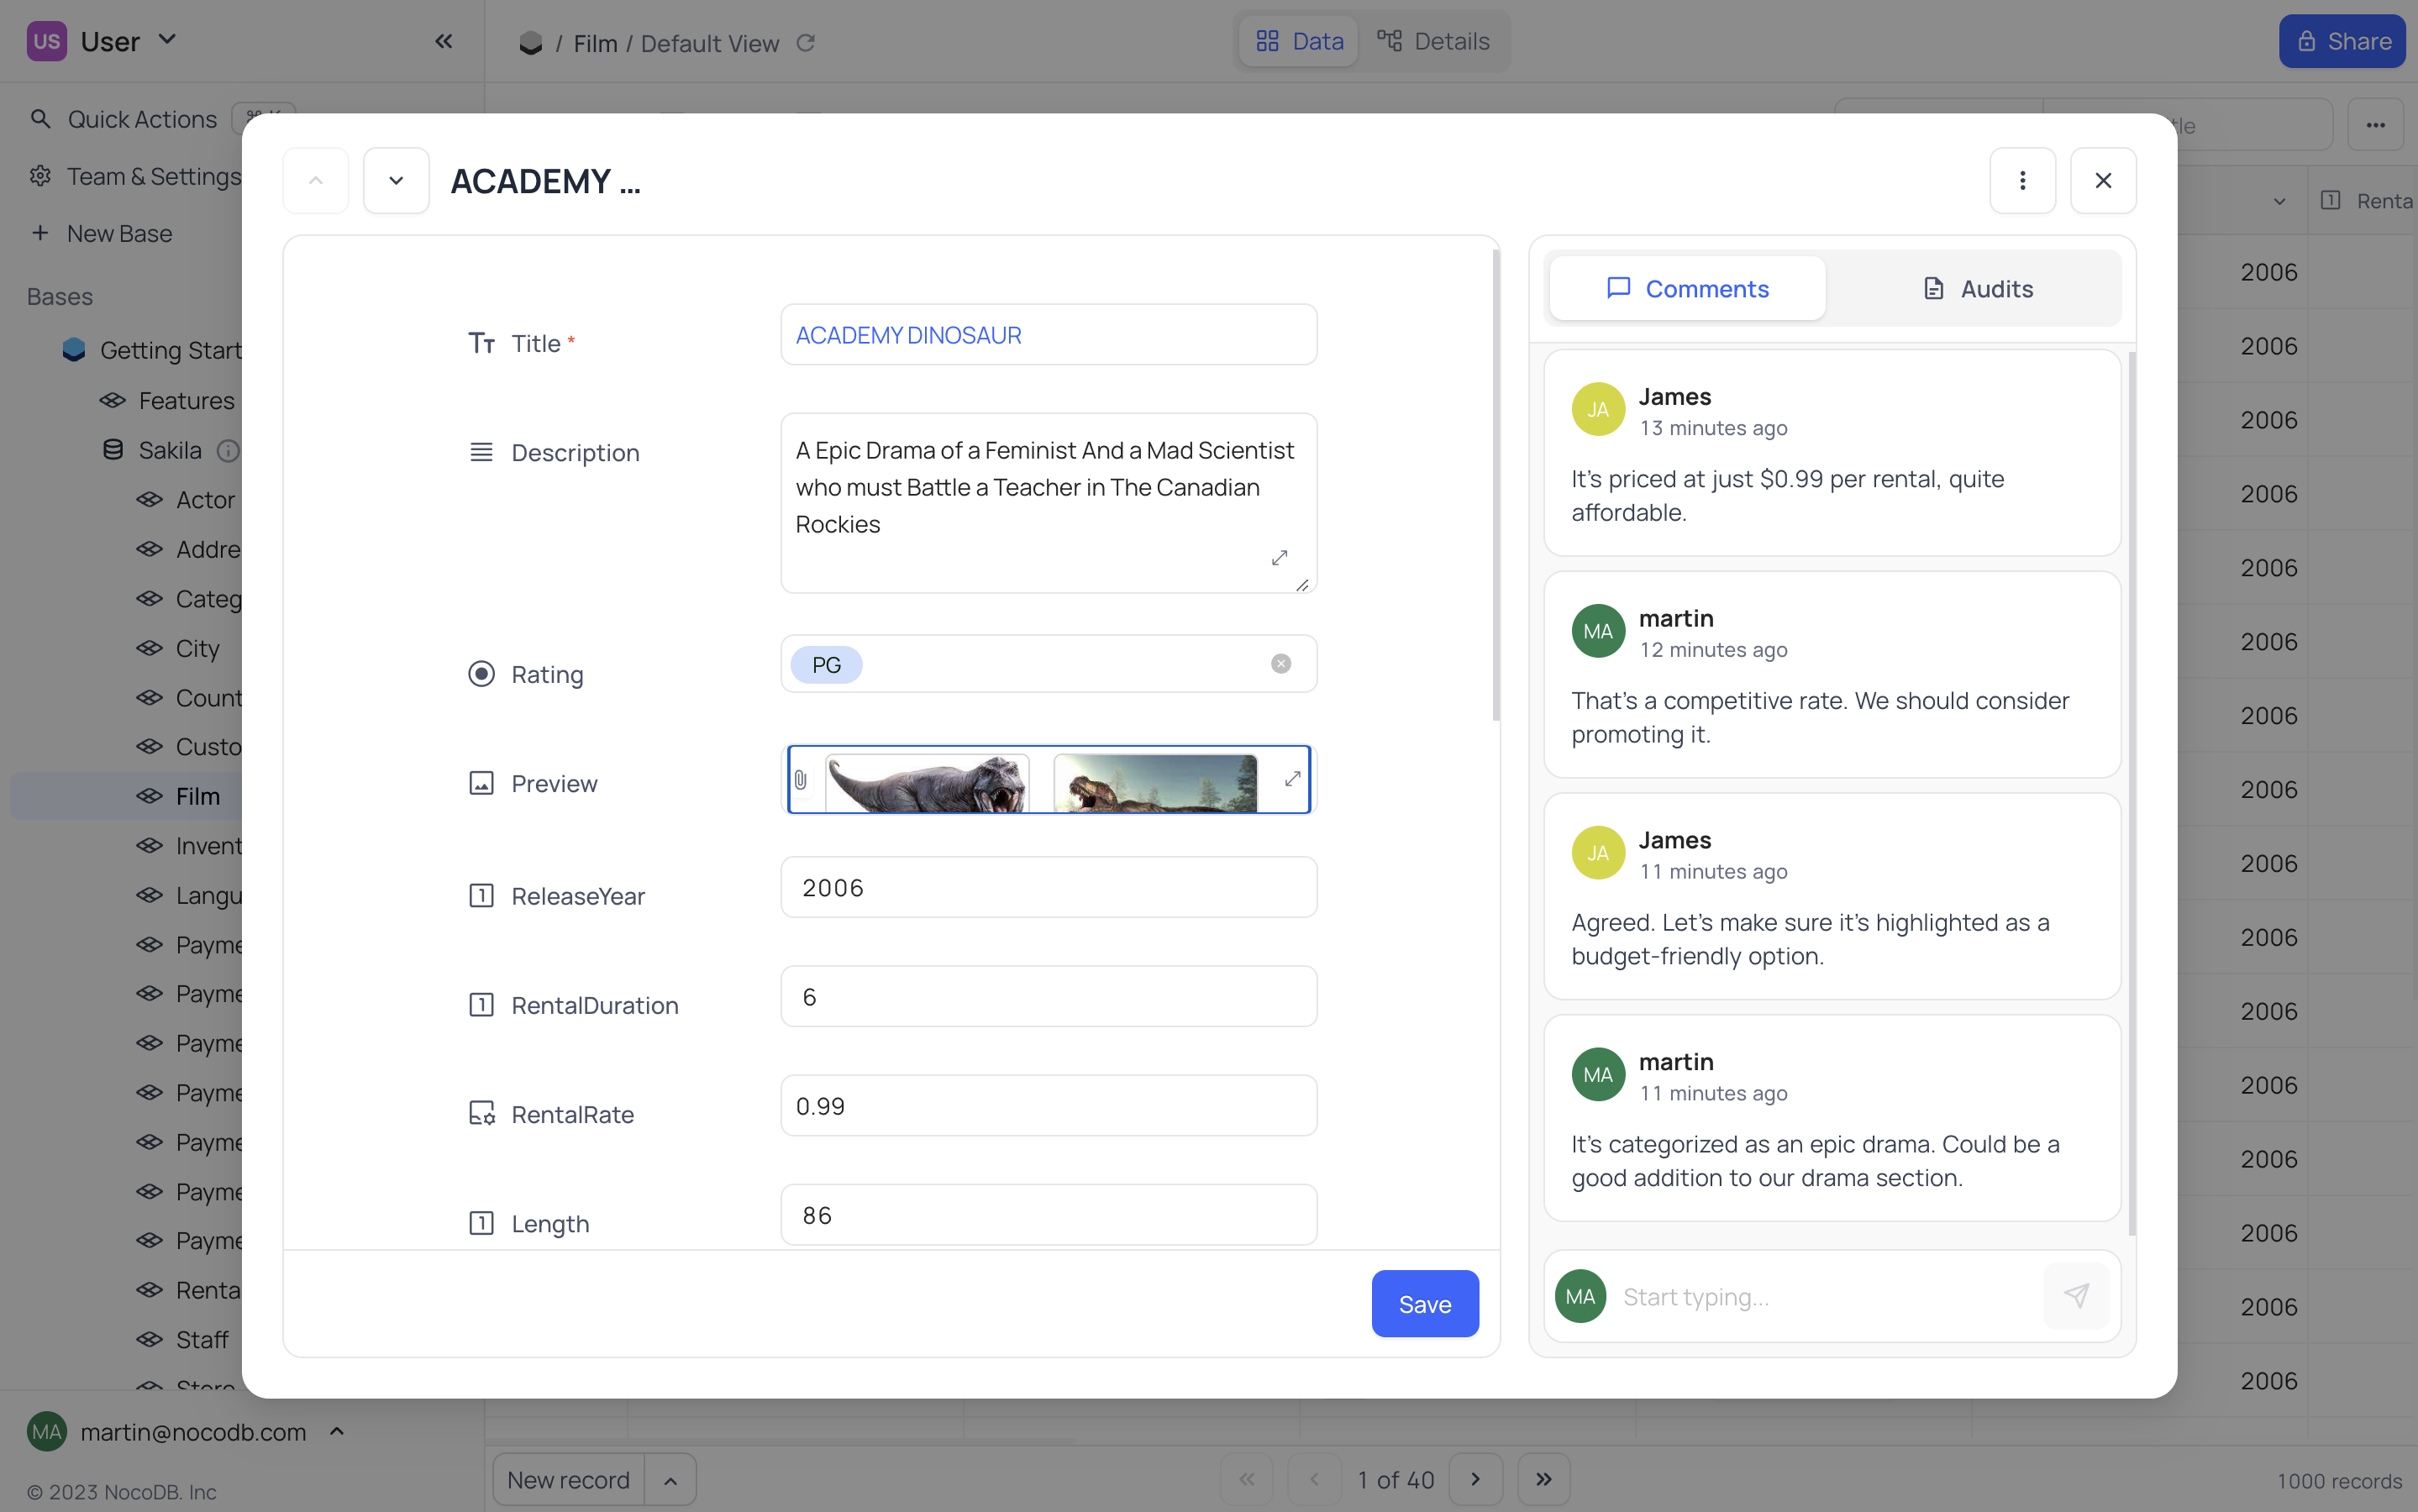
Expanded record allows you to edit a record data using a form layout. Apart from record information, it also consists of the activity feed such as user comments or record revision history (audit).
Expanding a Record
To expand a record in a grid view, click on expand icon that appears on the first column (index column) on hover over a record.
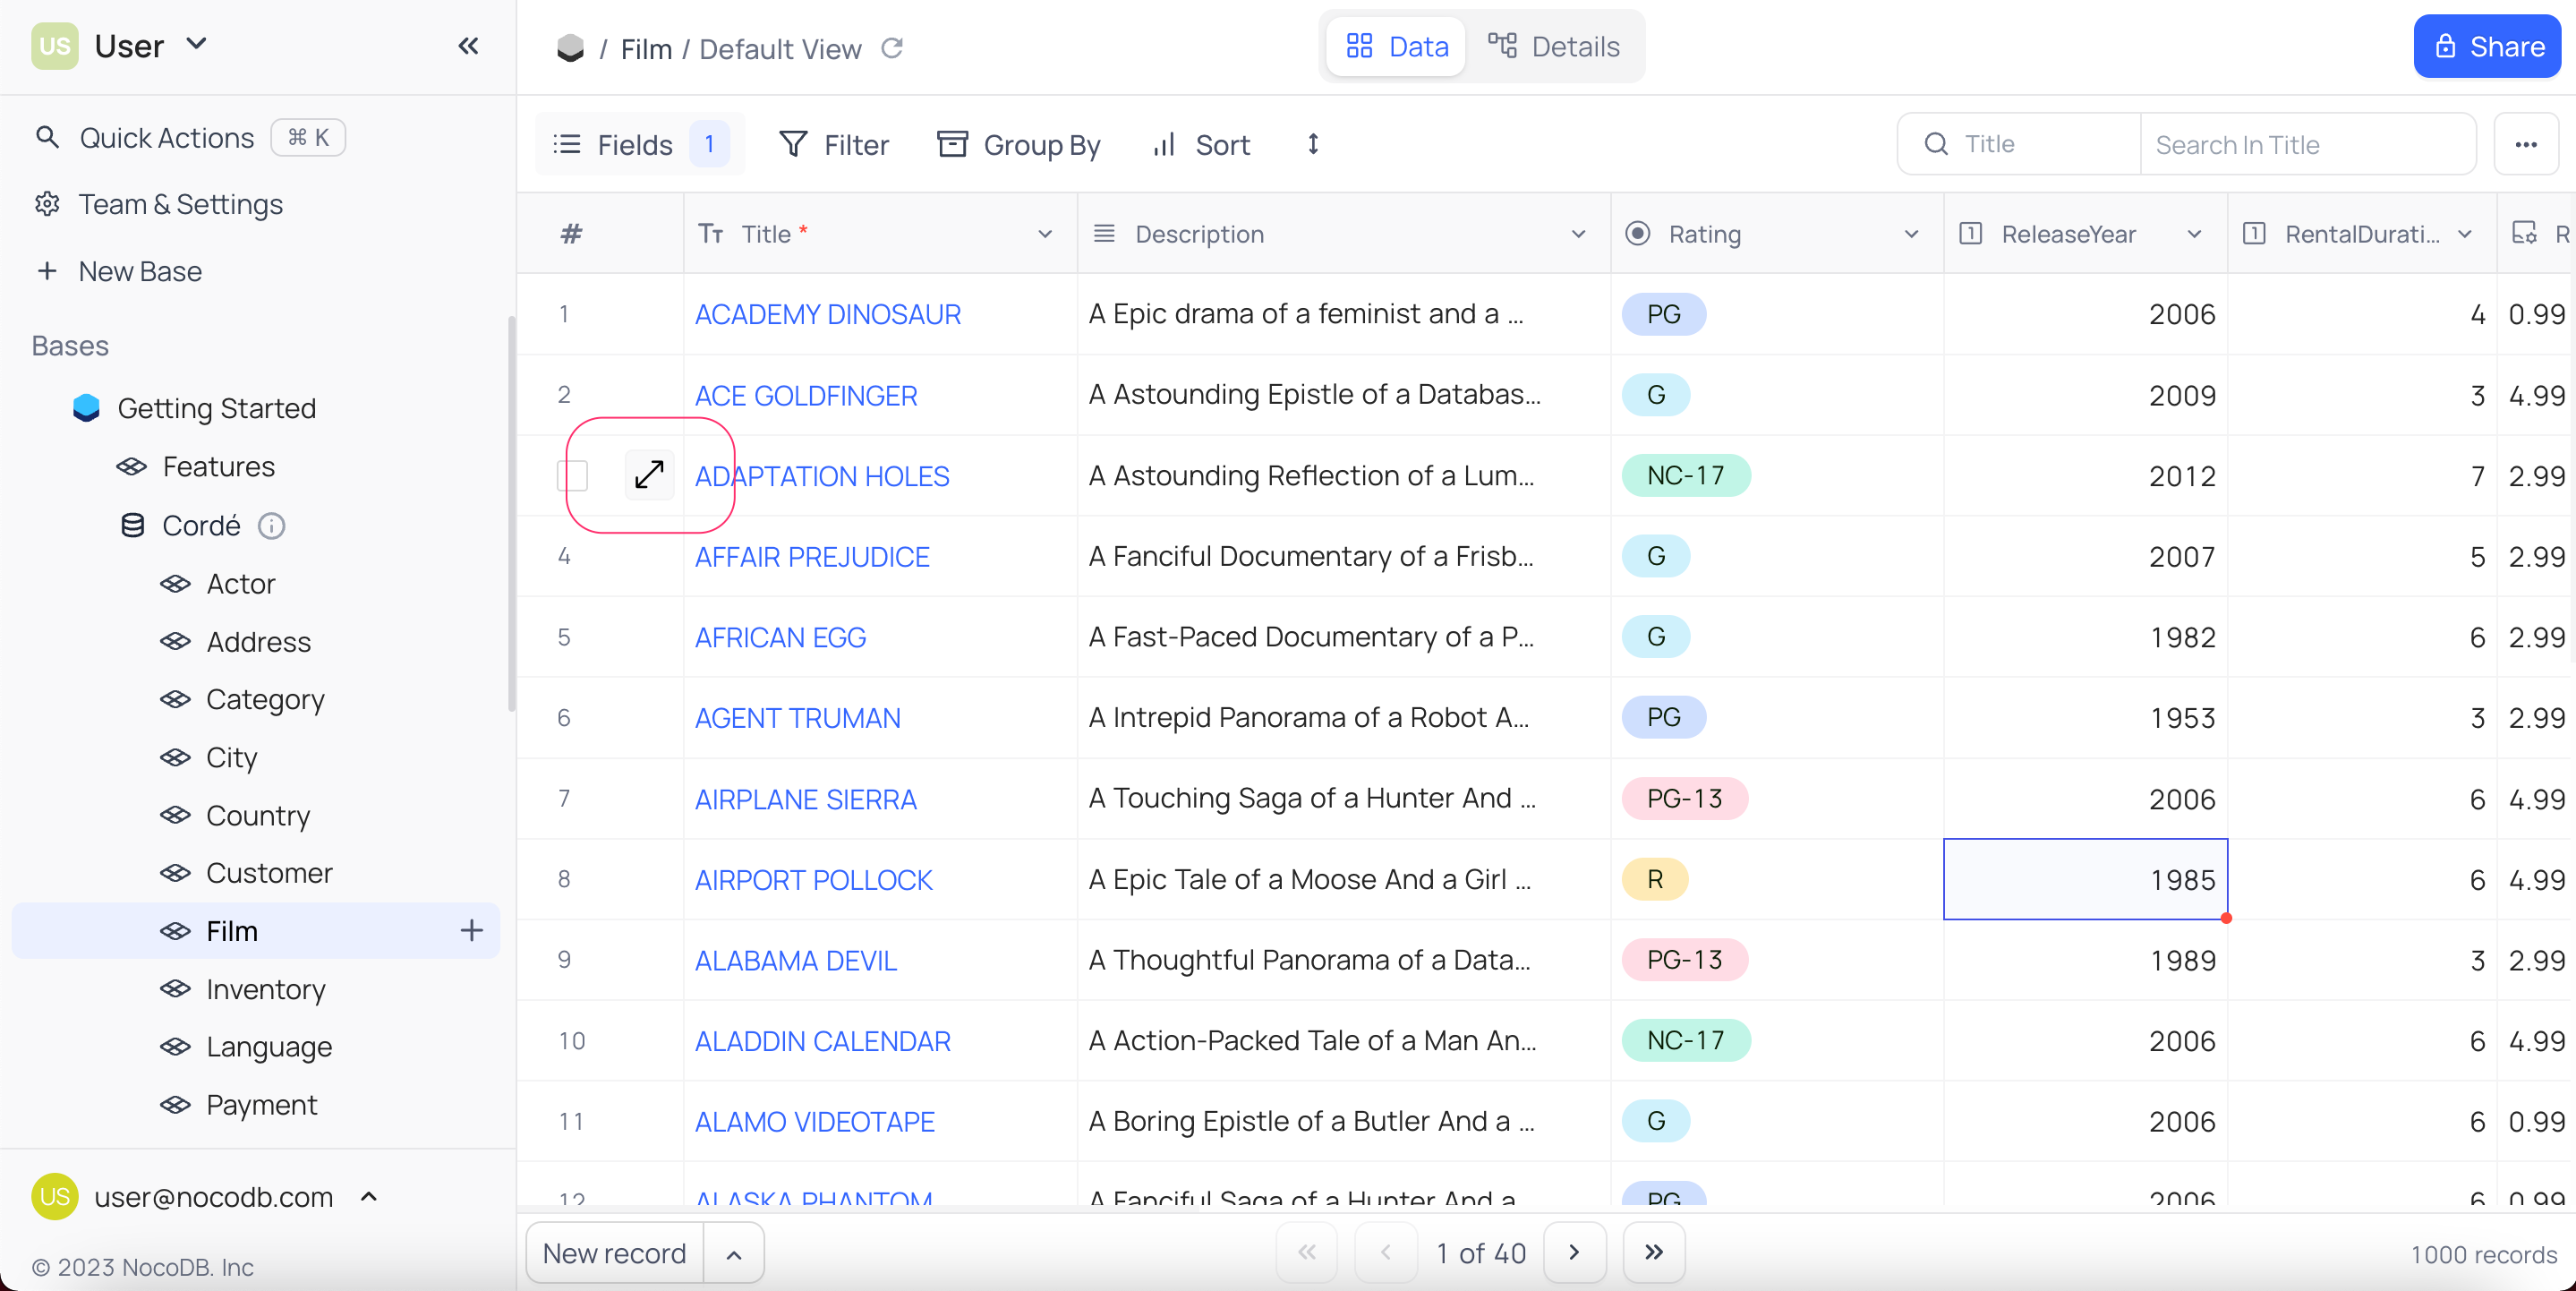
Shortcut : Use space bar on any cell to expand associated record.
Edit record
Expanded form displays all the fields of a record enabled for display in a form layout.
- You can edit the record data by clicking on the field and entering the value.
Show hidden fields: Click onShow hidden fieldsbutton to display all the fields of a record.- Click on
Savebutton to save the changes. Close the expanded form by clicking onXbutton in the top right corner of the form to discard the changes. - Navigate to next/previous record using
Next/Previousbutton in the top left corner of the form.
Any changes made to the links field (link/unlink) will be saved automatically.

Record Audit
In an expanded form,
- Click on
Audittab - A list of all the changes made to the record will be displayed
- You can only view the audit log. You cannot edit or delete the audit log.
- Audit log is only available in Self-hosted version currently

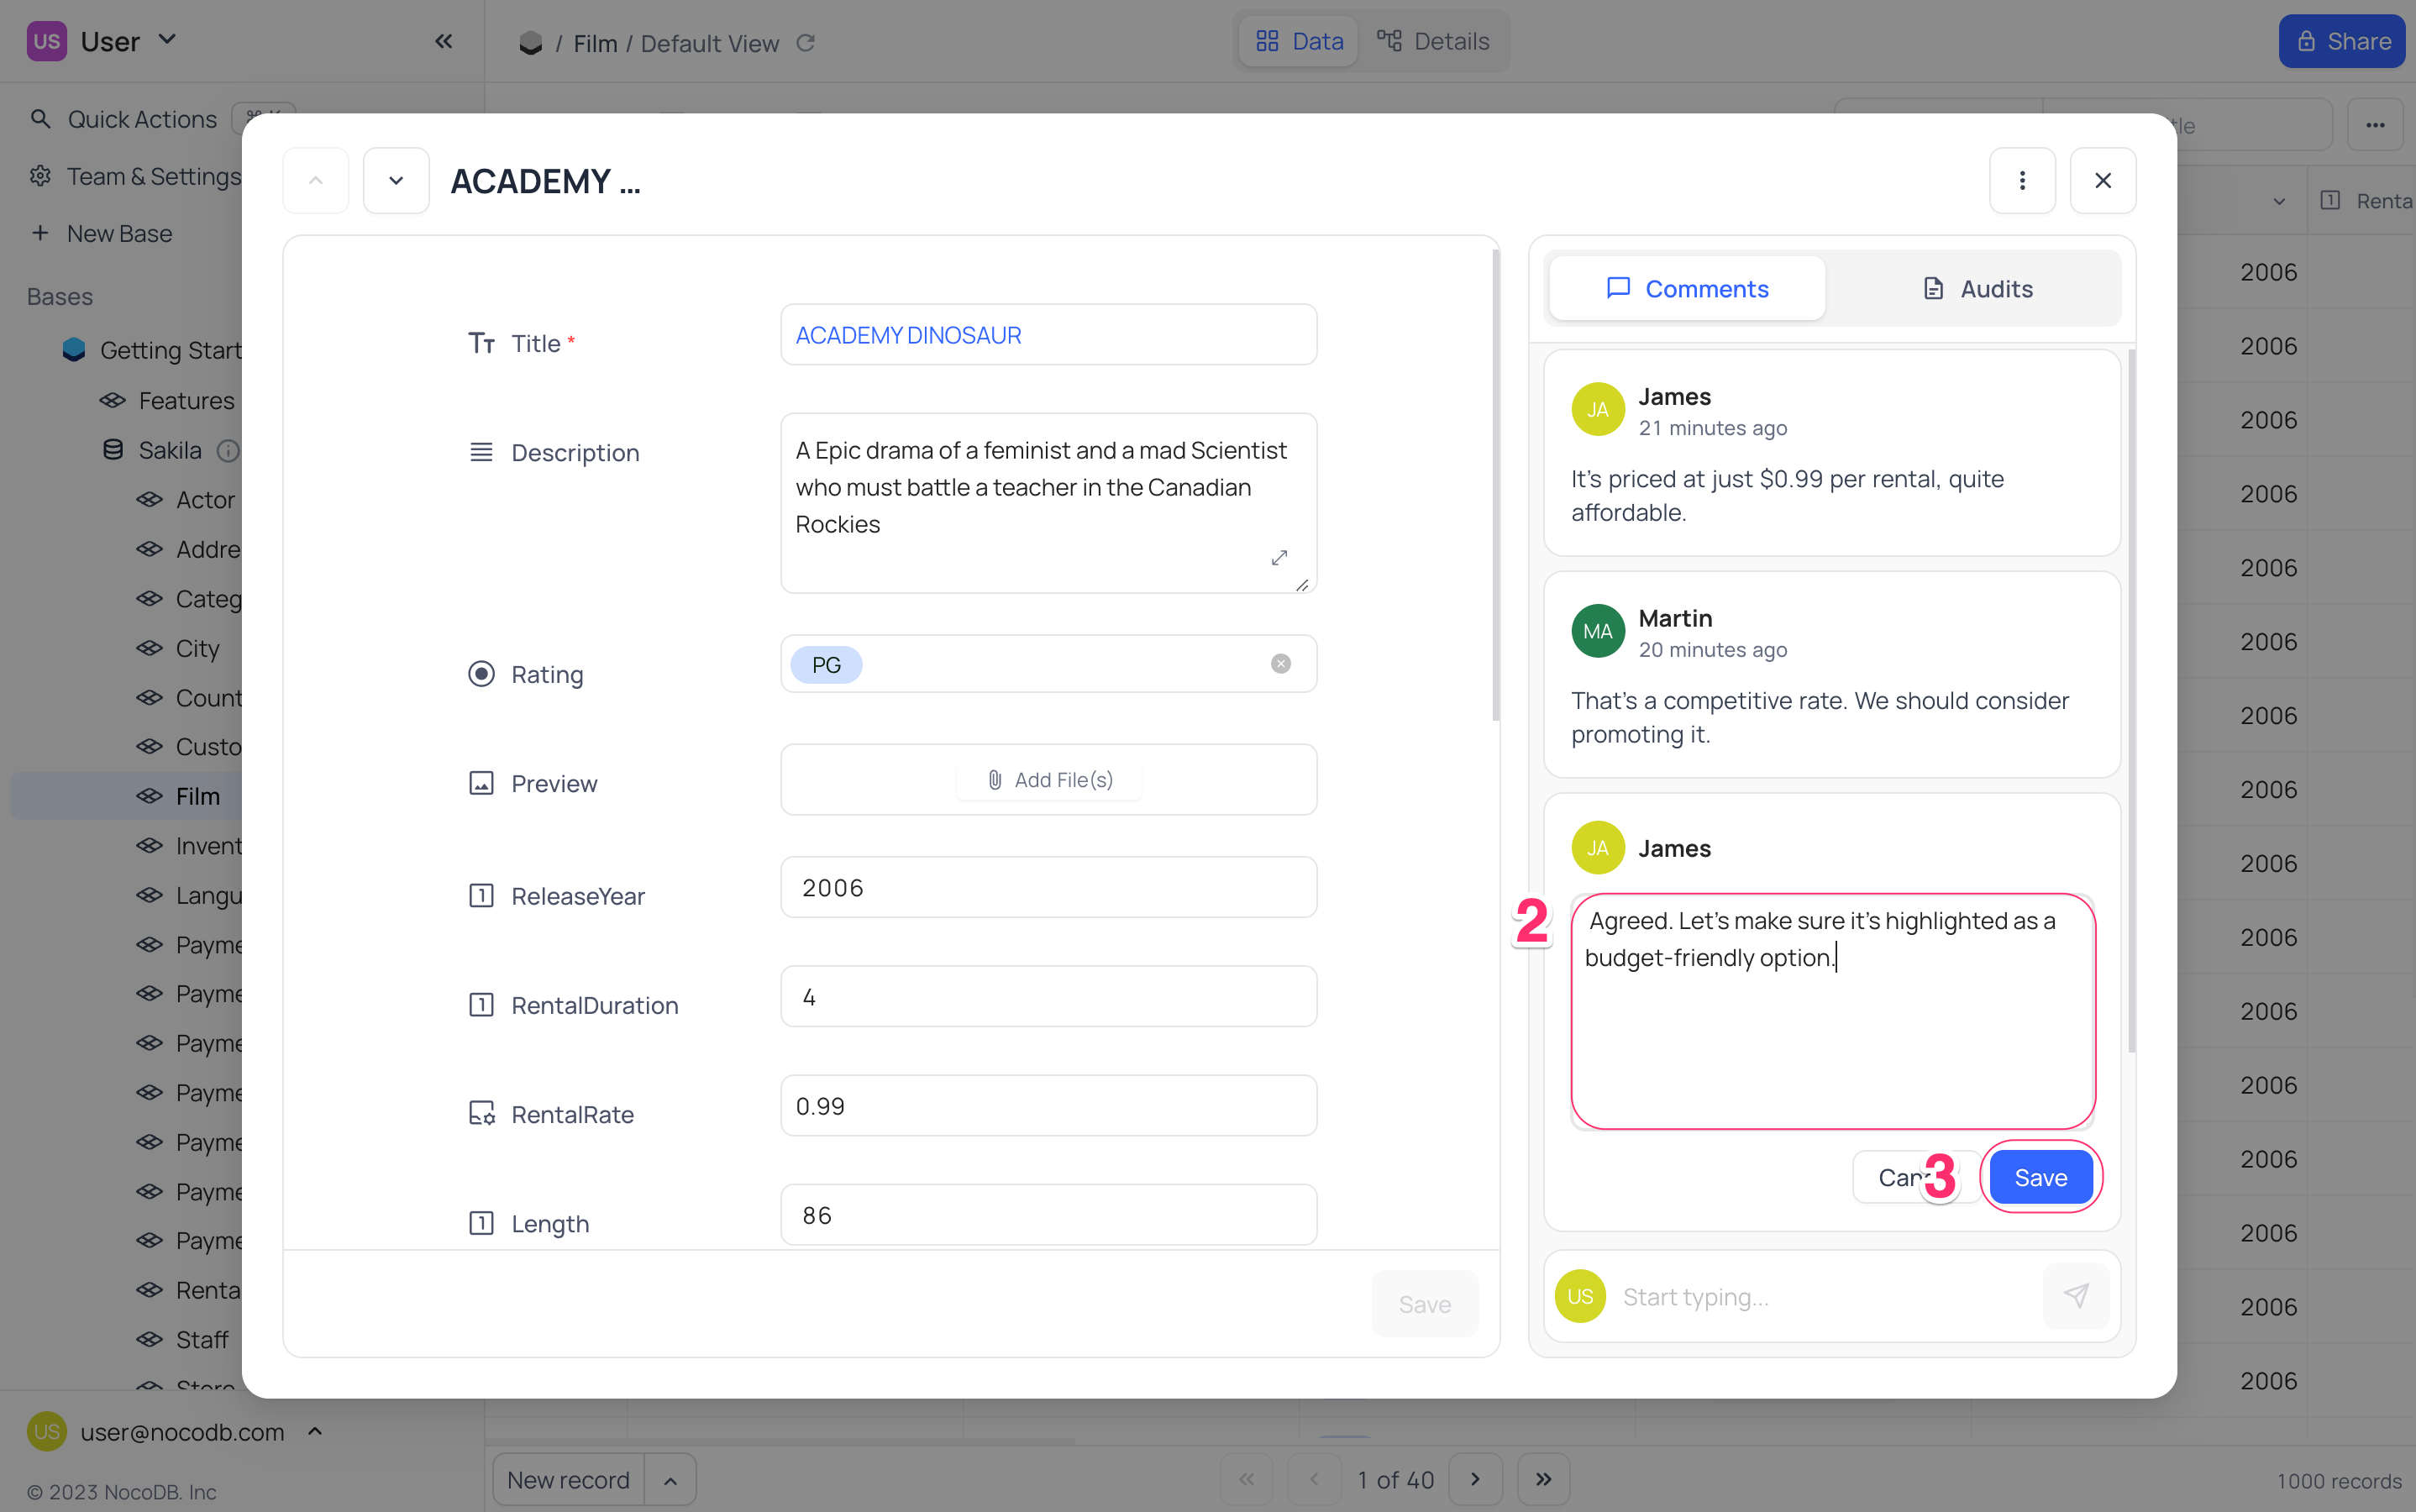
Record Comment
The Comments feature allows you to collaborate directly within records by leaving comments, making it easier to discuss and track changes. You can also receive notifications for updates, ensuring everyone stays informed in real time.
@mentions & comments resolve feature is only supported in cloud hosted / self-hosted enterprise plans
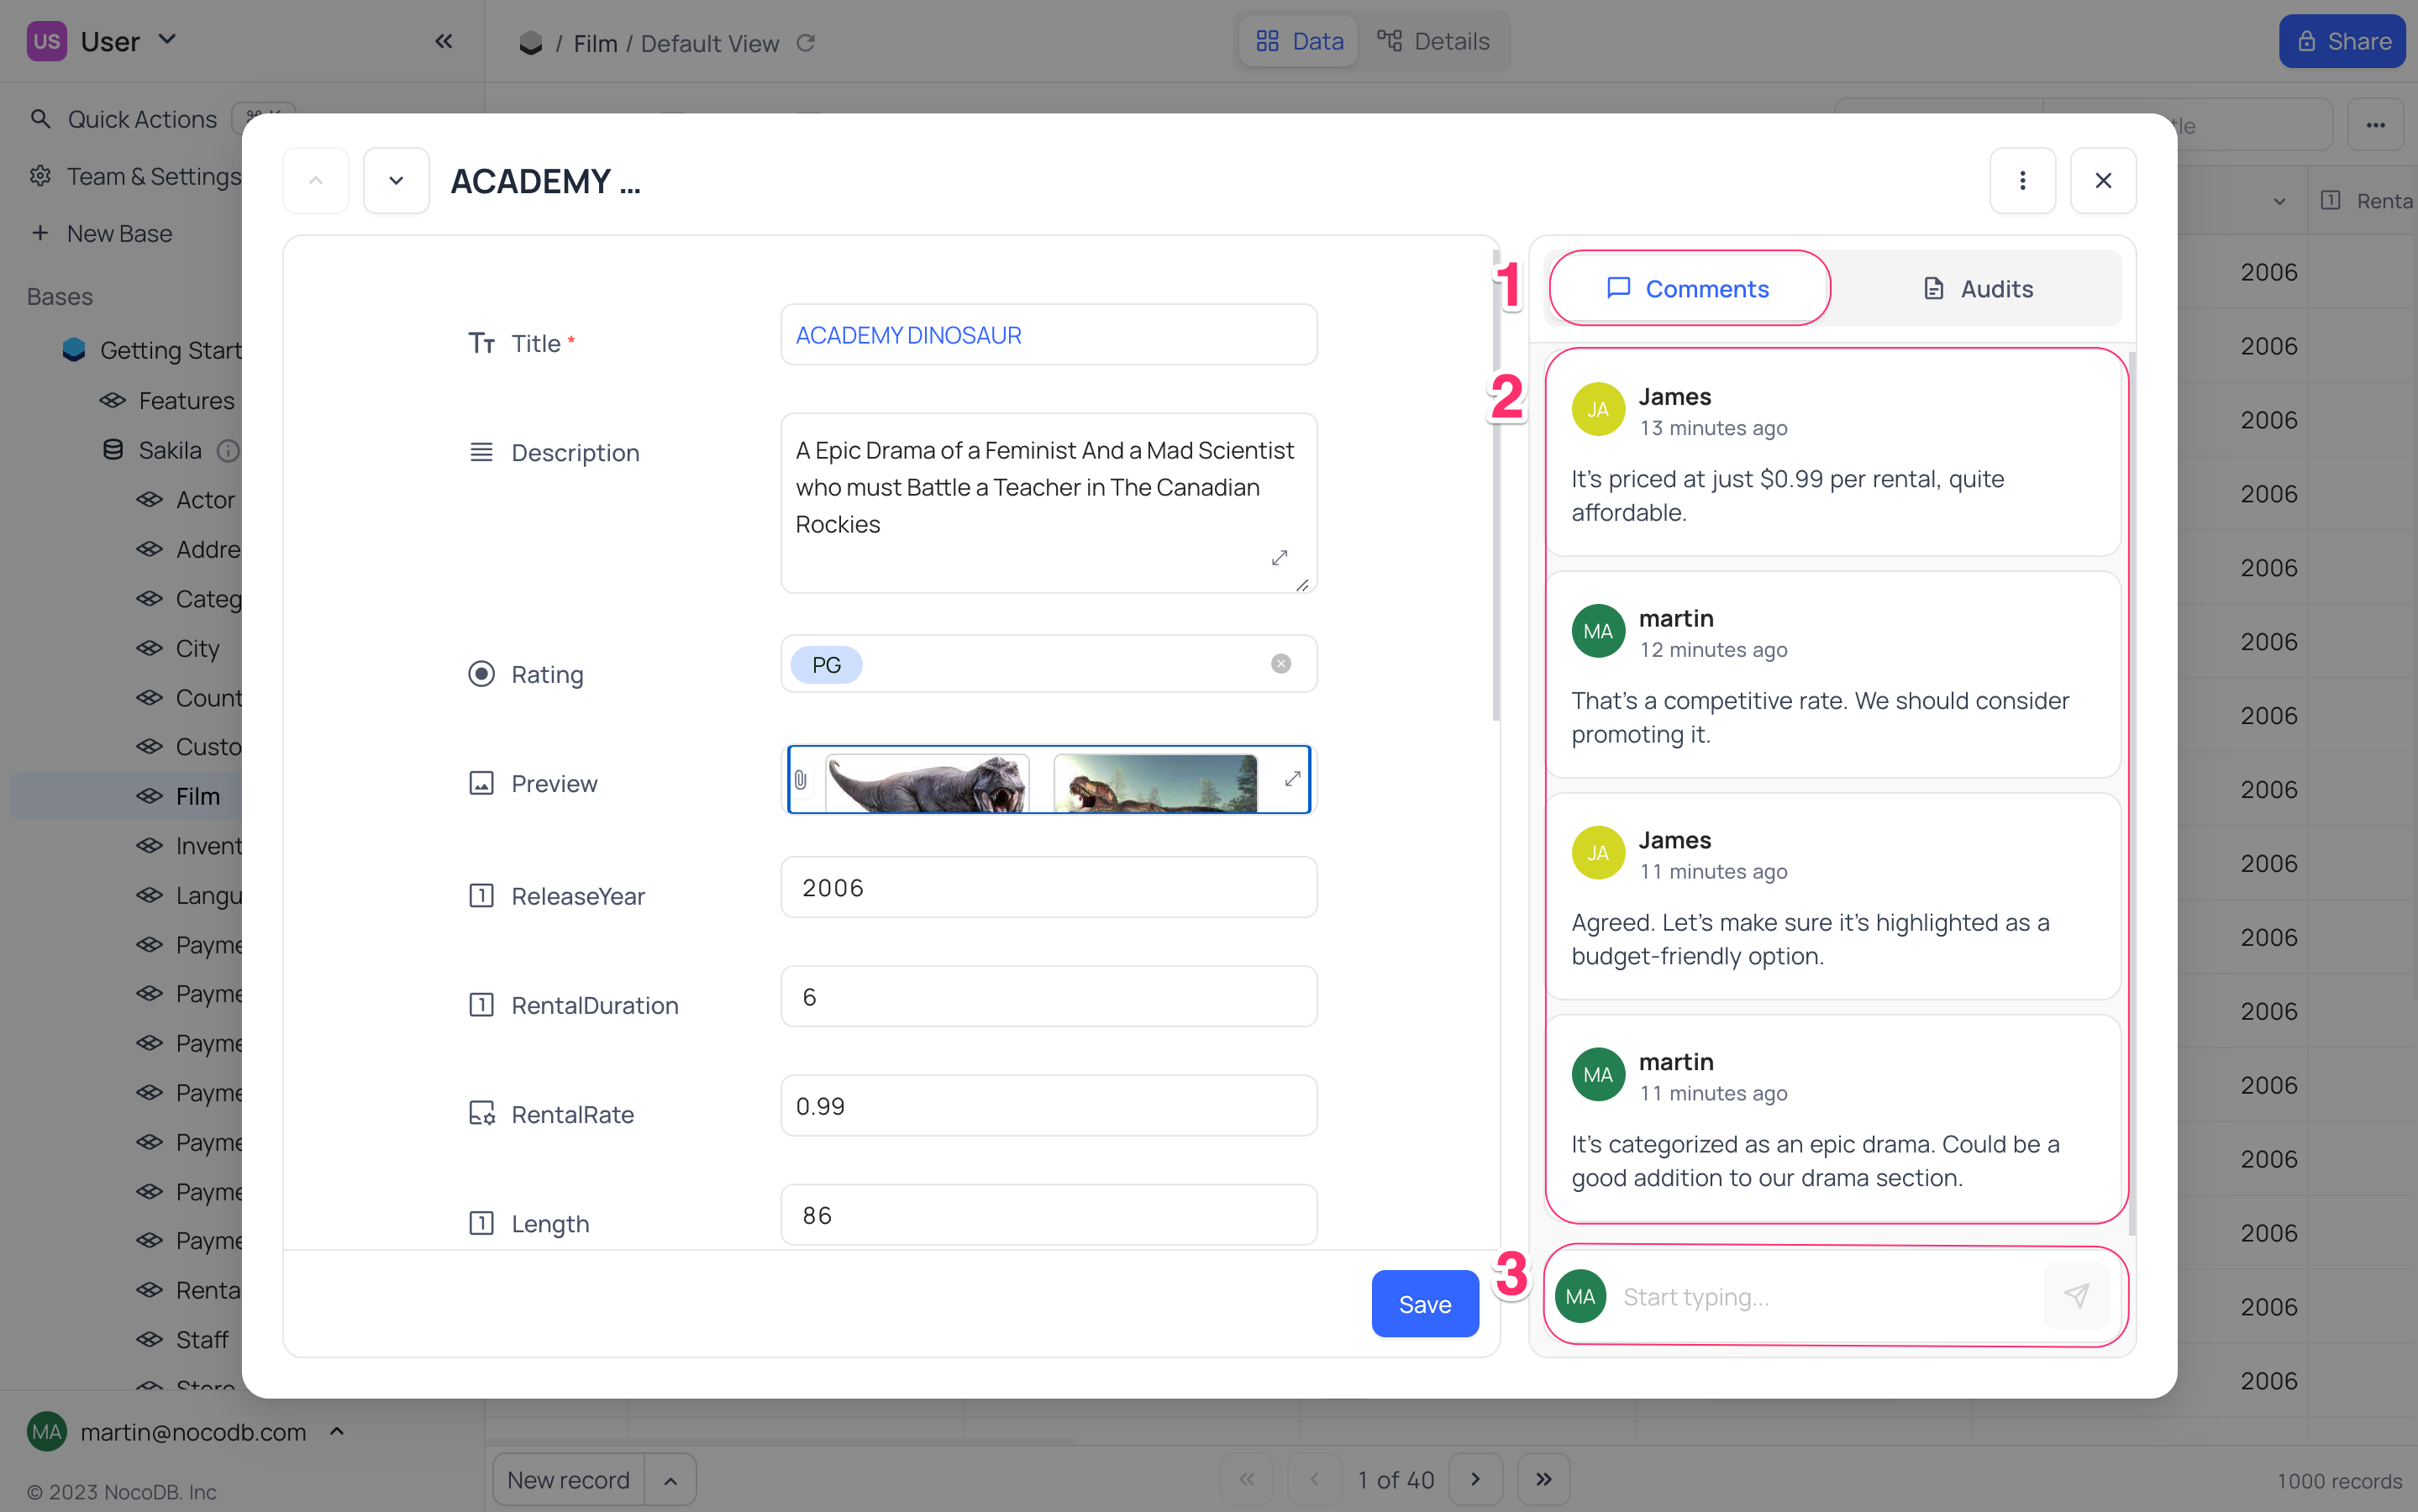
Add Comment
In an expanded form,
- Click on
Commentstab - A list of all the comments made to the record will be displayed
- Click on input box at the bottom to add a new comment, and press
Enterto save
Edit Comment
In comments list of an expanded form,
- Click on
Editicon on the right side of the comment - Edit the comment and
- Click on
Saveicon OR PressEnterto save the changes


You can only edit your own comments. Changes to comments are also recorded in the audit log.
Record Actions
Copy Record URL
In an expanded form, click Copy Record URL to share the record form to other authorized users.
Duplicate record
Using context menu (...) in the top right corner of the expanded form, you can duplicate the record. Duplicated record will not be saved by default. You can edit the record and save it.
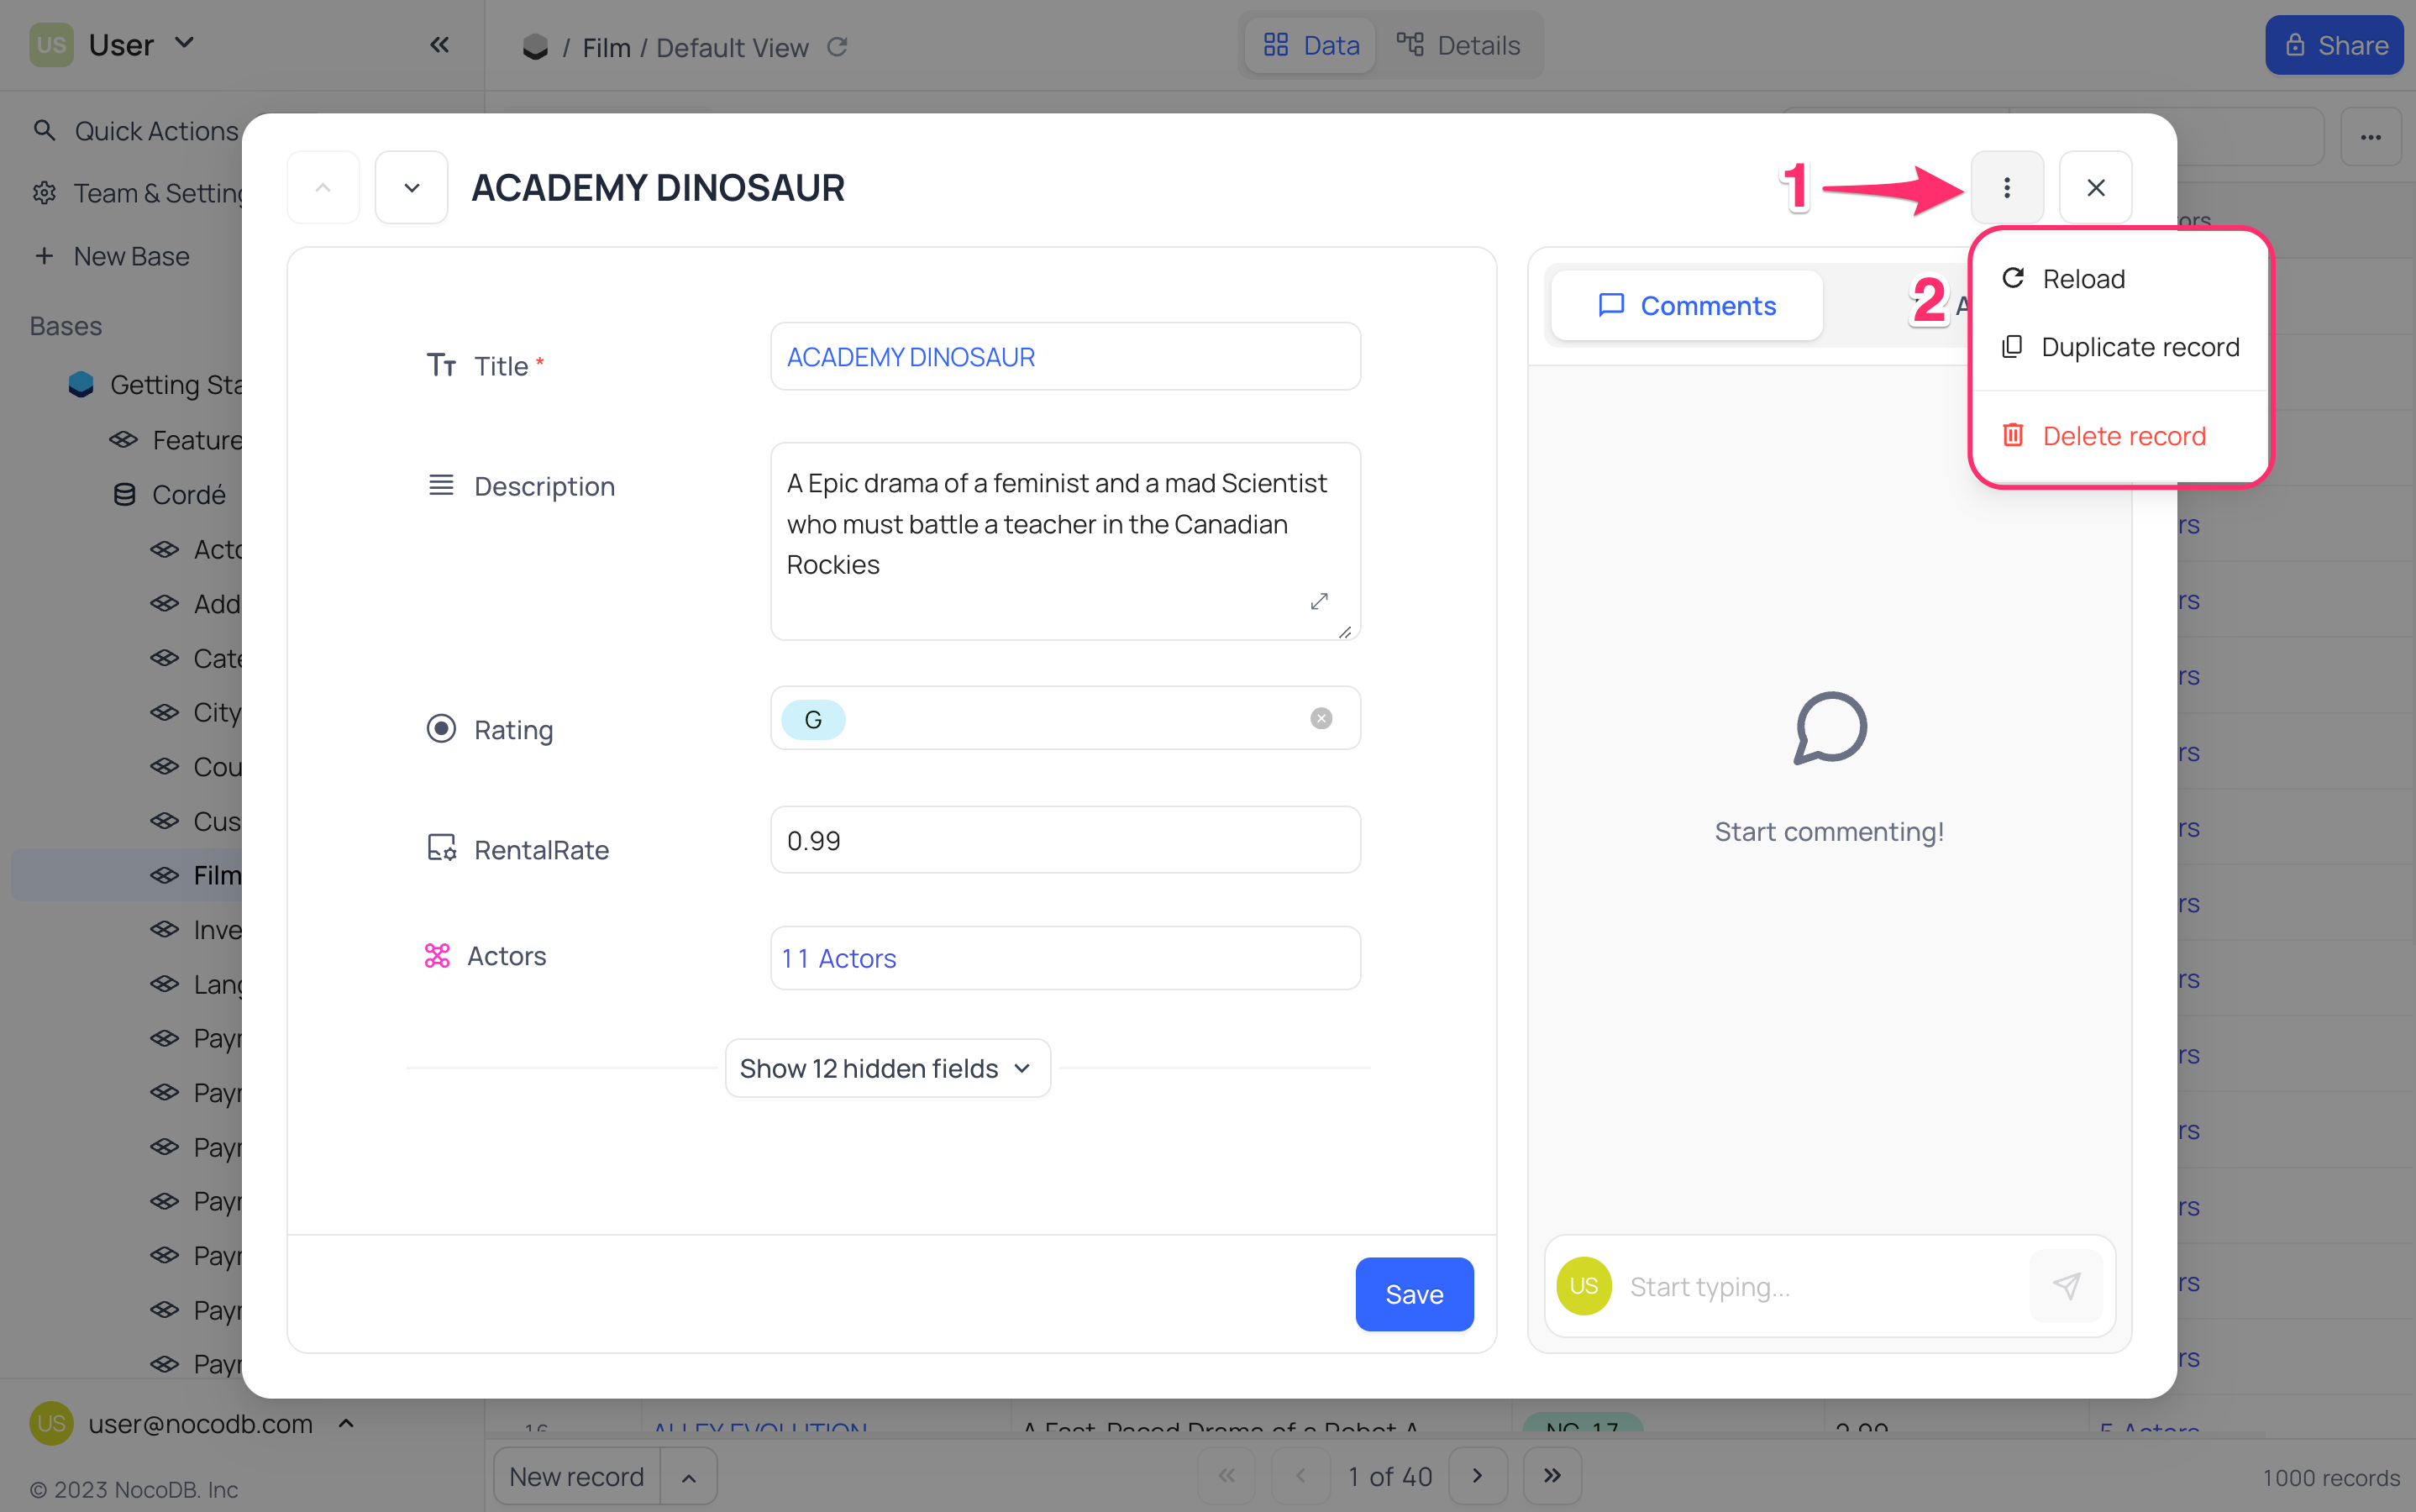
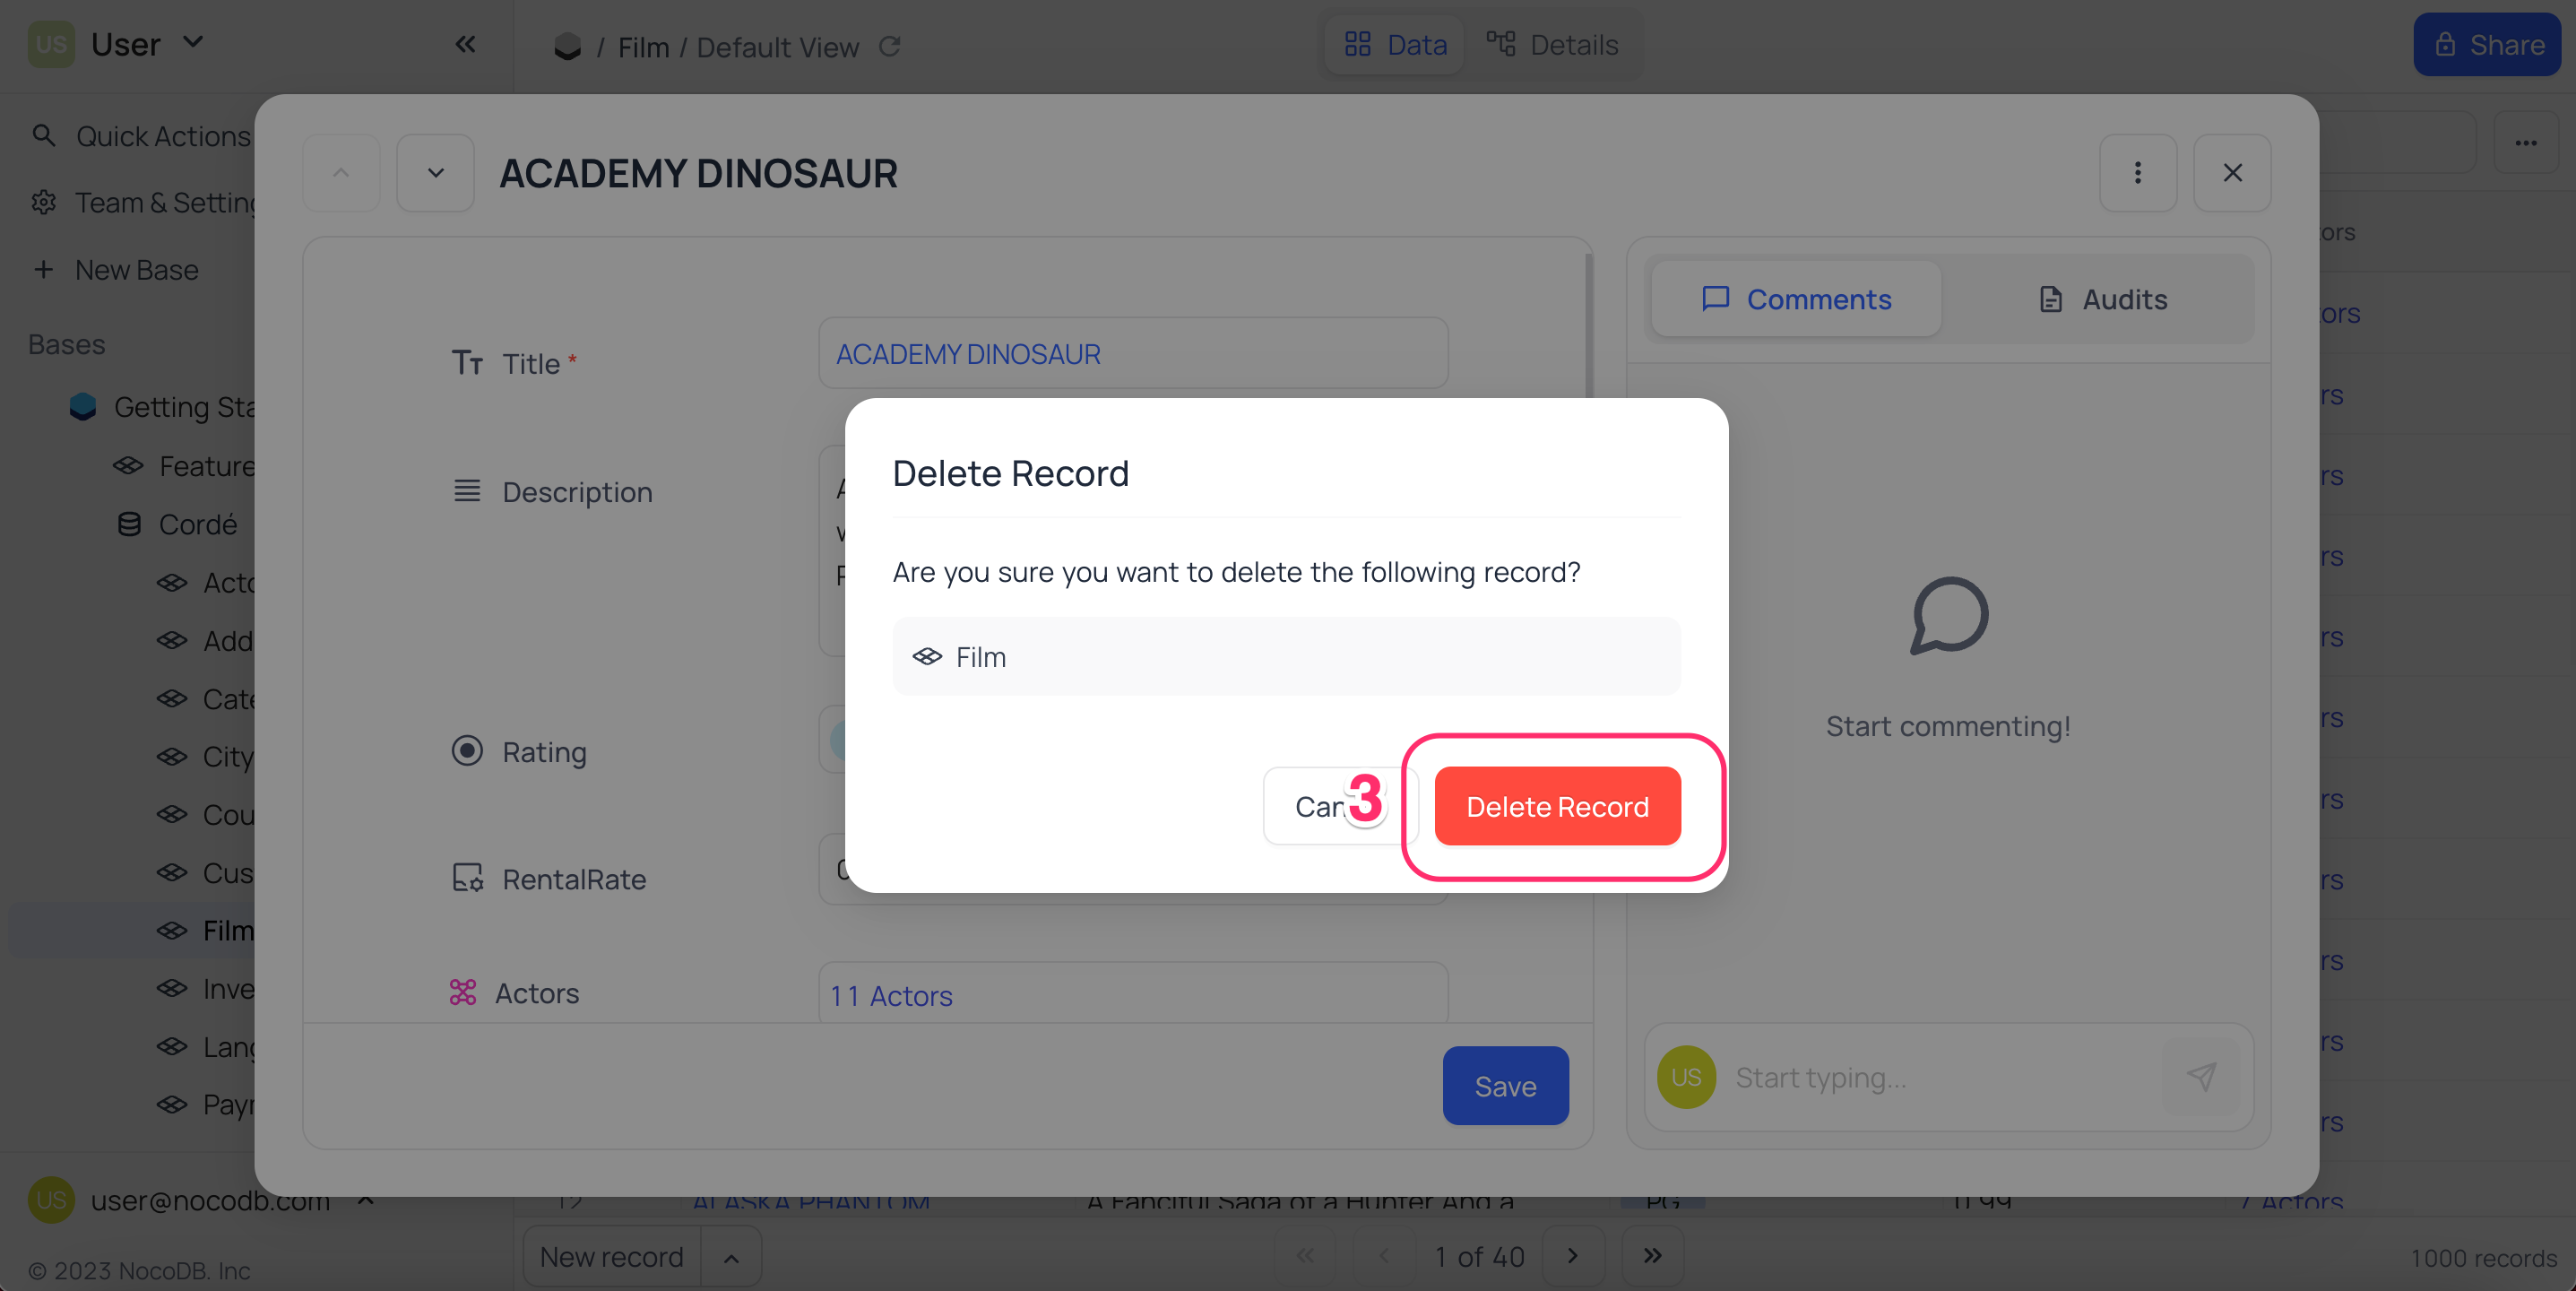
Delete record
Using context menu (...) in the top right corner of the expanded form, you can delete the record.
On the confirmation dialog, click on Delete button to delete the record.
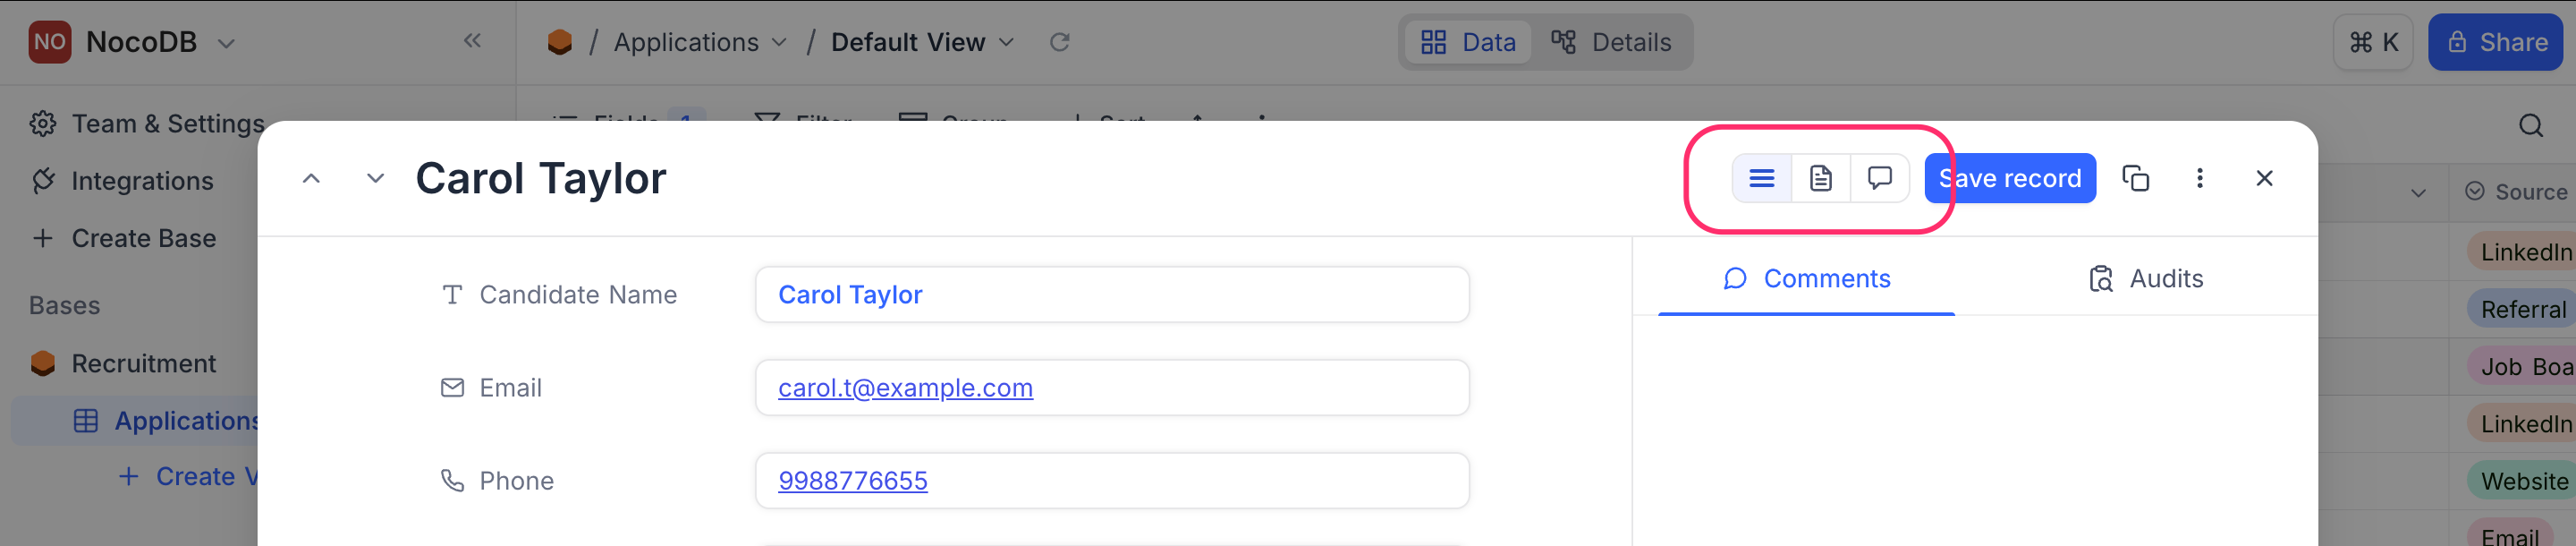
Record view modes
Modern data collaboration requires more than just viewing and editing records—it demands flexible interfaces tailored to specific tasks. Whether you're entering structured data, reviewing files, or engaging in team discussions, having the right record view enhances both productivity and clarity.
This article introduces three powerful modes for interacting with individual records:
- Field Mode for structured data entry and editing
- File Preview Mode for visually inspecting attachments
- Discussion Mode for seamless collaboration and context-rich conversations
Each mode is purpose-built to help you focus on what matters most, ensuring your workflows remain efficient, intuitive, and collaborative.
Field Mode
Field Mode is designed for editing and viewing all field values of a record. It provides a structured, form-like layout where each field is displayed clearly with its label and value.
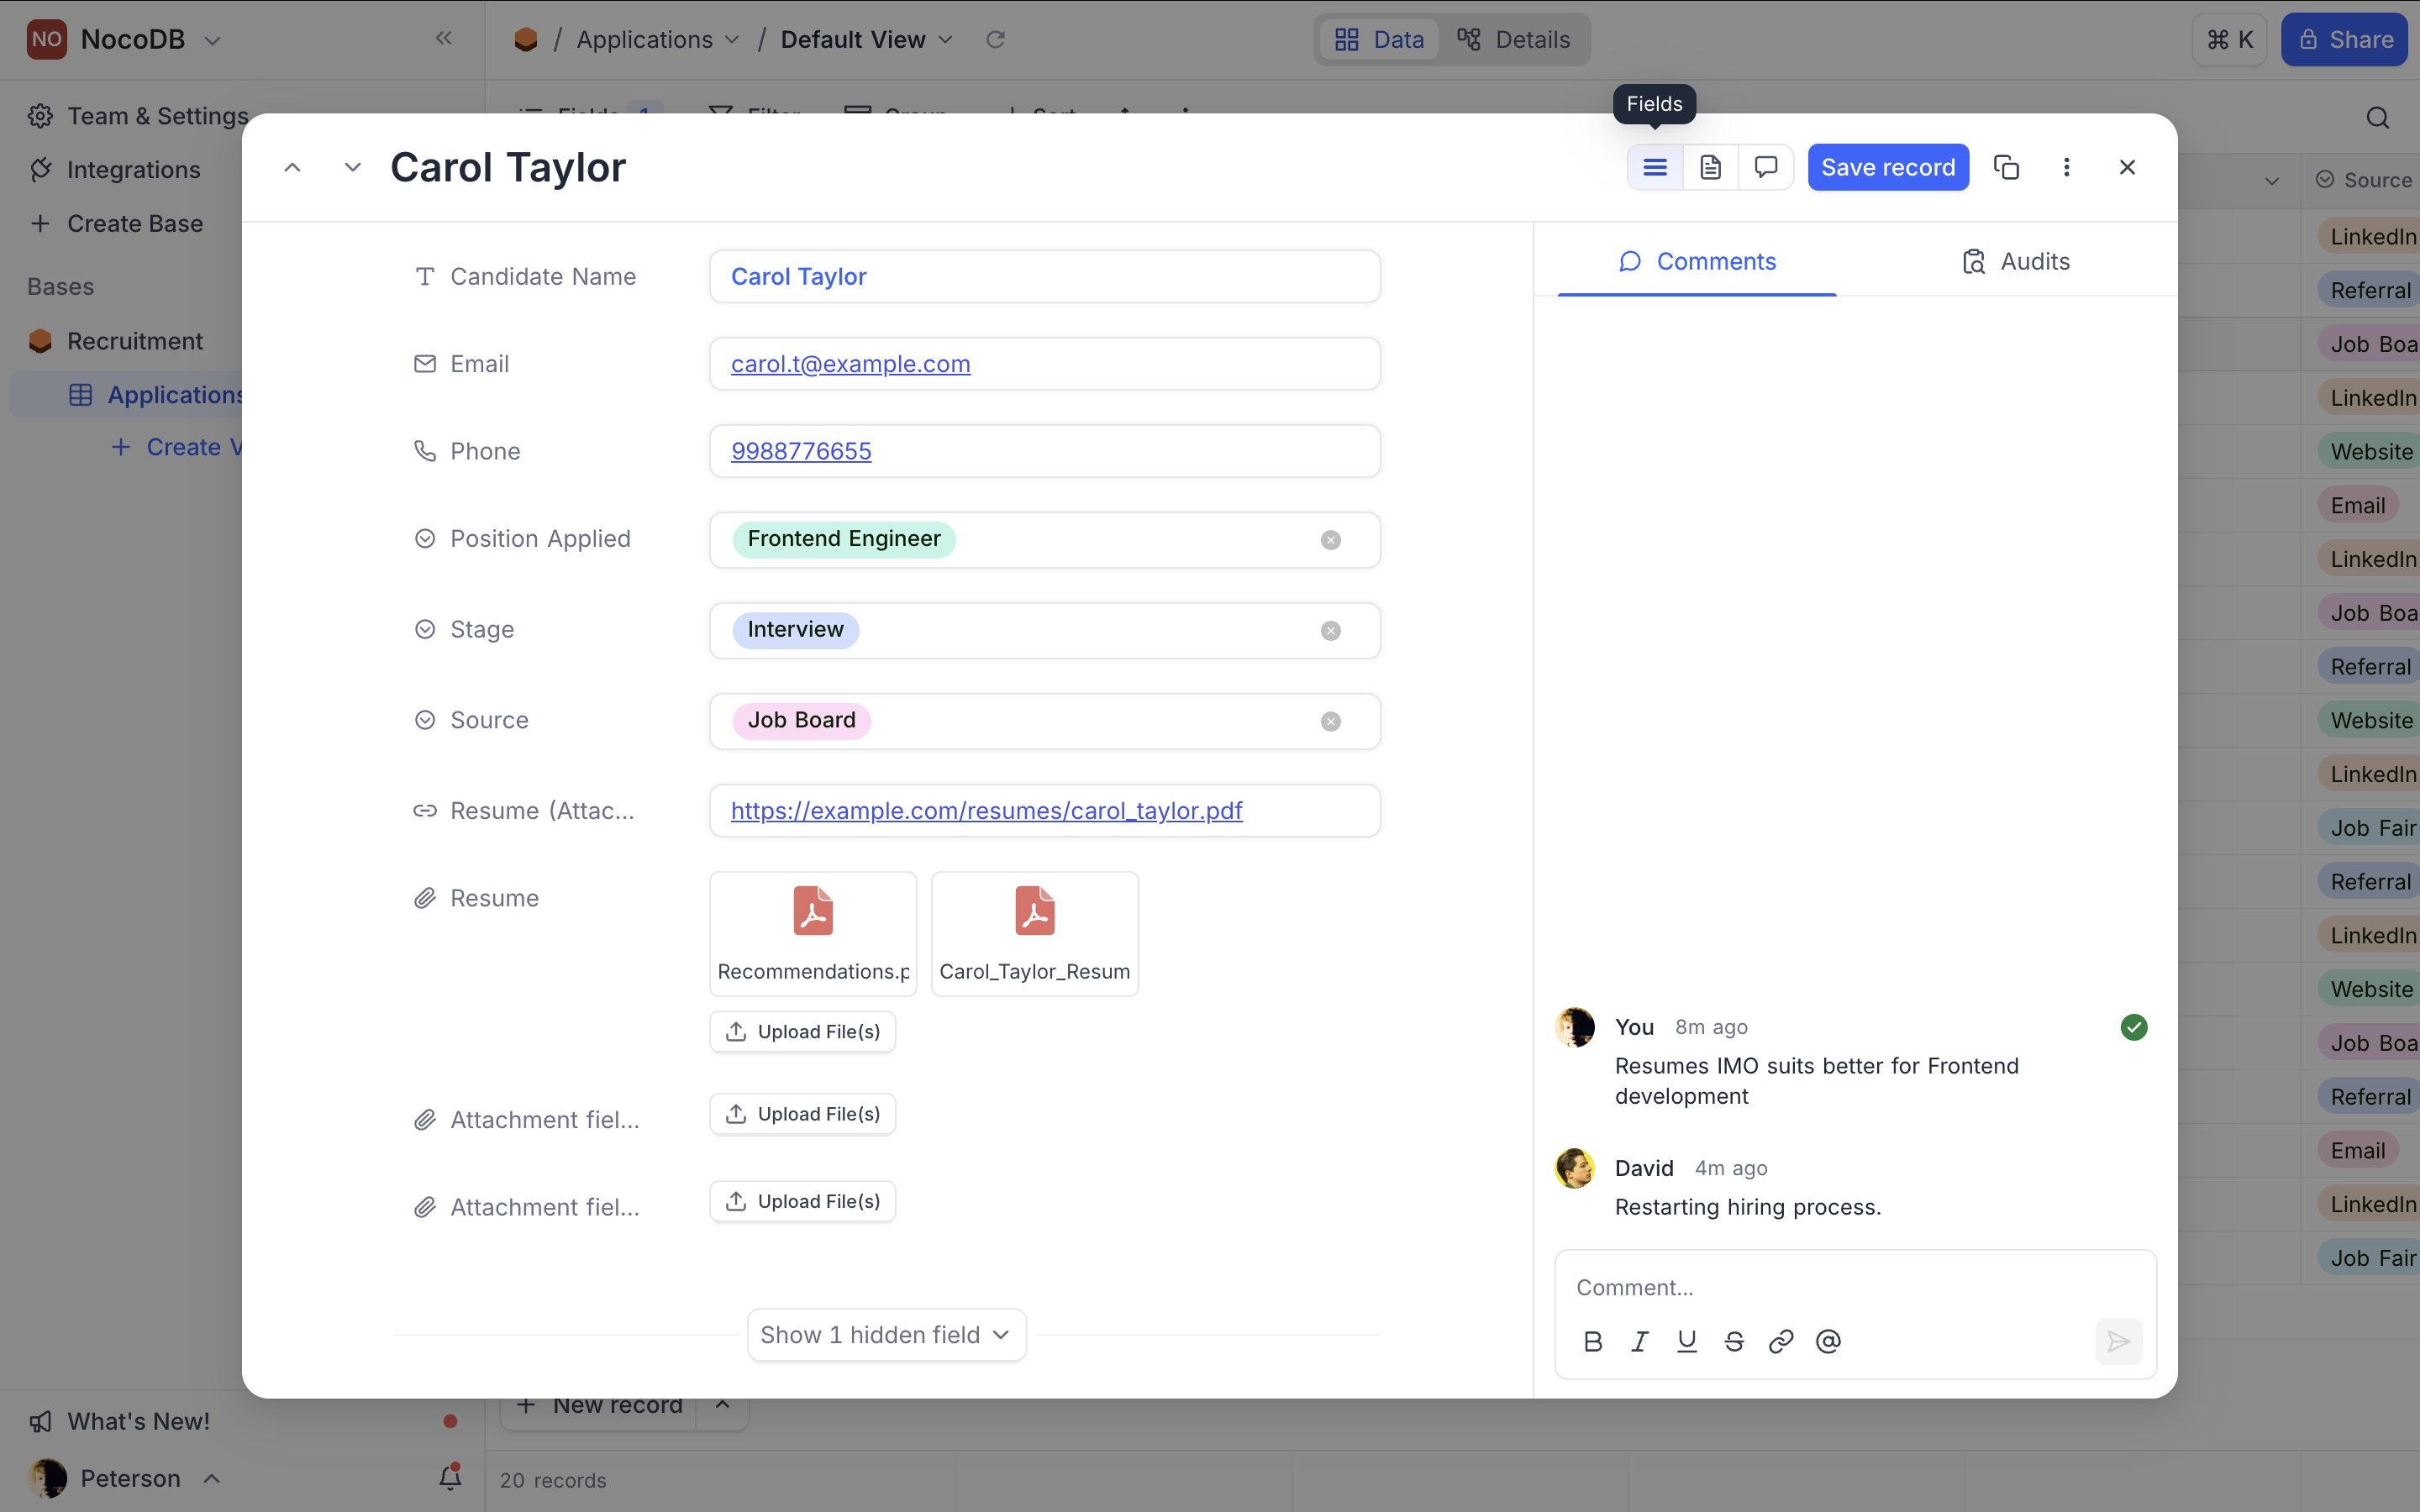
File Preview Mode ☁
File Preview Mode is only available in cloud hosted / self-hosted enterprise plans
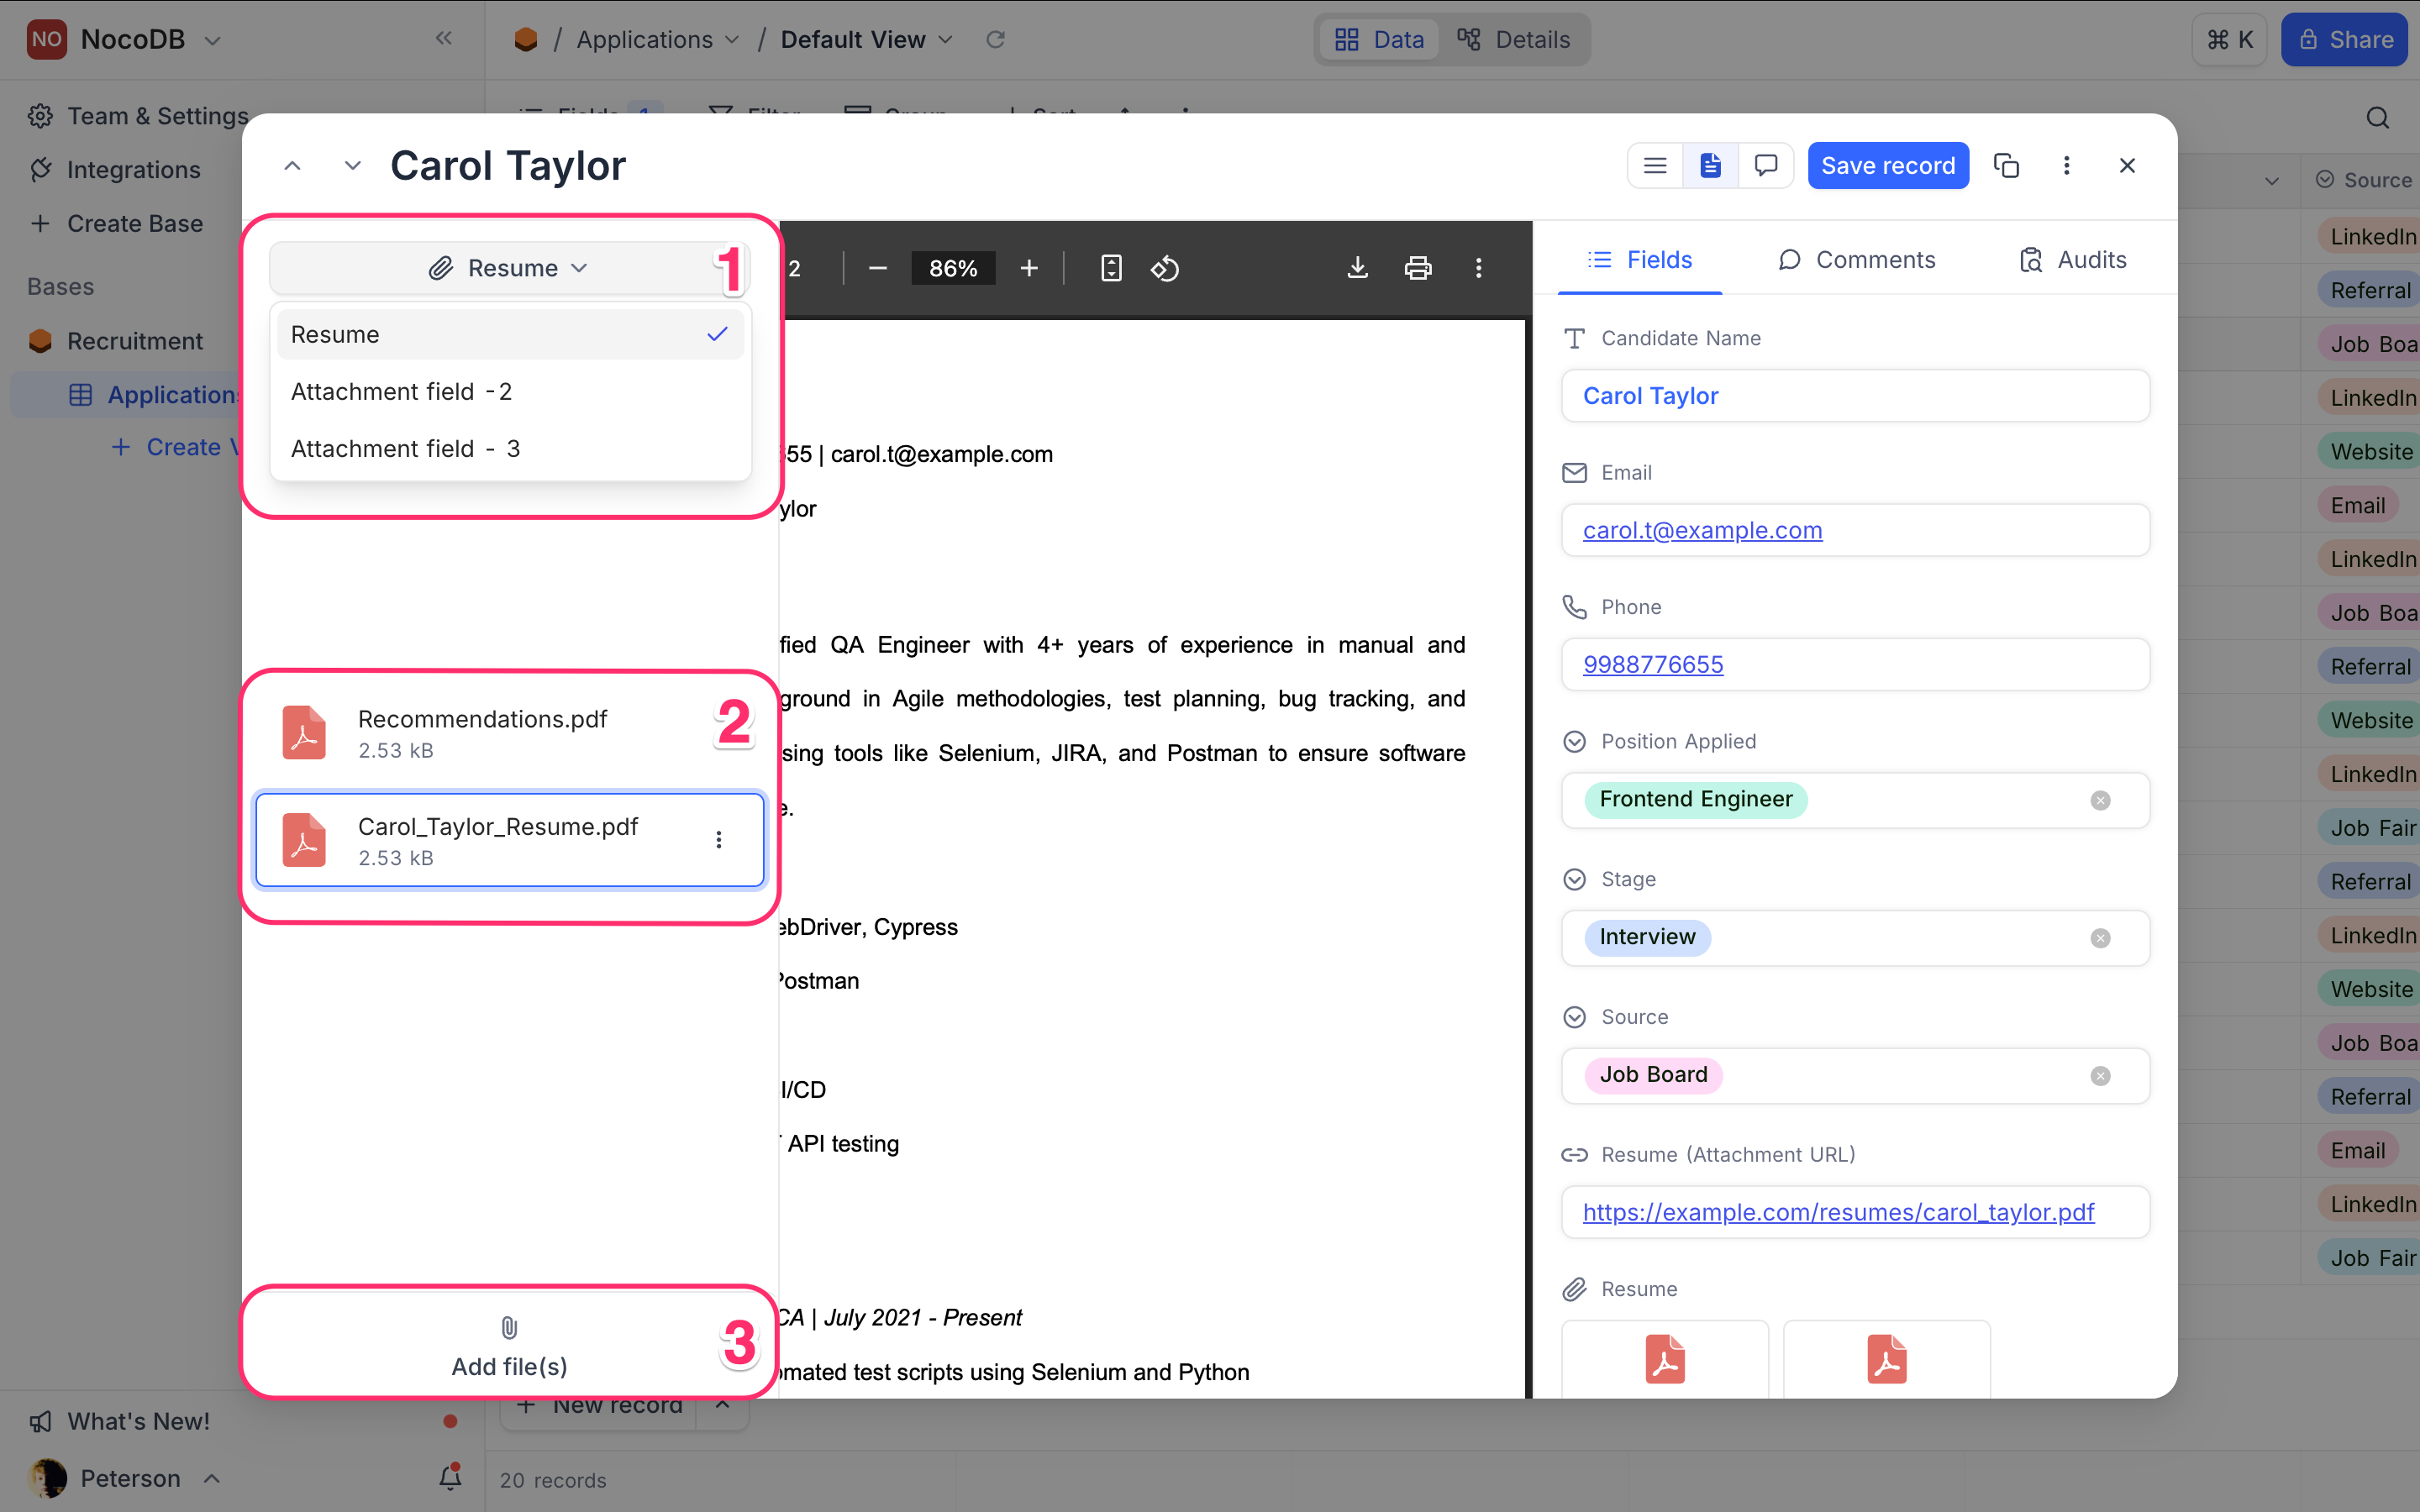
File Preview Mode prioritizes visual file content by displaying attachments front and center. It’s perfect for image-heavy or document-centric records.

-
Configure attachment field : File preview mode by default uses first attachment field in the table to display the file. If there are multiple attachment fields, you can choose which one to display by selecting the desired field from the dropdown in the top left corner of the record viewer panel.
-
Navigate through files : File preview mode picks up the first file attachment in the record and displays it prominently. If there are multiple attachments, you can hover over left side panel to see a list of all files. Clicking on any file will open it.
-
Add more files : You can also add new files directly from this view. Just click on the
+ Add fileicon in the bottom left corner of the file preview panel to upload a new file.
Supported files
File Preview Mode supports a wide range of media types:
🖼️ Image Files
.jpeg, .jpg, .png, .gif, .svg, .bmp, .ico, .webp, .avif, .heif, .heifs, .heic, .heic-sequence
🔊 Audio Files
.mp3, .flac, .wav, .m4a
🎞️ Video Files
.webm, .mpg, .mp2, .mpeg, .ogg, .mp4, .m4v, .avi, .wmv, .mov, .qt, .flv, .mkv, .3gp, .3g2, .vob, .ts, .mp4a
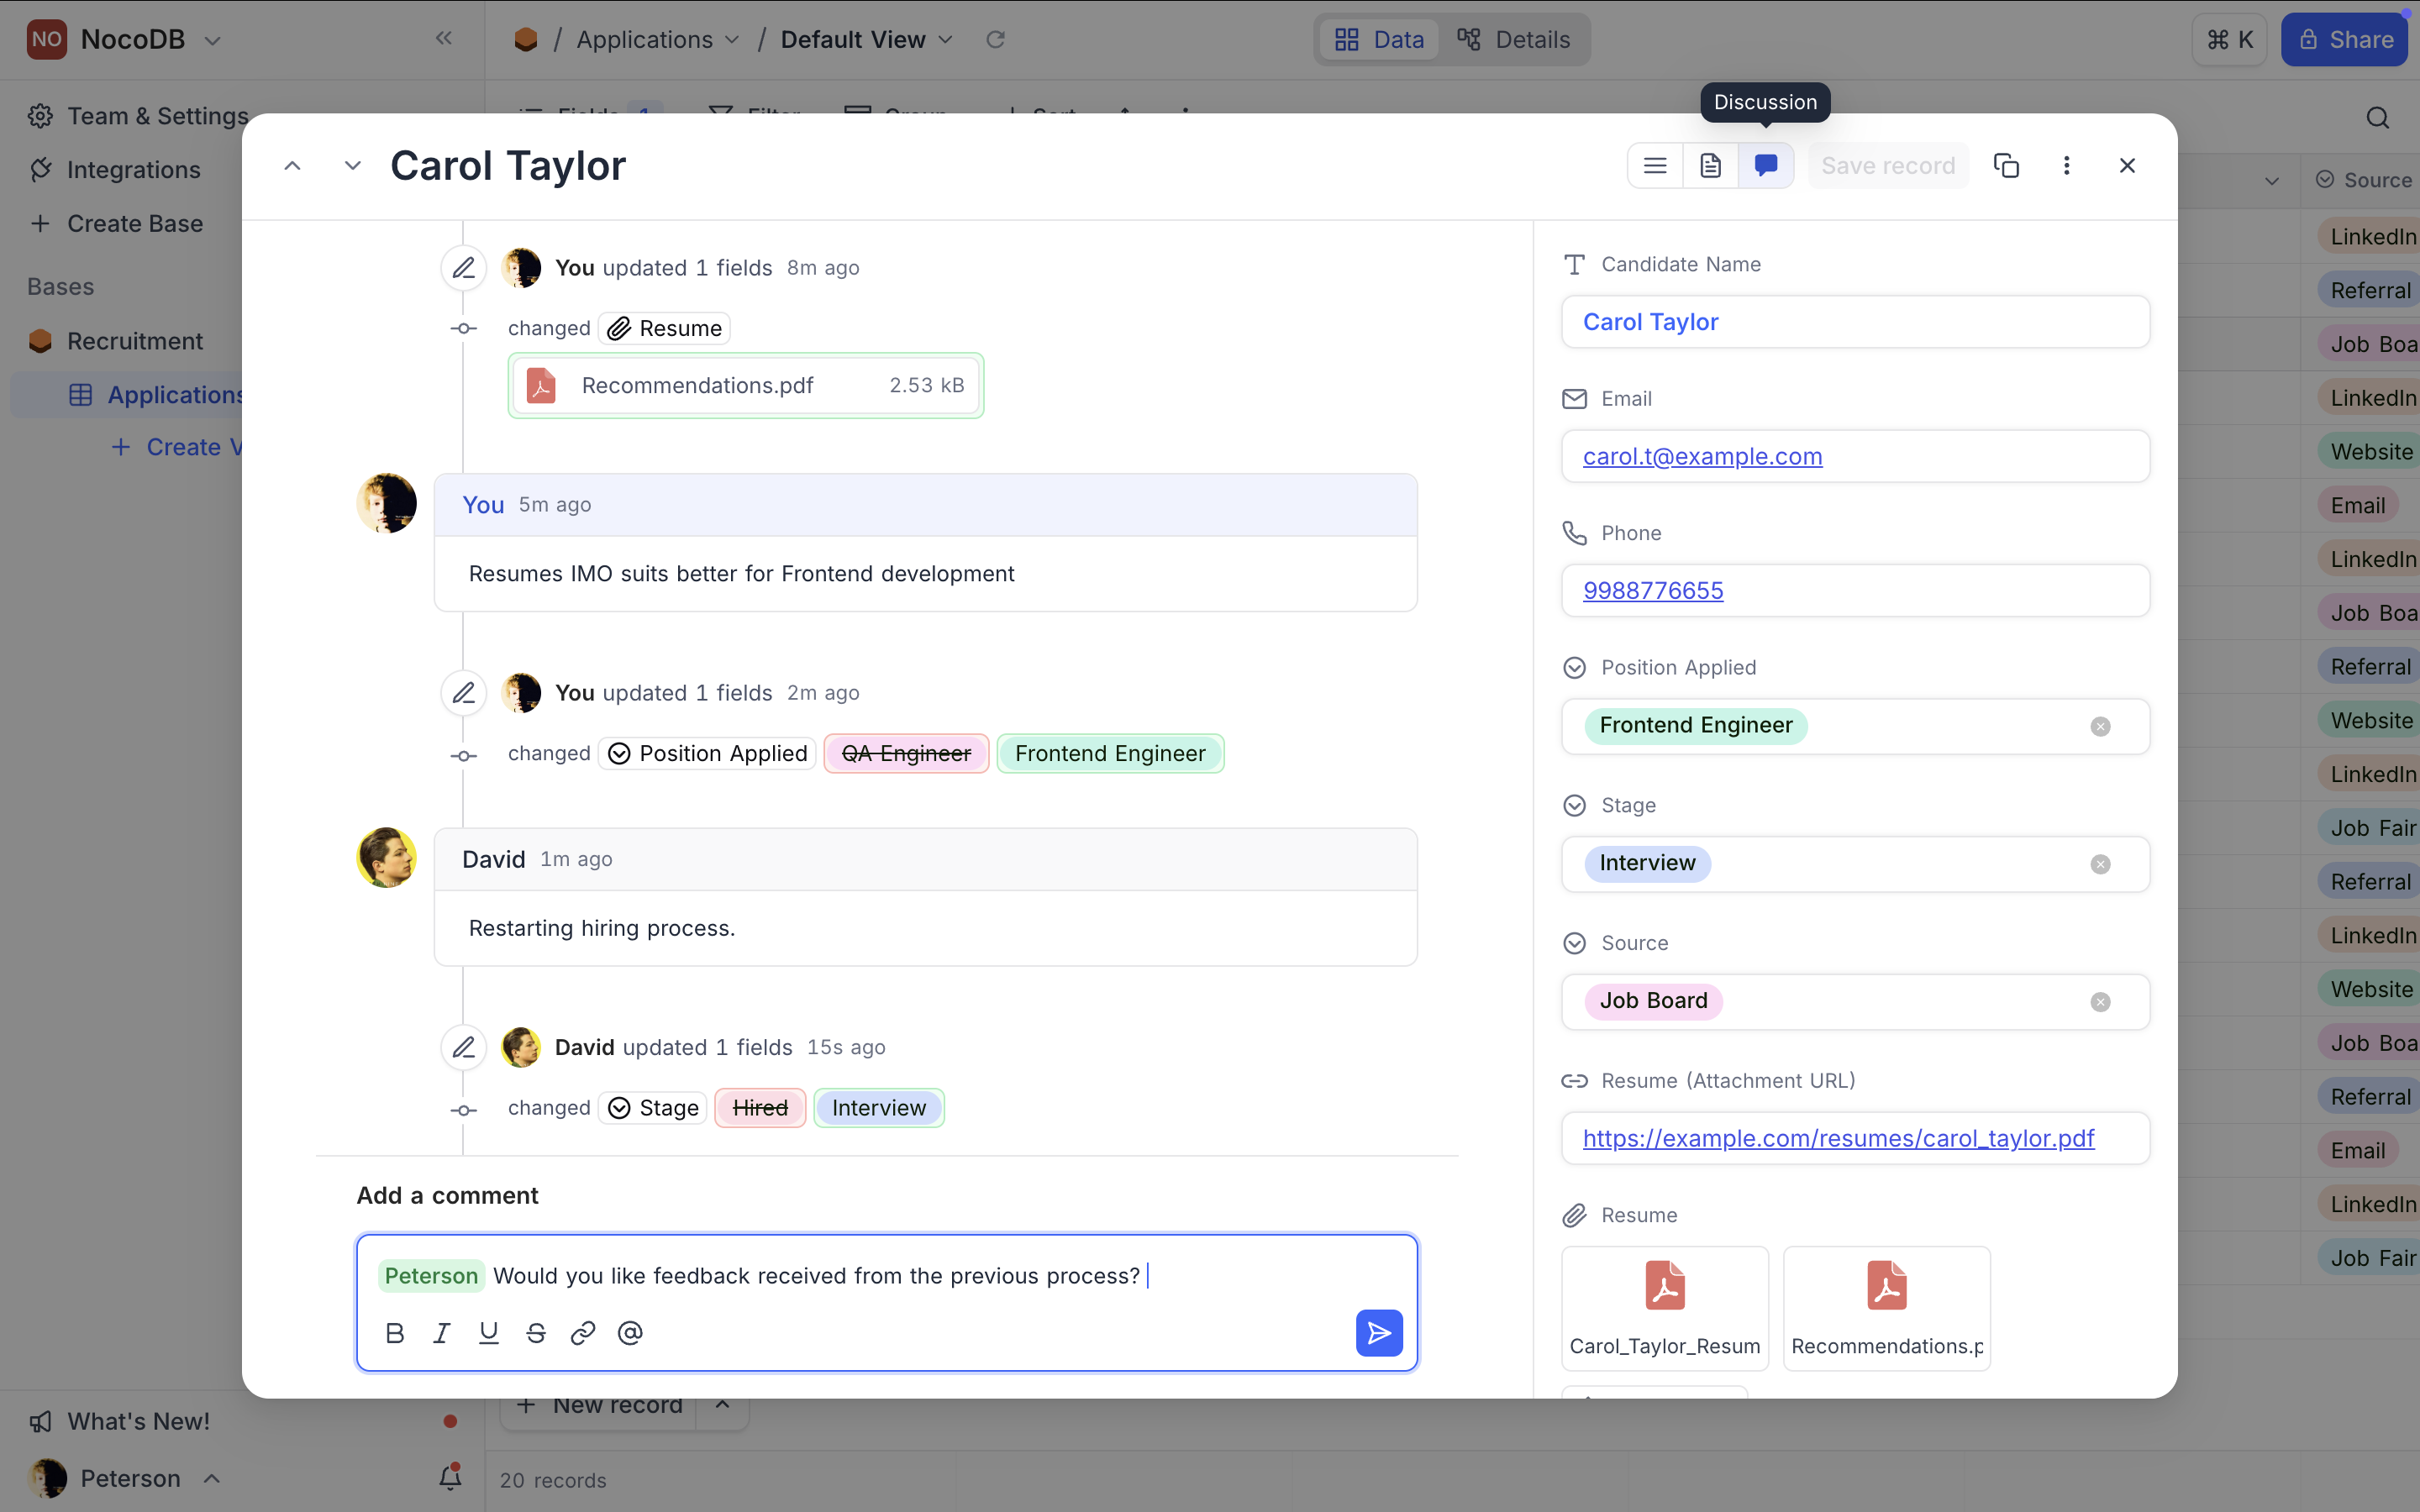
Discussion mode ☁
Discussion Mode is only available in cloud hosted / self-hosted enterprise plans
Discussion Mode brings conversations into context. It shows all comments and threads related to a specific record, fostering collaboration and communication.
Switching between modes
To switch between modes, select a record and look for the mode switcher in the top-right corner of the record viewer panel. Click the icons to toggle between views.