Share base
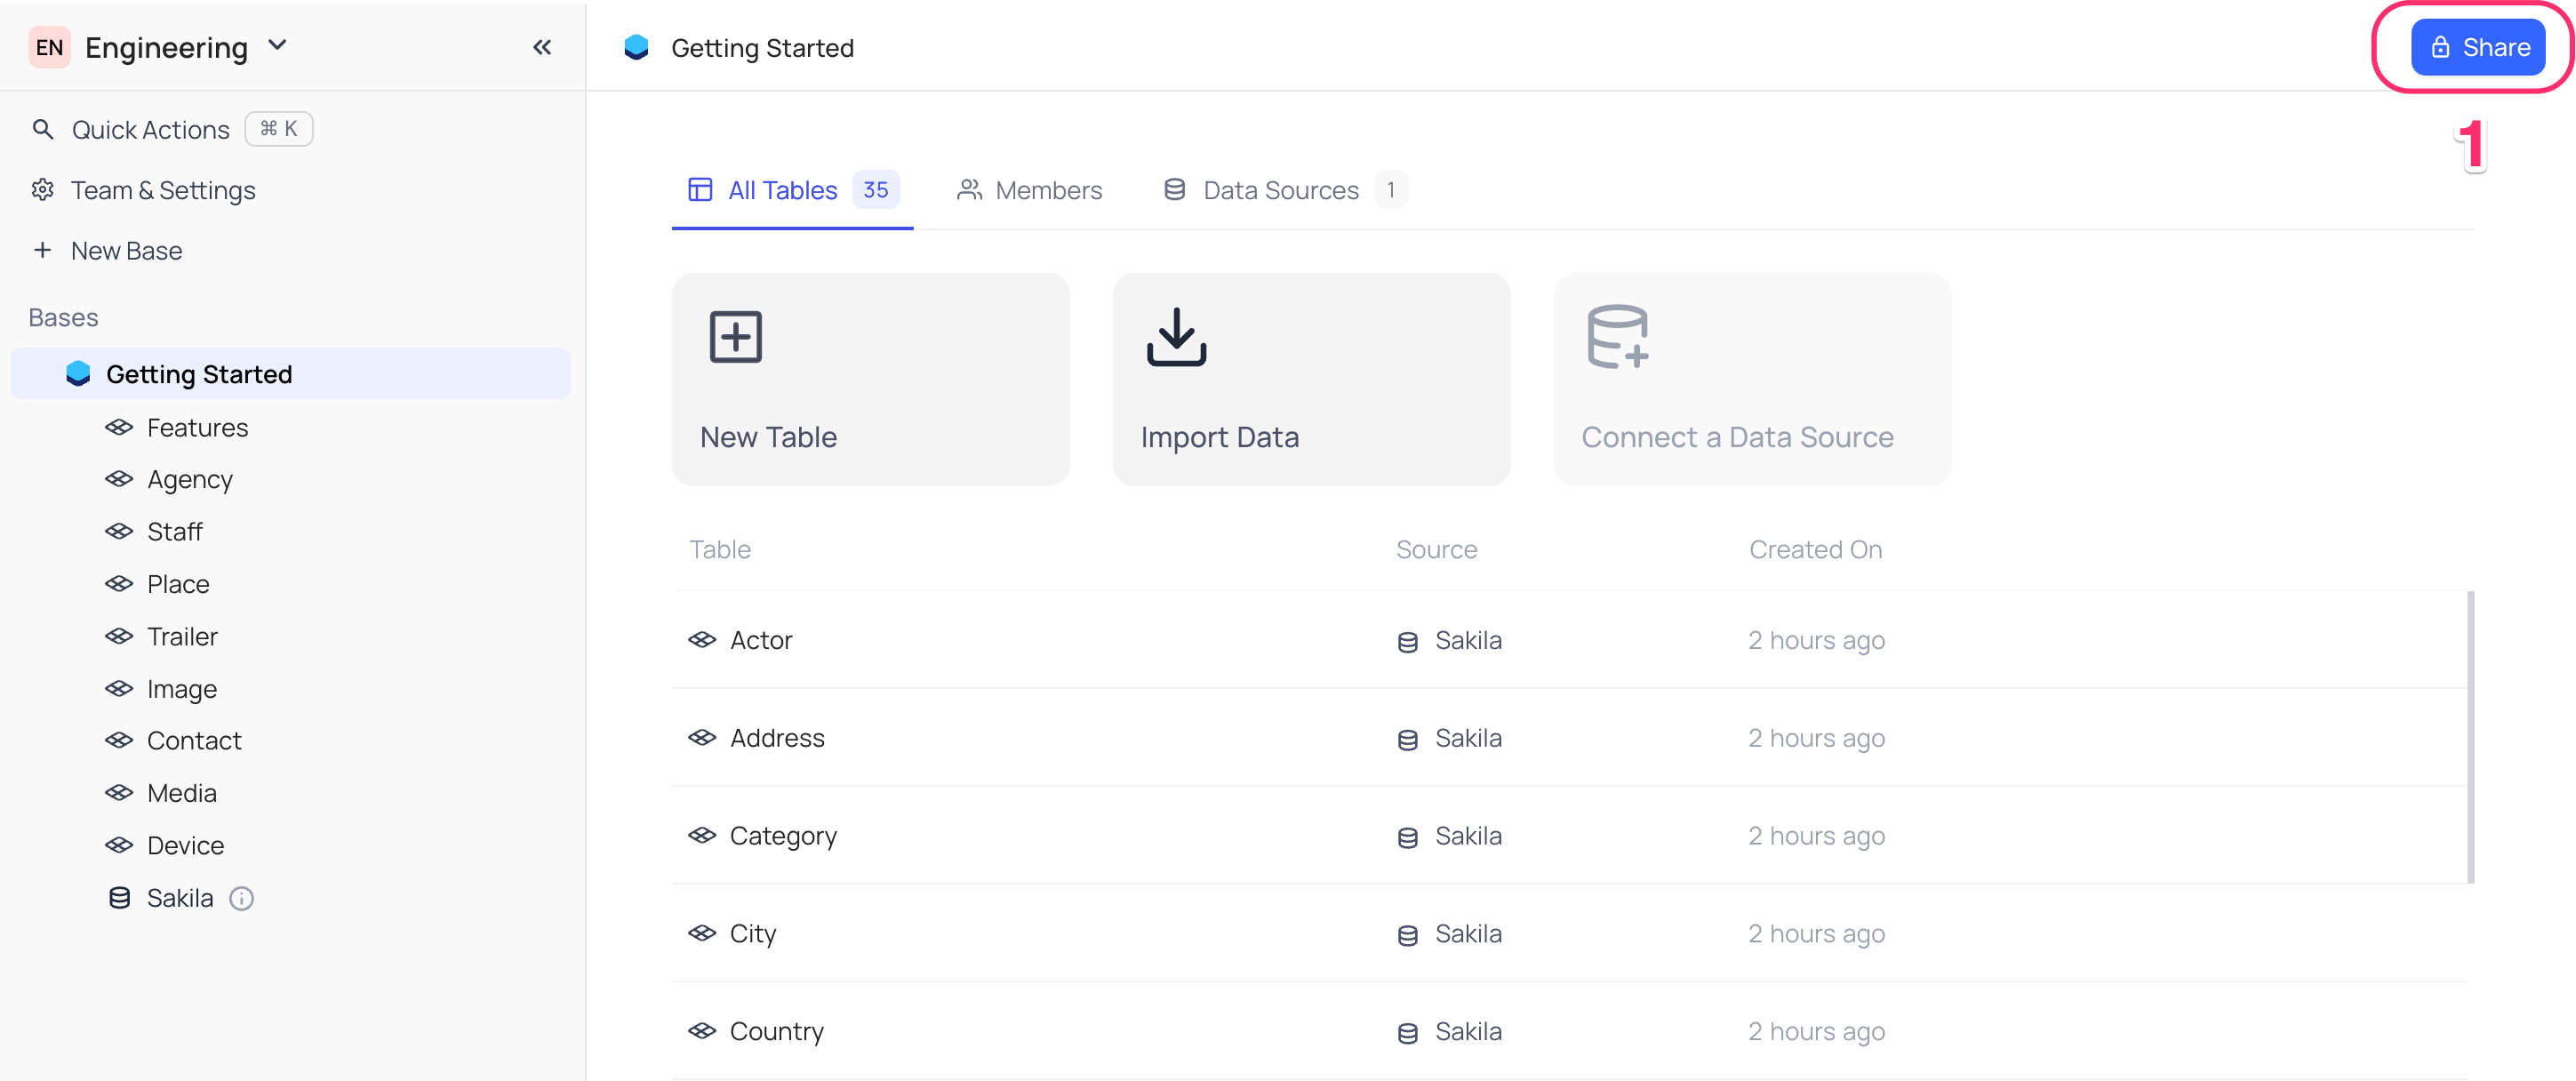
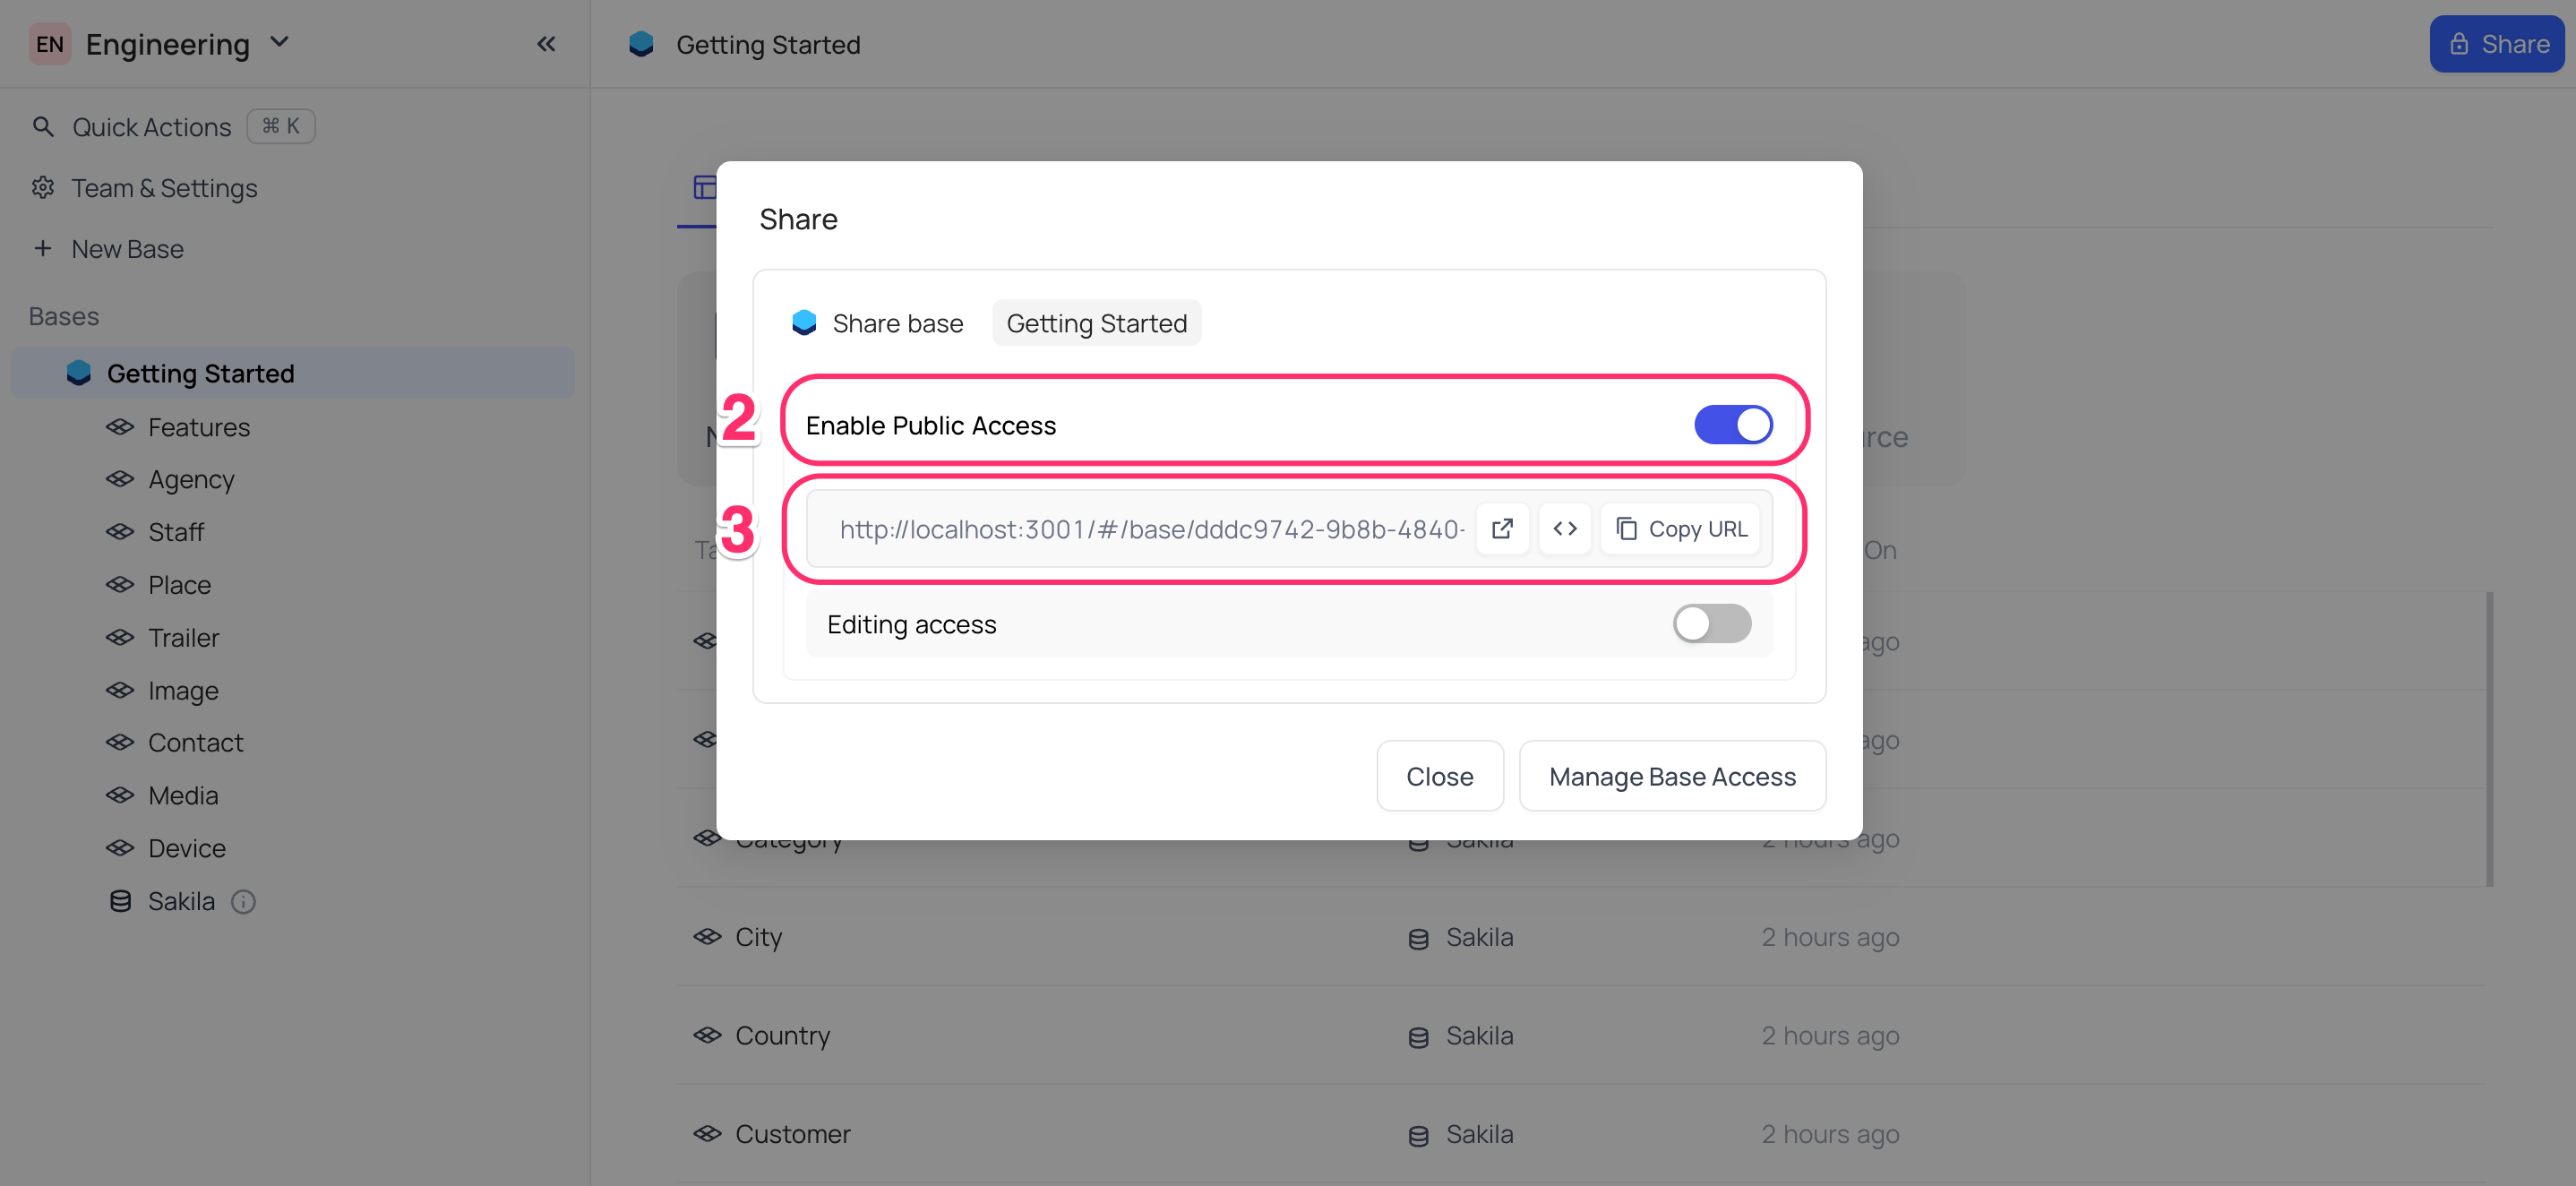
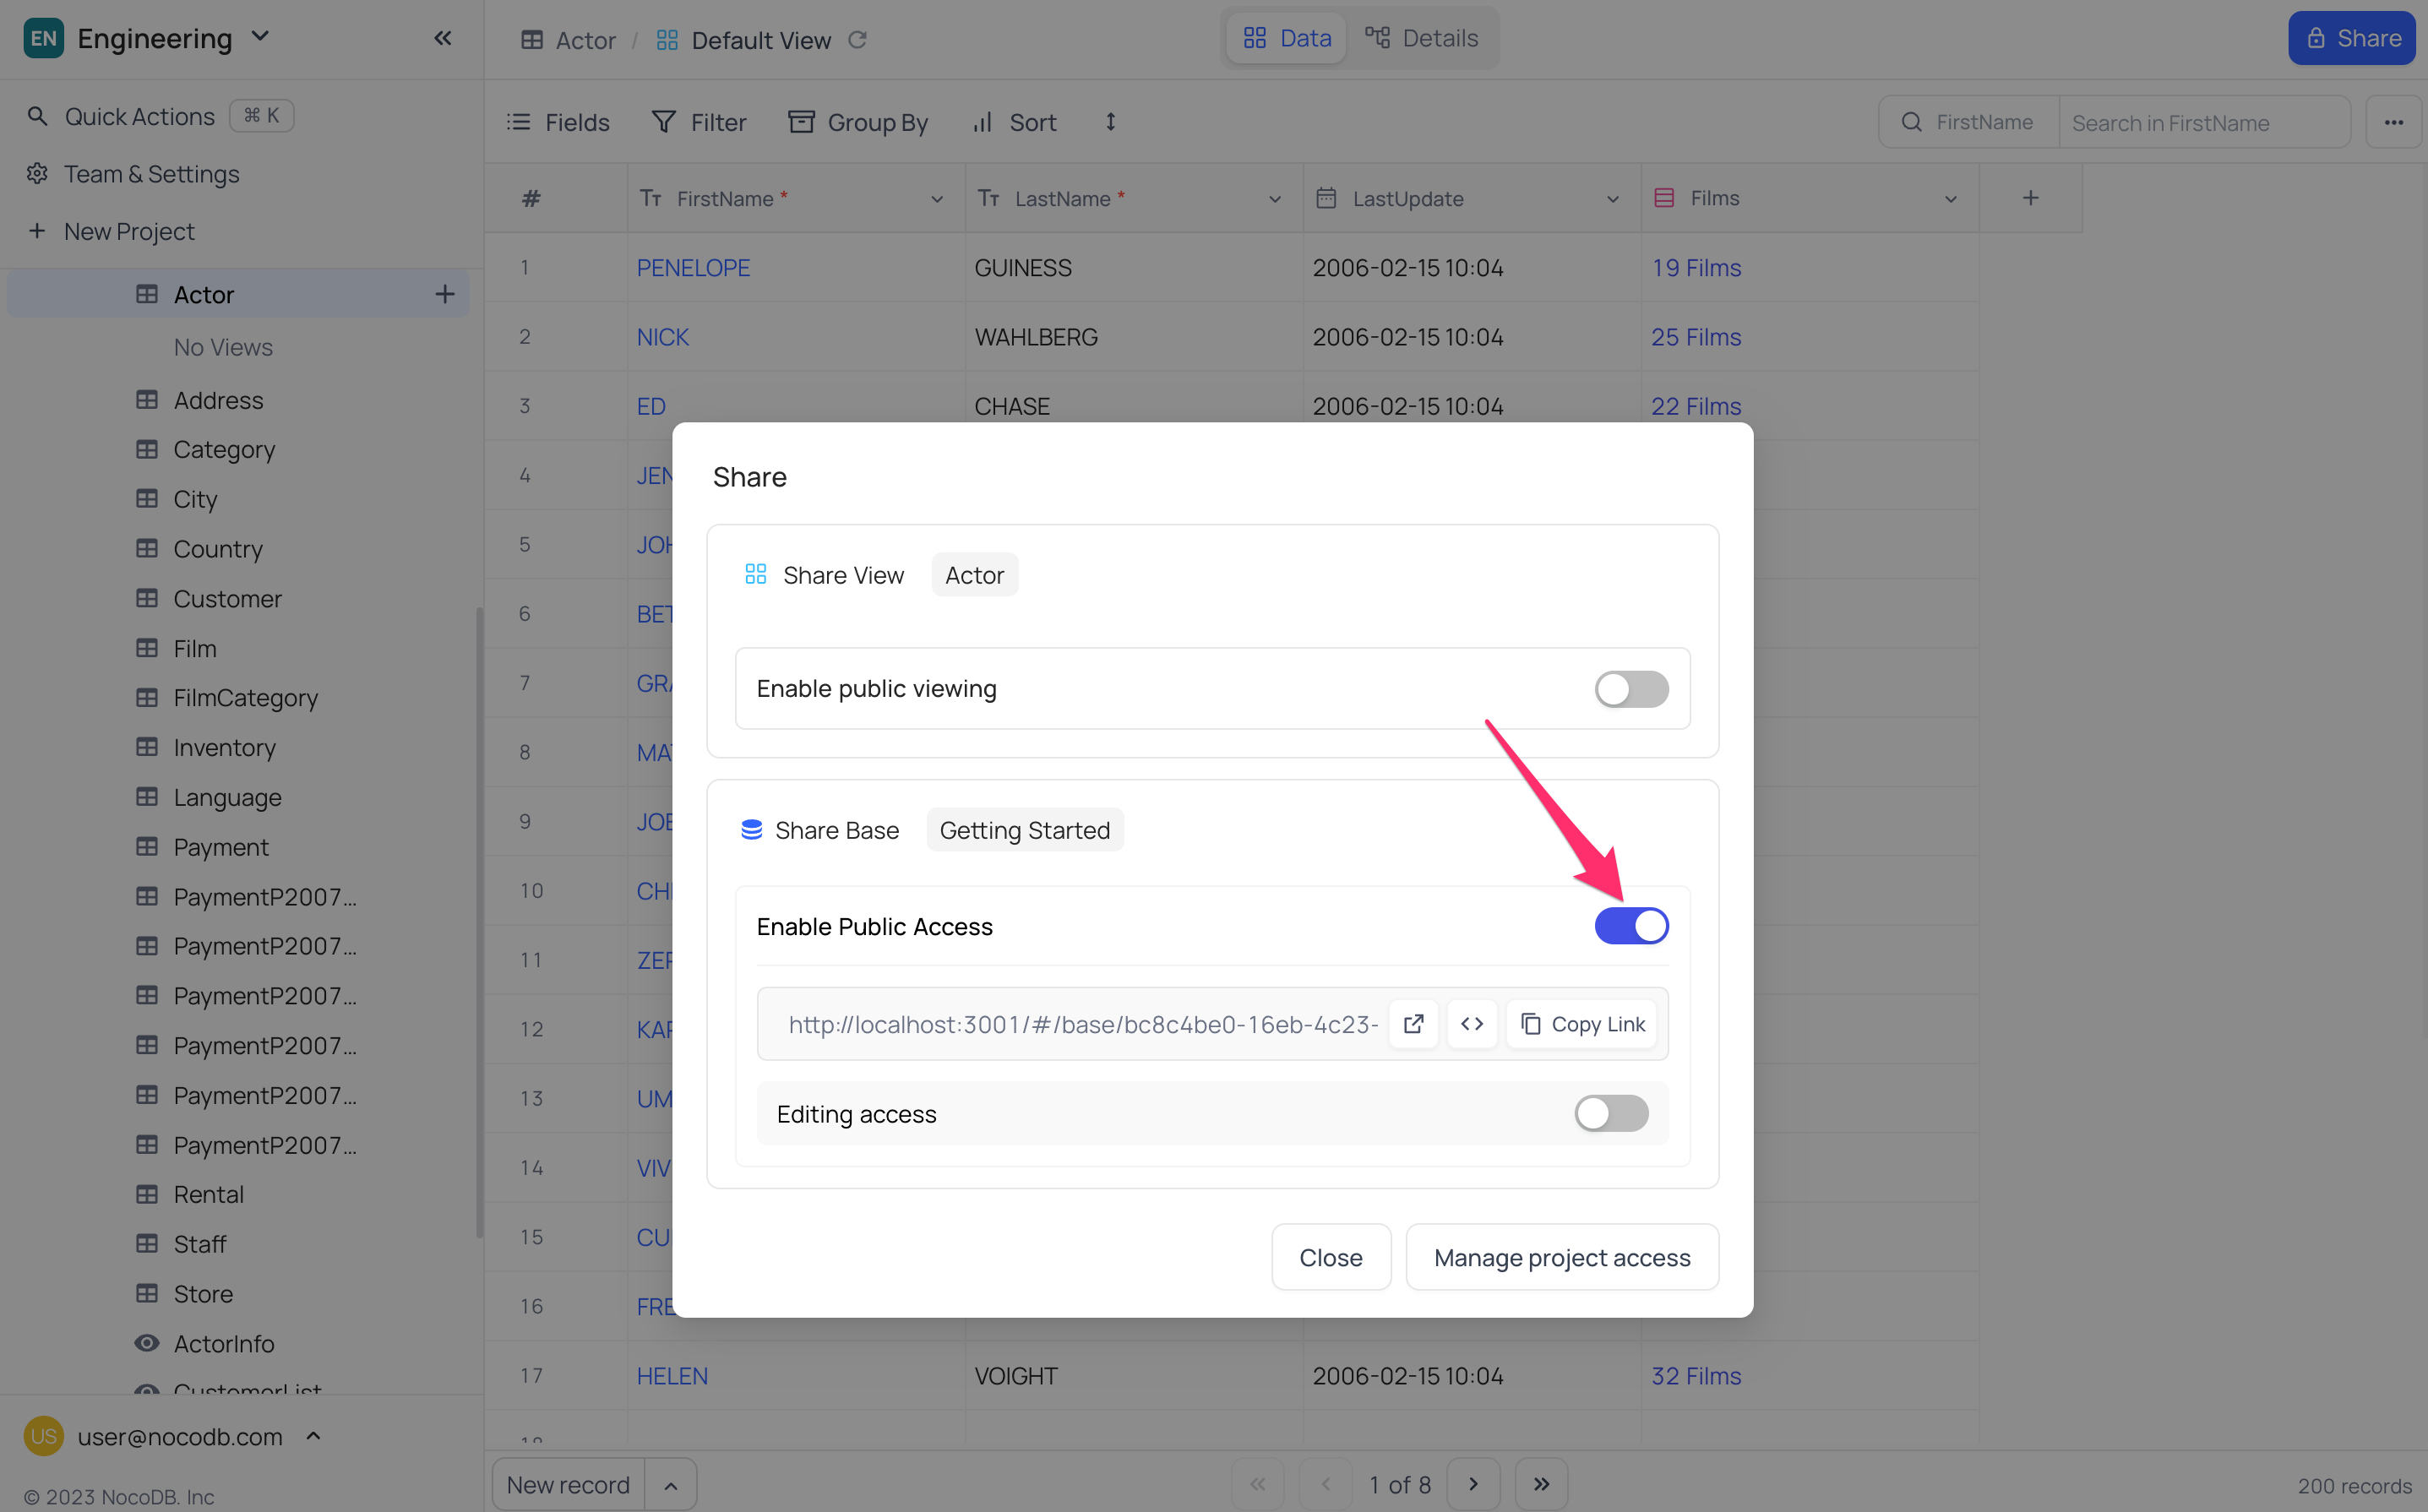
To share a base, follow the steps below:
- Navigate to the top right corner of the top navigation bar and click on the
Sharebutton. - In the
Shared basesection, toggle the switch toEnable public accessin order to activate the shared base feature. - The generated link for the shared base will be displayed above and can be utilized to share this base with others. To copy the URL, simply click on the
Copy Linkoption.
Copy base
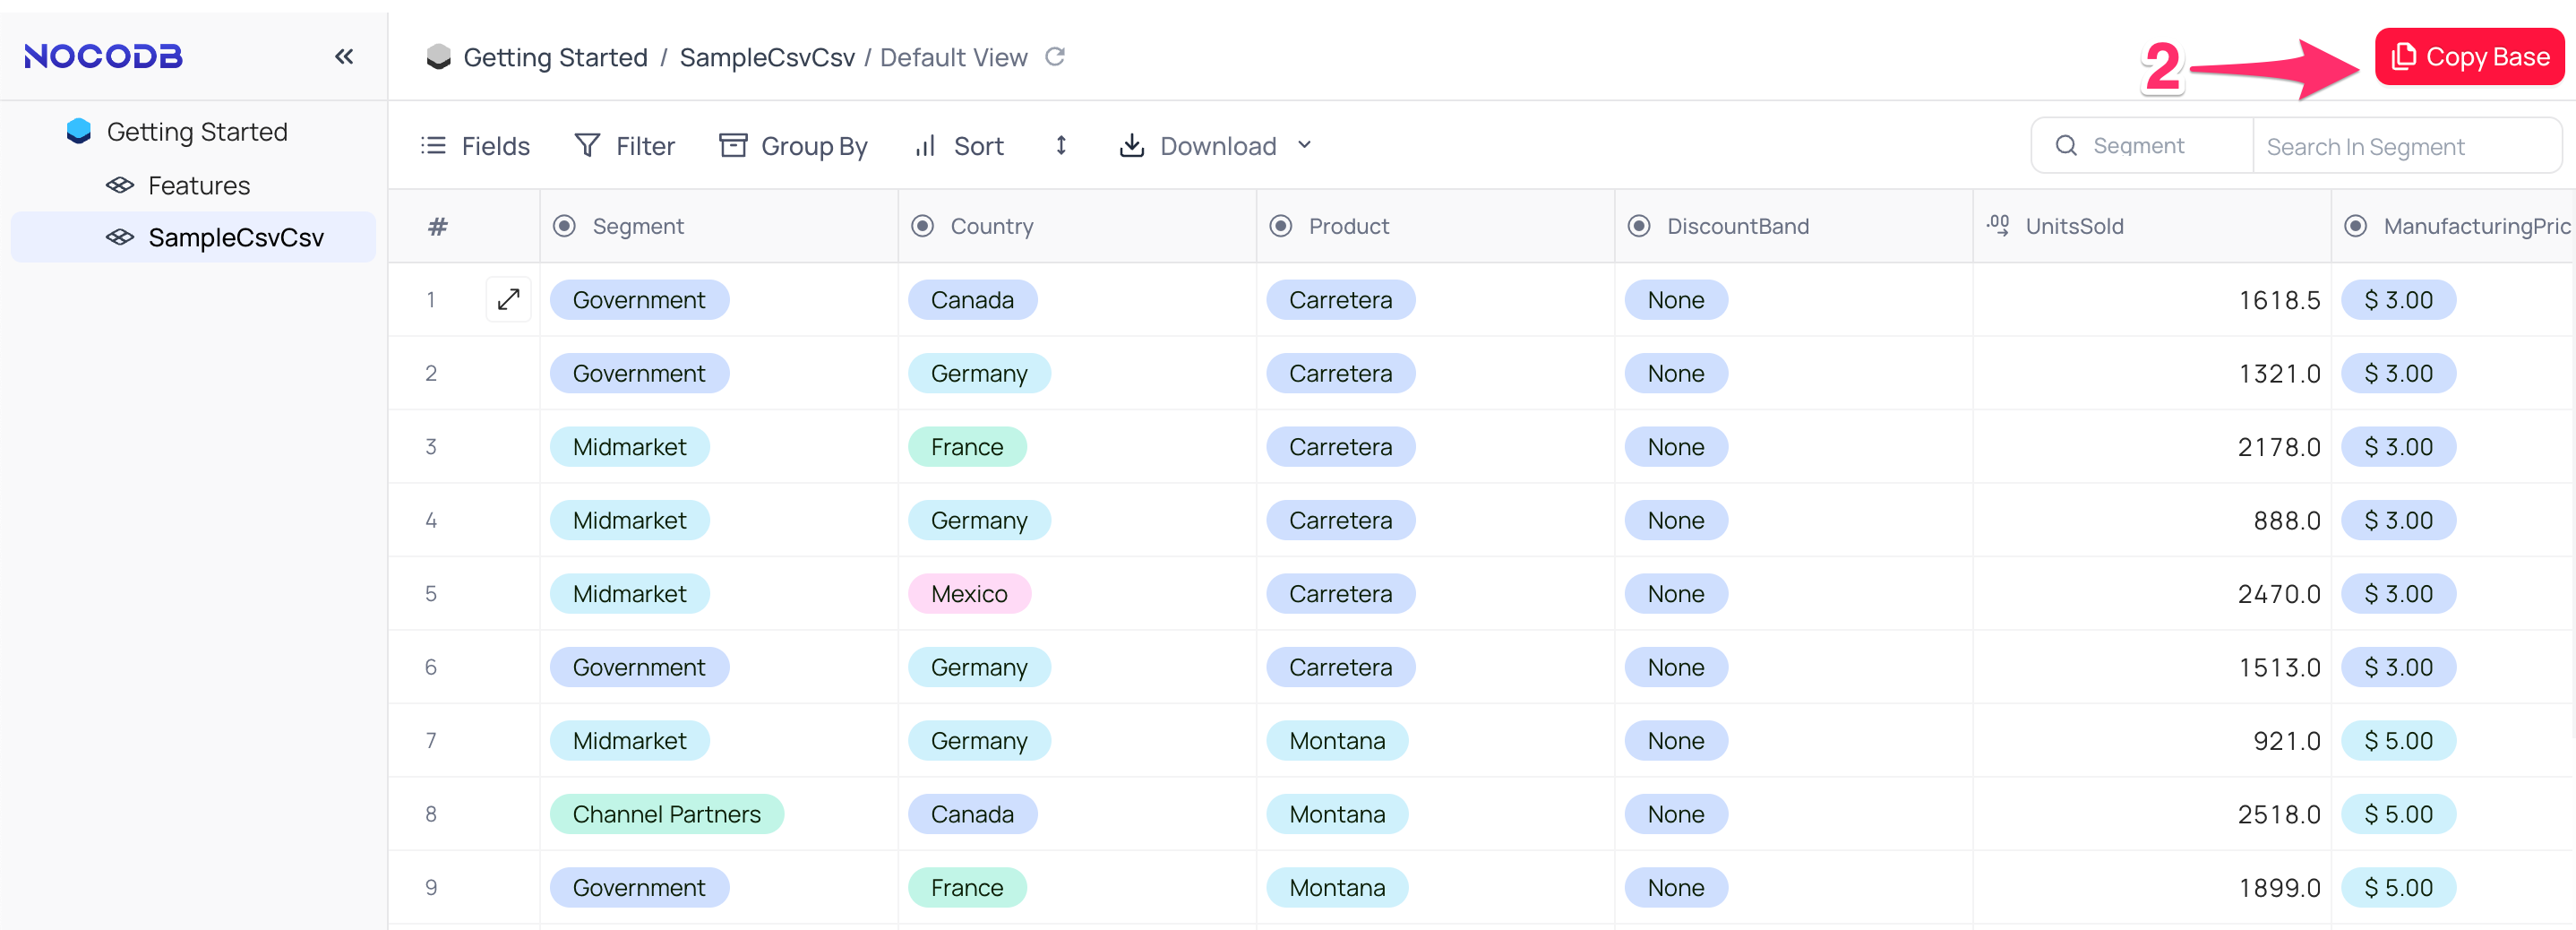
The Copy base feature allows users to create a copy of the base (import base) into their own Workspace. This feature is also useful for users who wish to utilize a base as a template for future bases. To copy a base, follow the steps below:
- Access shared base URL that you wish to copy.
- Click on the
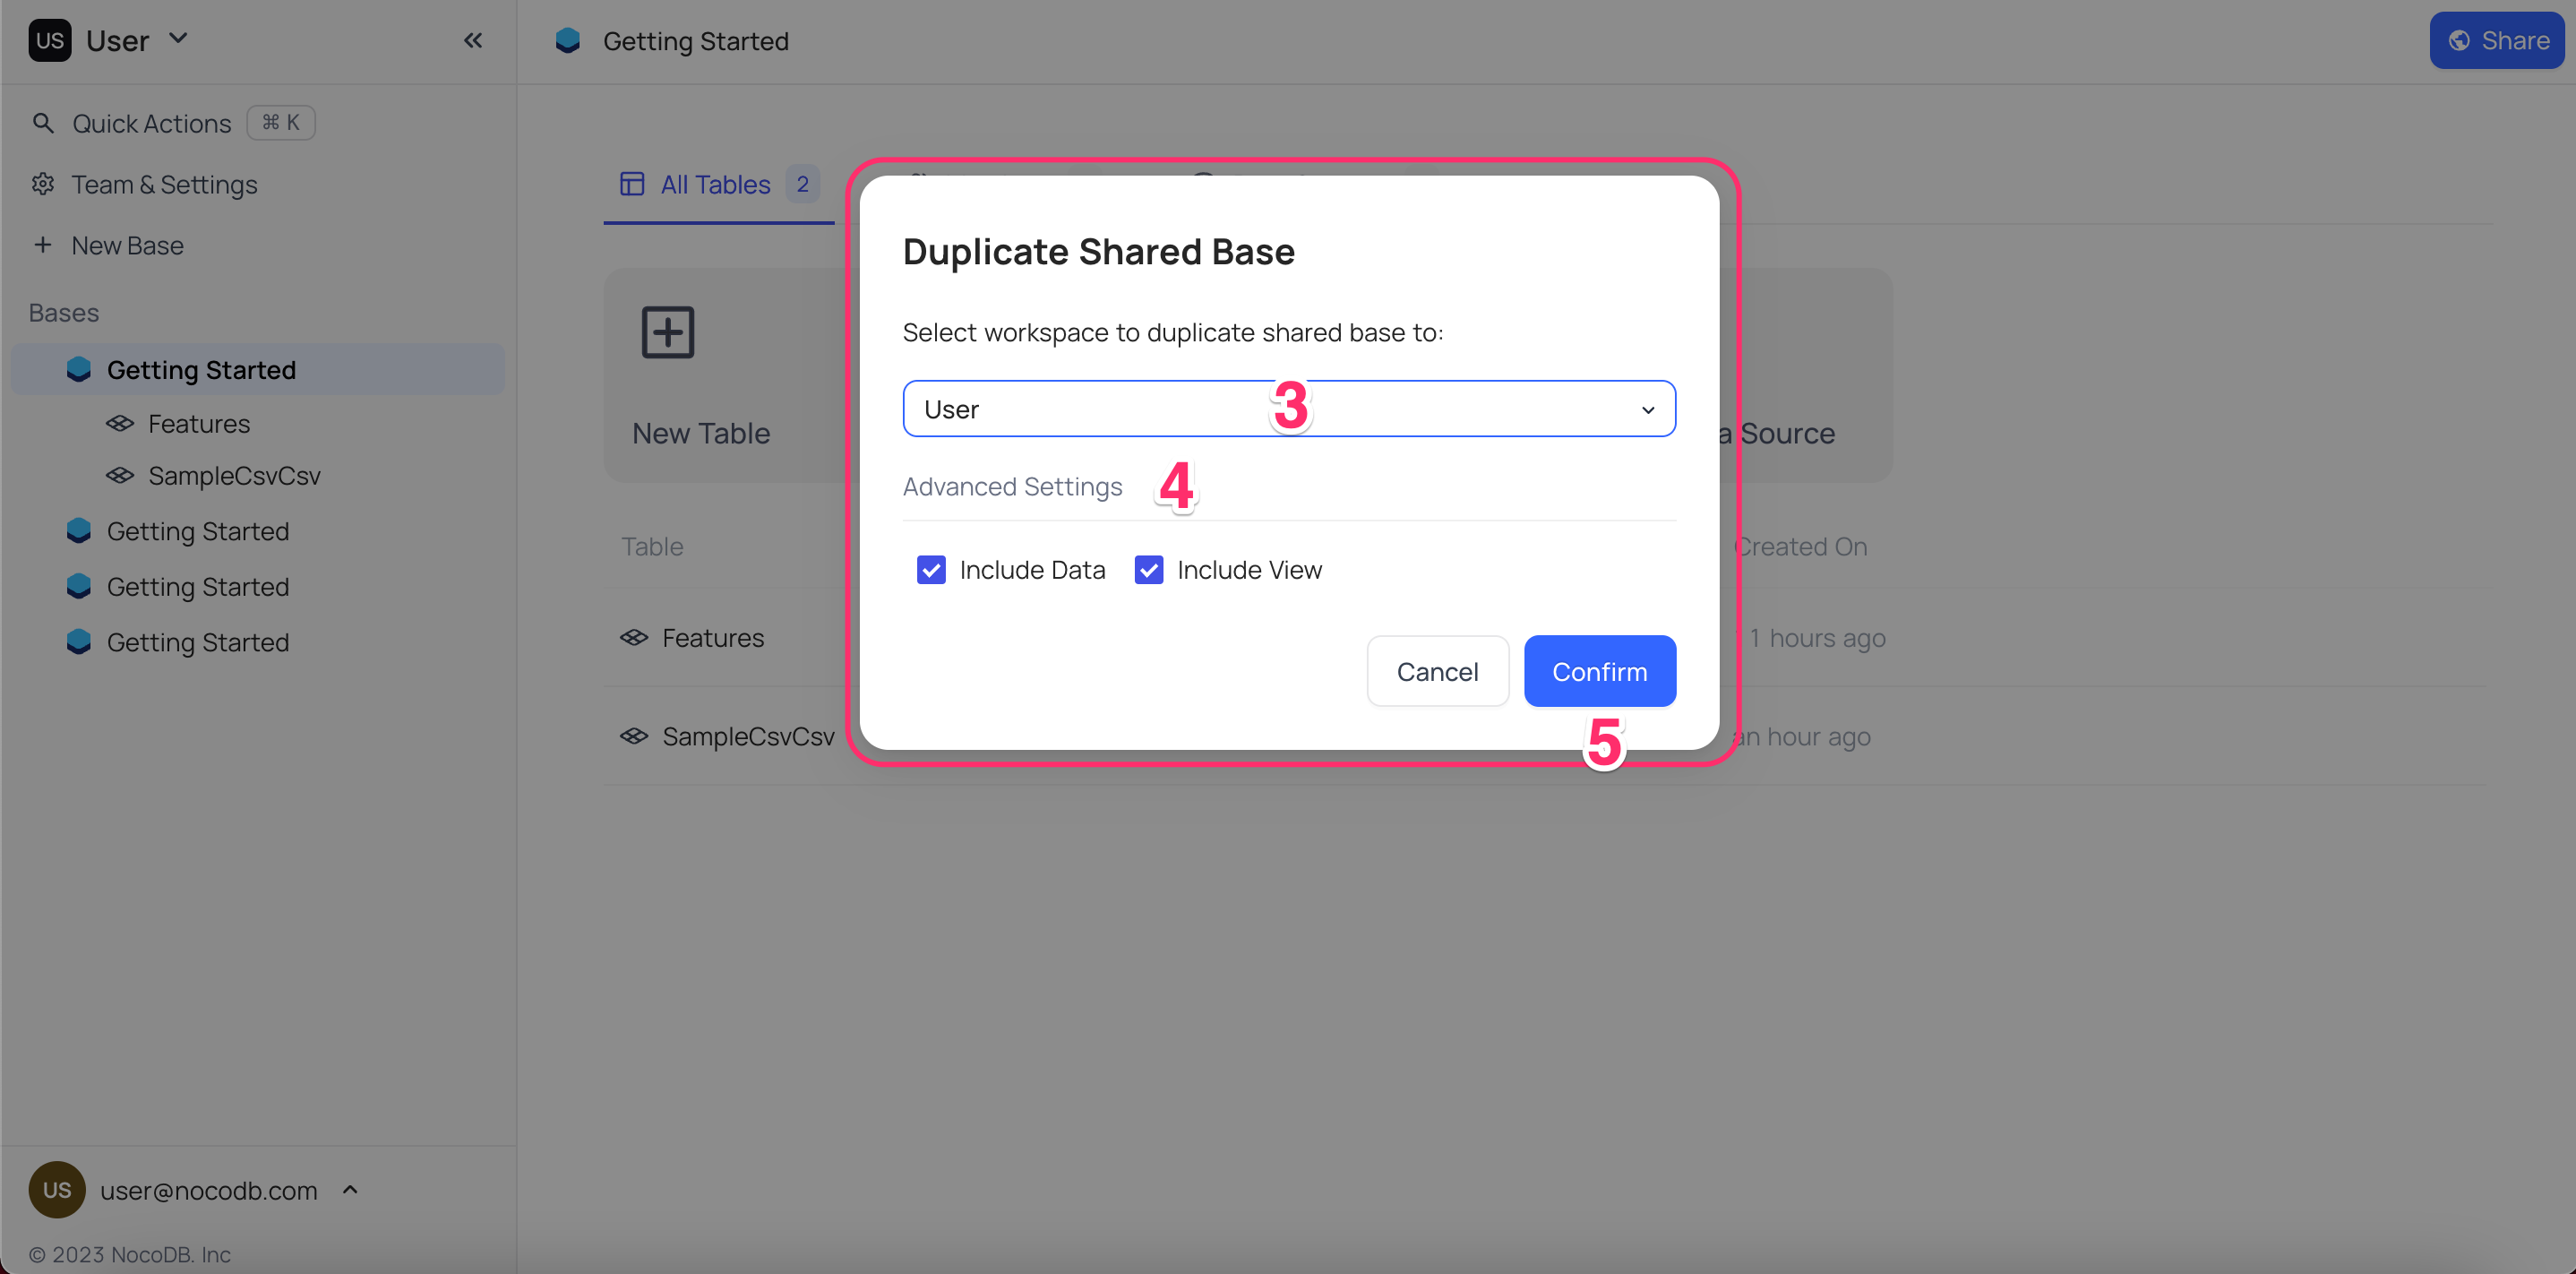
Copy basebutton located in the top right corner of the toolbar. - A modal will appear, prompting you to select the Workspace you wish to copy the base to. Select the desired Workspace
- Configure if you wish to copy the base with or without data / views.
- Click on the
Copy basebutton to complete the process.
Modify Share base
Amending the Share base setting will render the previously generated Share base link invalid and generate a new link in its place.
Here are the steps to modify it:
- Click on the
Sharebutton located in the top right corner of the toolbar. - Toggle the option labeled
Enable public accessto deactivate the base share. - Toggle the same option,
Enable public access,to reactivate the base share, subsequently generating a new link.
Disable Share base
Disabling Share base will render the previously generated Share base link invalid
Here are the steps to disable it:
- Click on the 'Share' button located in the top right corner of the toolbar.
- Toggle the option labeled
Enable public accessto deactivate the base share.

Share base Access Permissions
The "Shared base" can be configured in two modes:
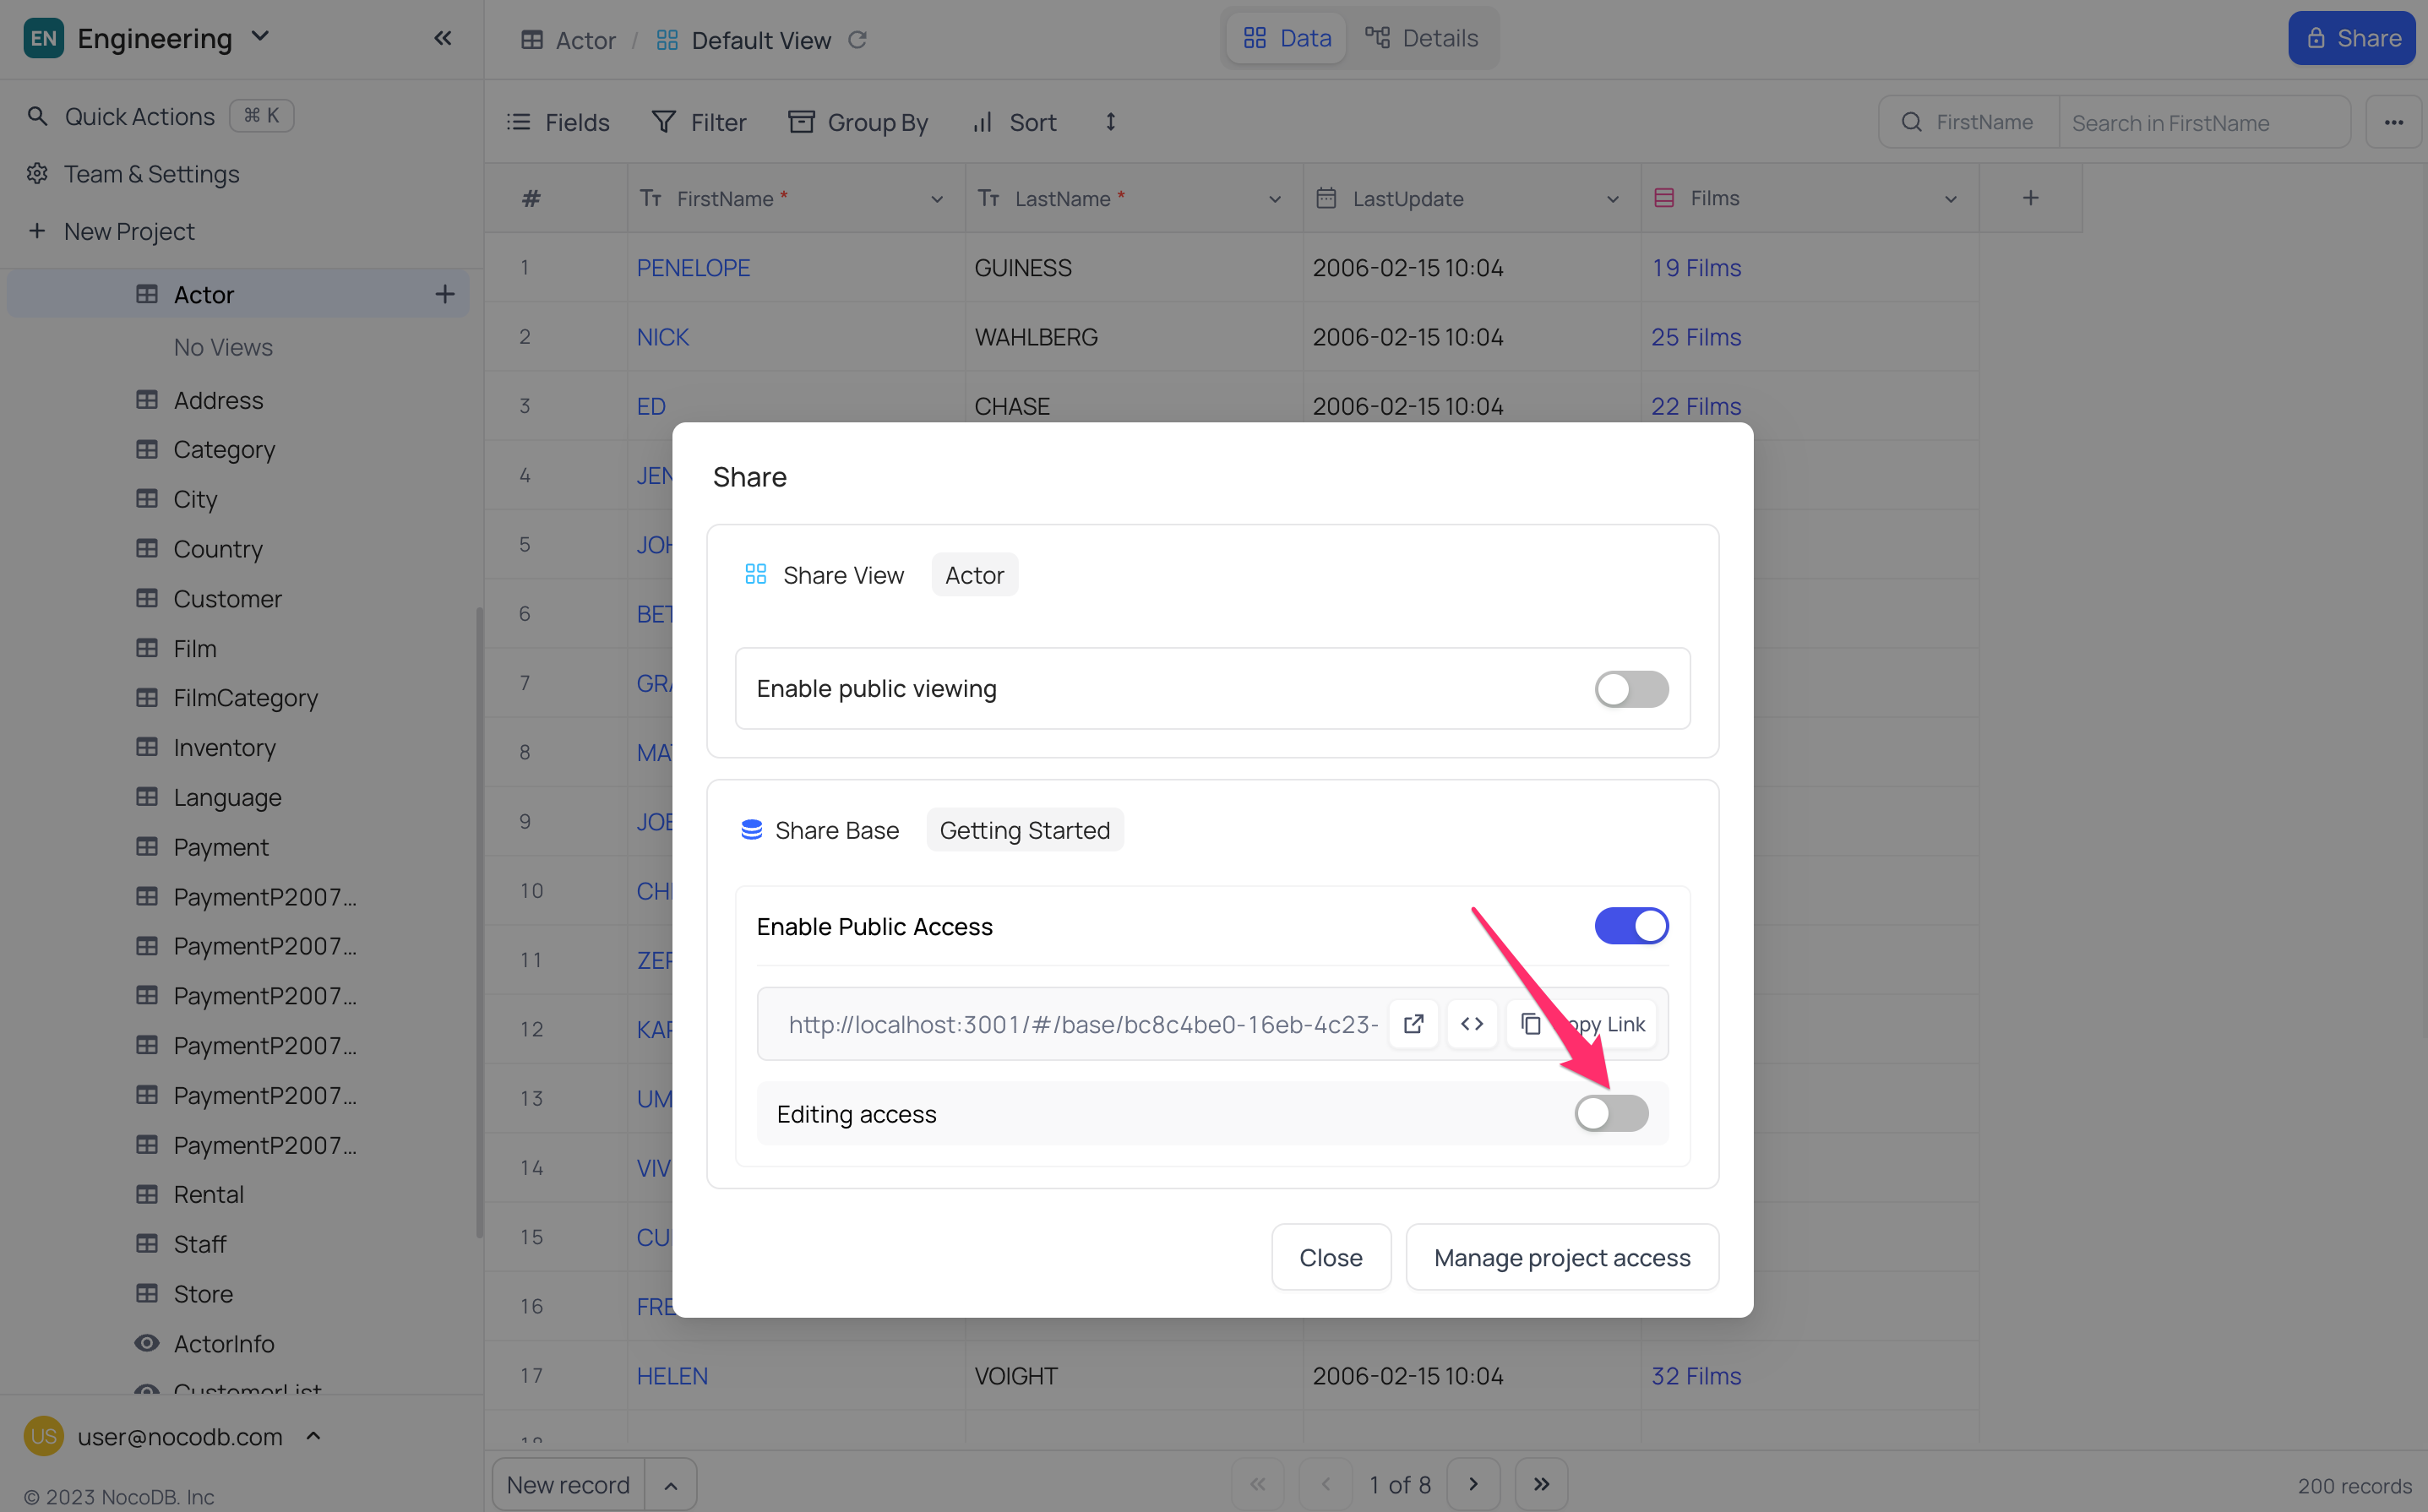
- Viewer - Users with the provided link will have read-only access to the base data.
- Editor - Users with the provided link will have read and write access to the base data.
- The default access permission is set to
Viewer - Shared base with
Editoraccess permission is only available in Self-hosted version currently
Toggle Enable Editor Access button to configure permissions as desired
Embeddable Frame
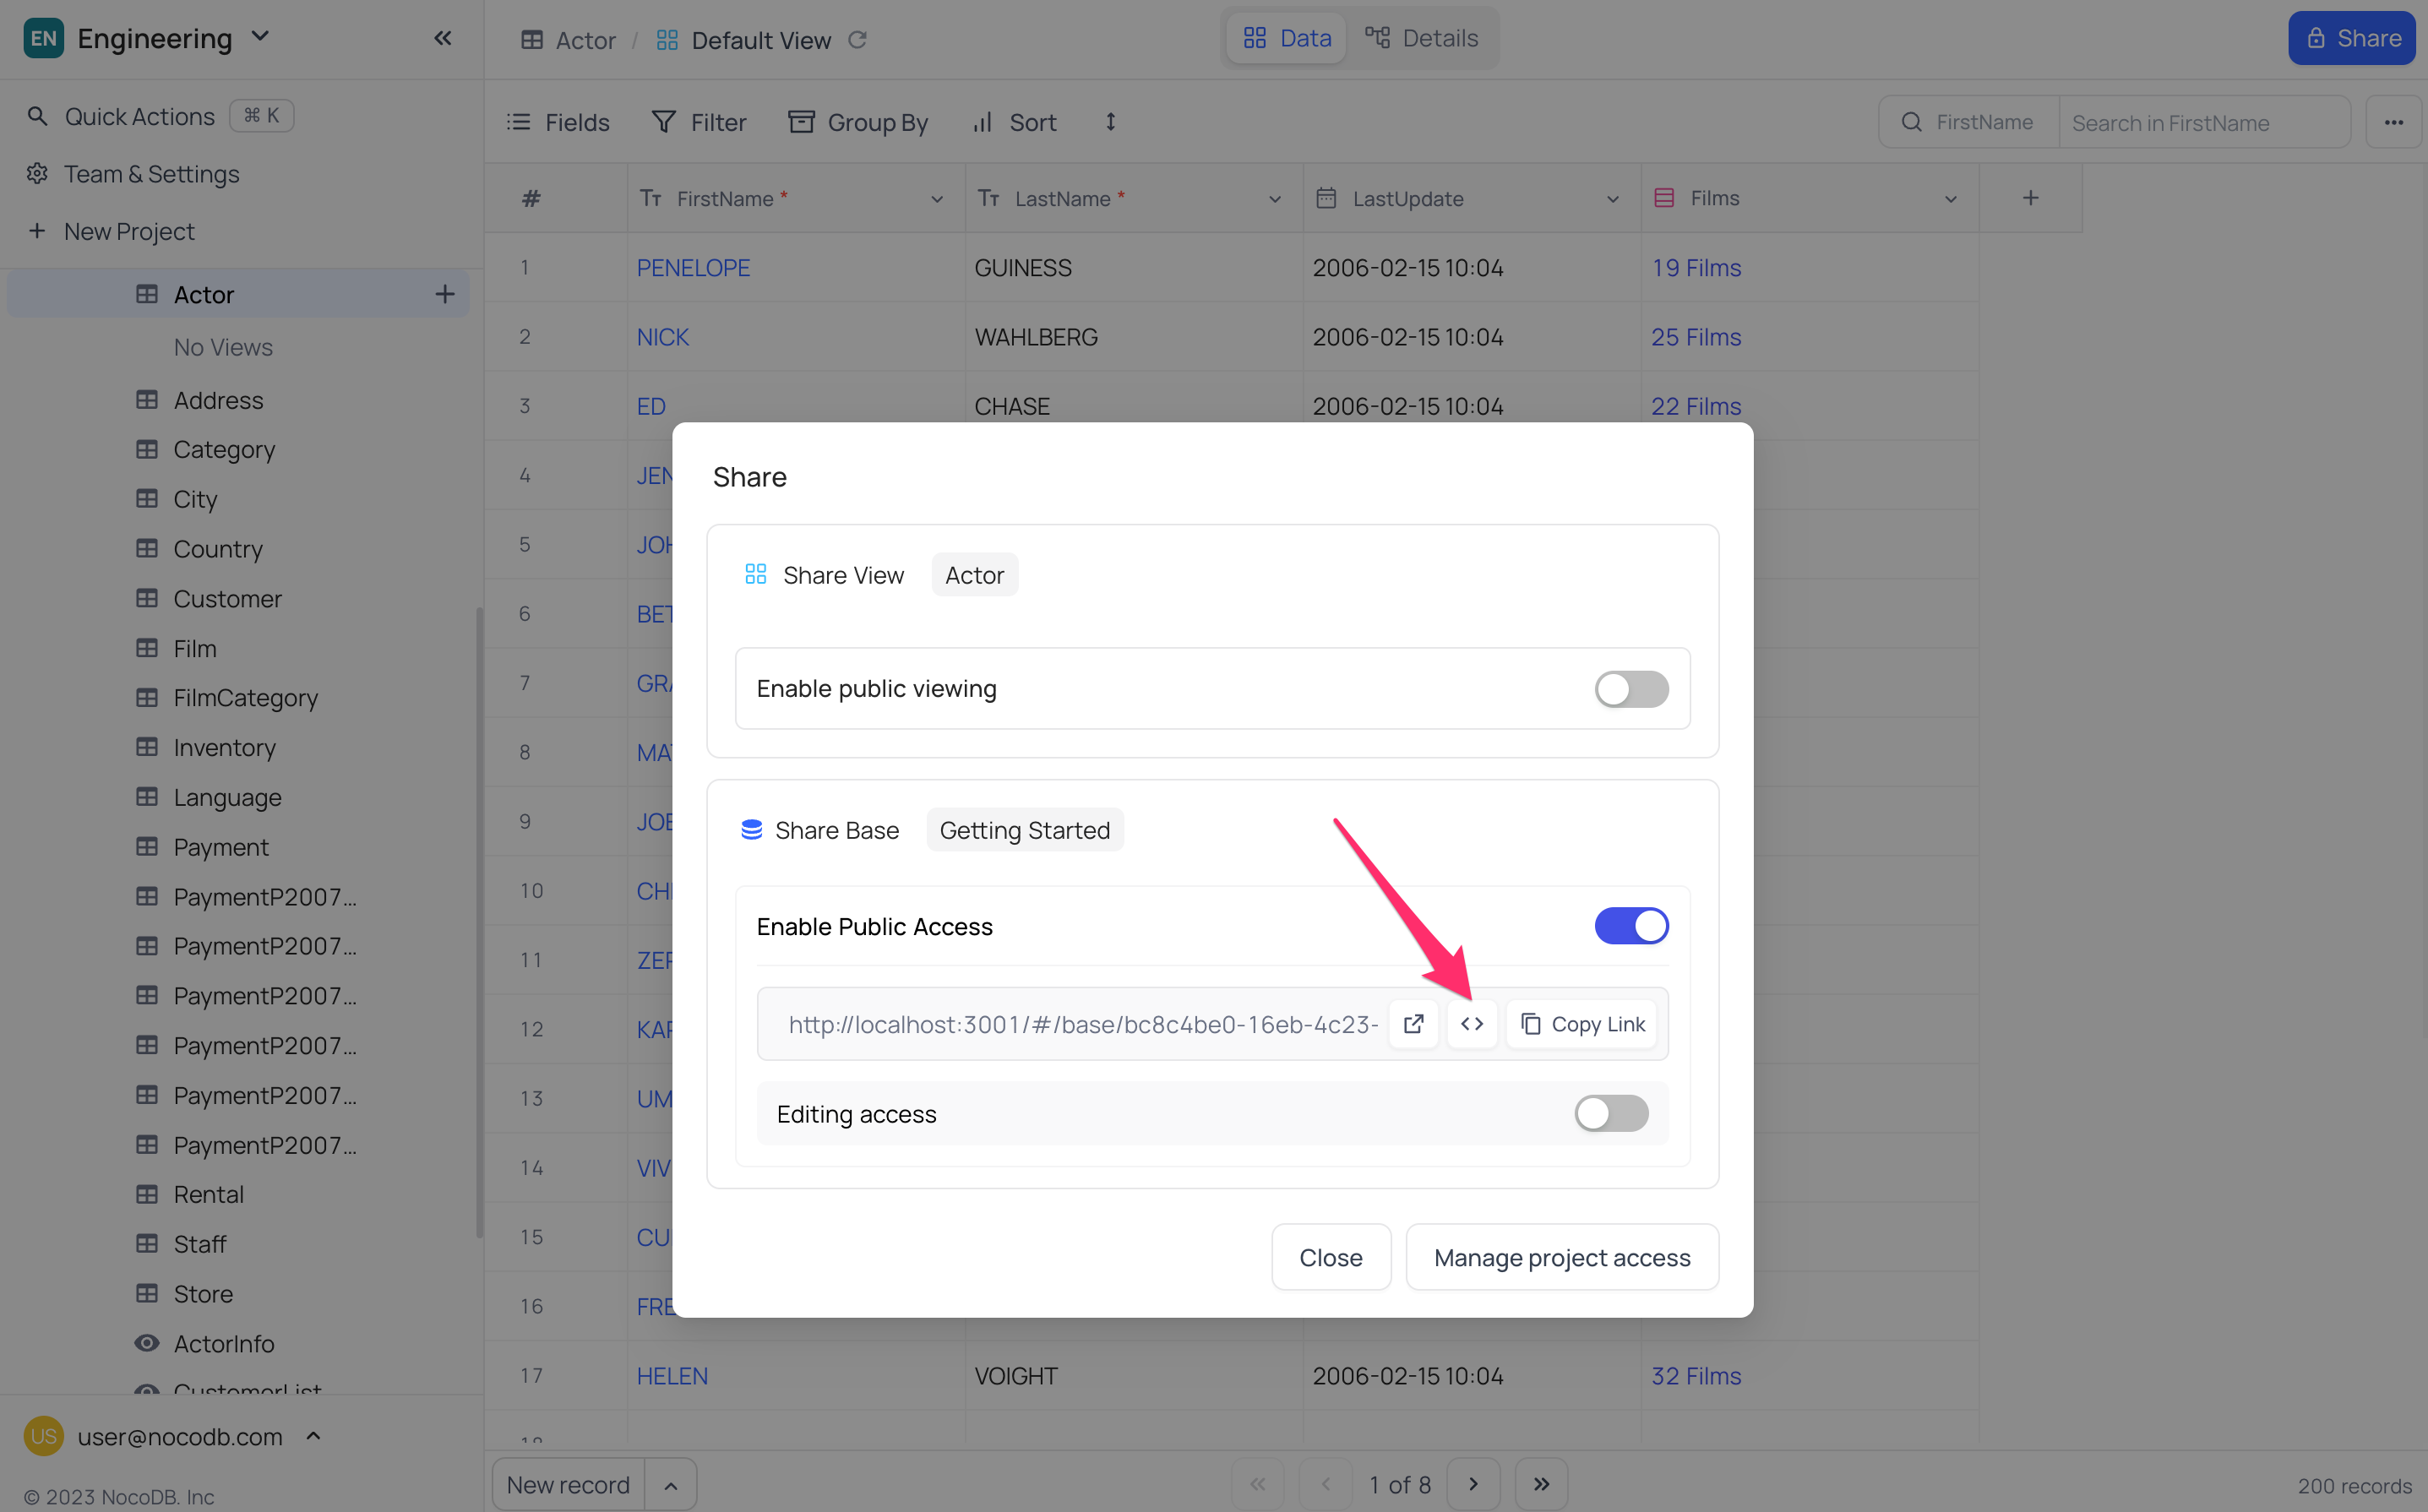
The NocoDB interface can be seamlessly integrated into existing applications through the utilization of the HTML IFRAME attribute. This feature empowers users to embed the NocoDB interface into their applications, allowing for a unified user experience. To generate the embeddable HTML code, follow these steps:
To Generate Embeddable HTML Code:
- Click the
Sharebutton located in the top right corner of the toolbar. - Within the
Shared base linktab, select the button to copy theEmbeddable HTML codeto your clipboard.
Example:
<iframe
        class="nc-embed"
        src="https://nocodb-nocodb-rsyir.ondigitalocean.app/dashboard/#/nc/base/e3bba9df-4fc1-4d11-b7ce-41c4a3ad6810?embed"
        frameBorder="0"
        width="100%"
        height="700"
        style="background: transparent; border: 1px solid #ddd"
>
</iframe>
Embed into application's HTML Body
Sample code with embedded iframe generated above
<!DOCTYPE html>
<html>
<body>
<iframe
        class="nc-embed"
        src="http://localhost:3000/#/nc/base/7d4b551c-b5e0-41c9-a87b-f3984c21d2c7?embed"
        frameBorder="0"
        width="100%"
        height="700"
        style="background: transparent; "
></iframe>
</body>
</html>