Okta
info
Please reach out to sales for SSO access.
This article briefs about the steps to configure Okta as Identity service provider for NocoDB
NocoDB, Retrieve Redirect URL
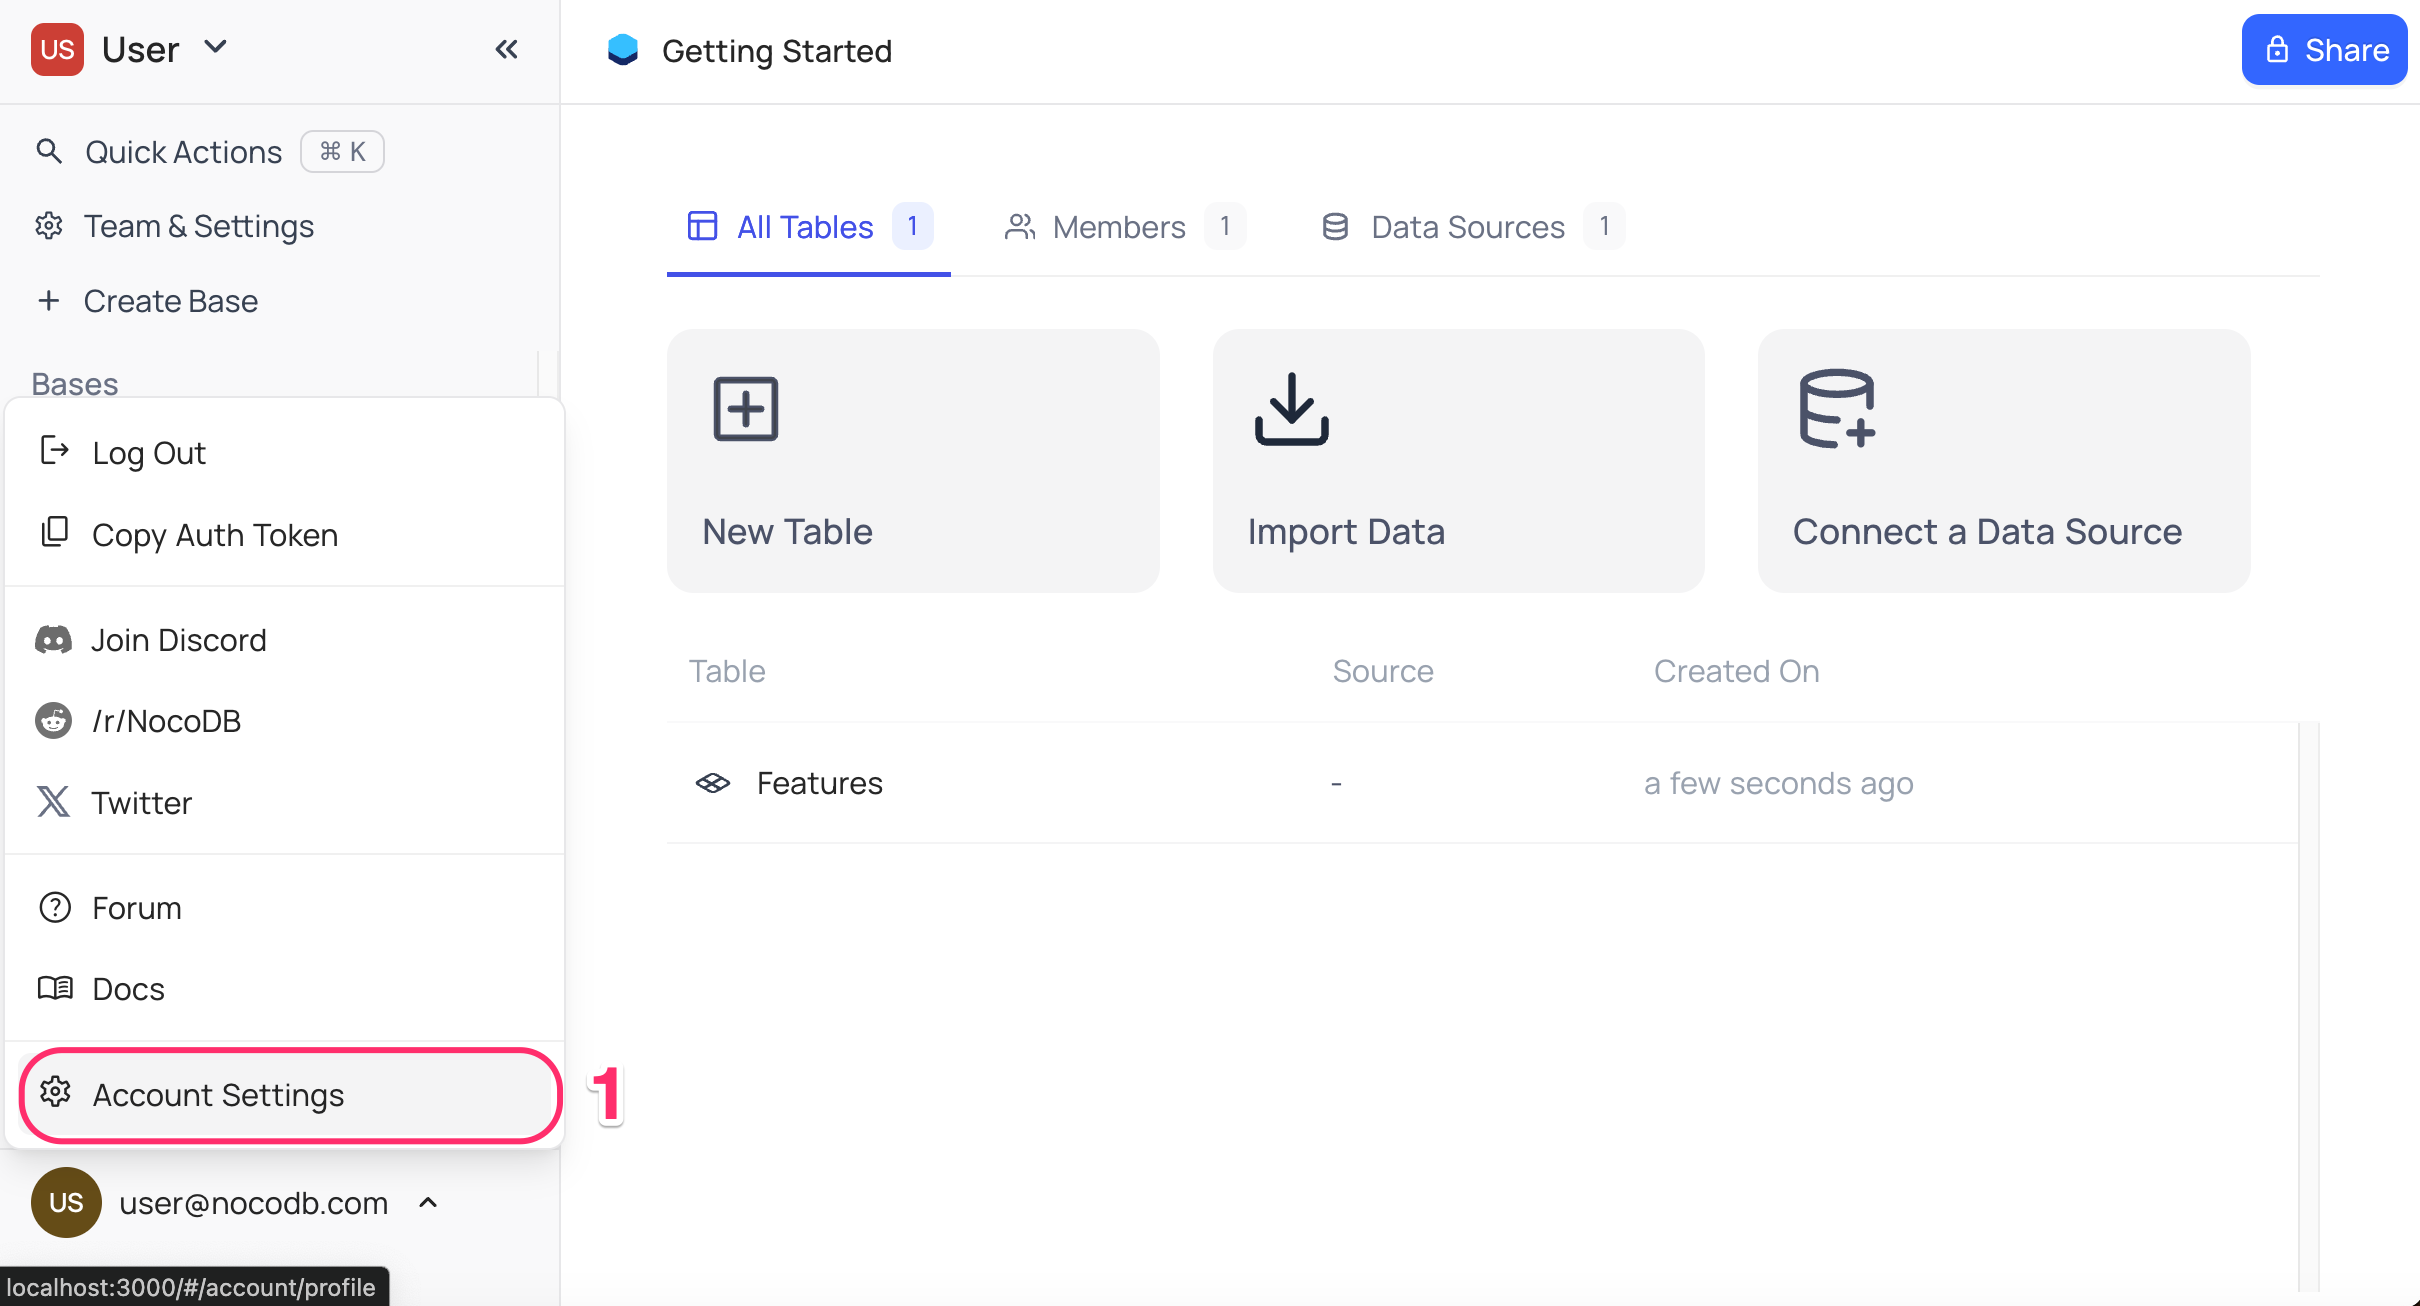
- Go to
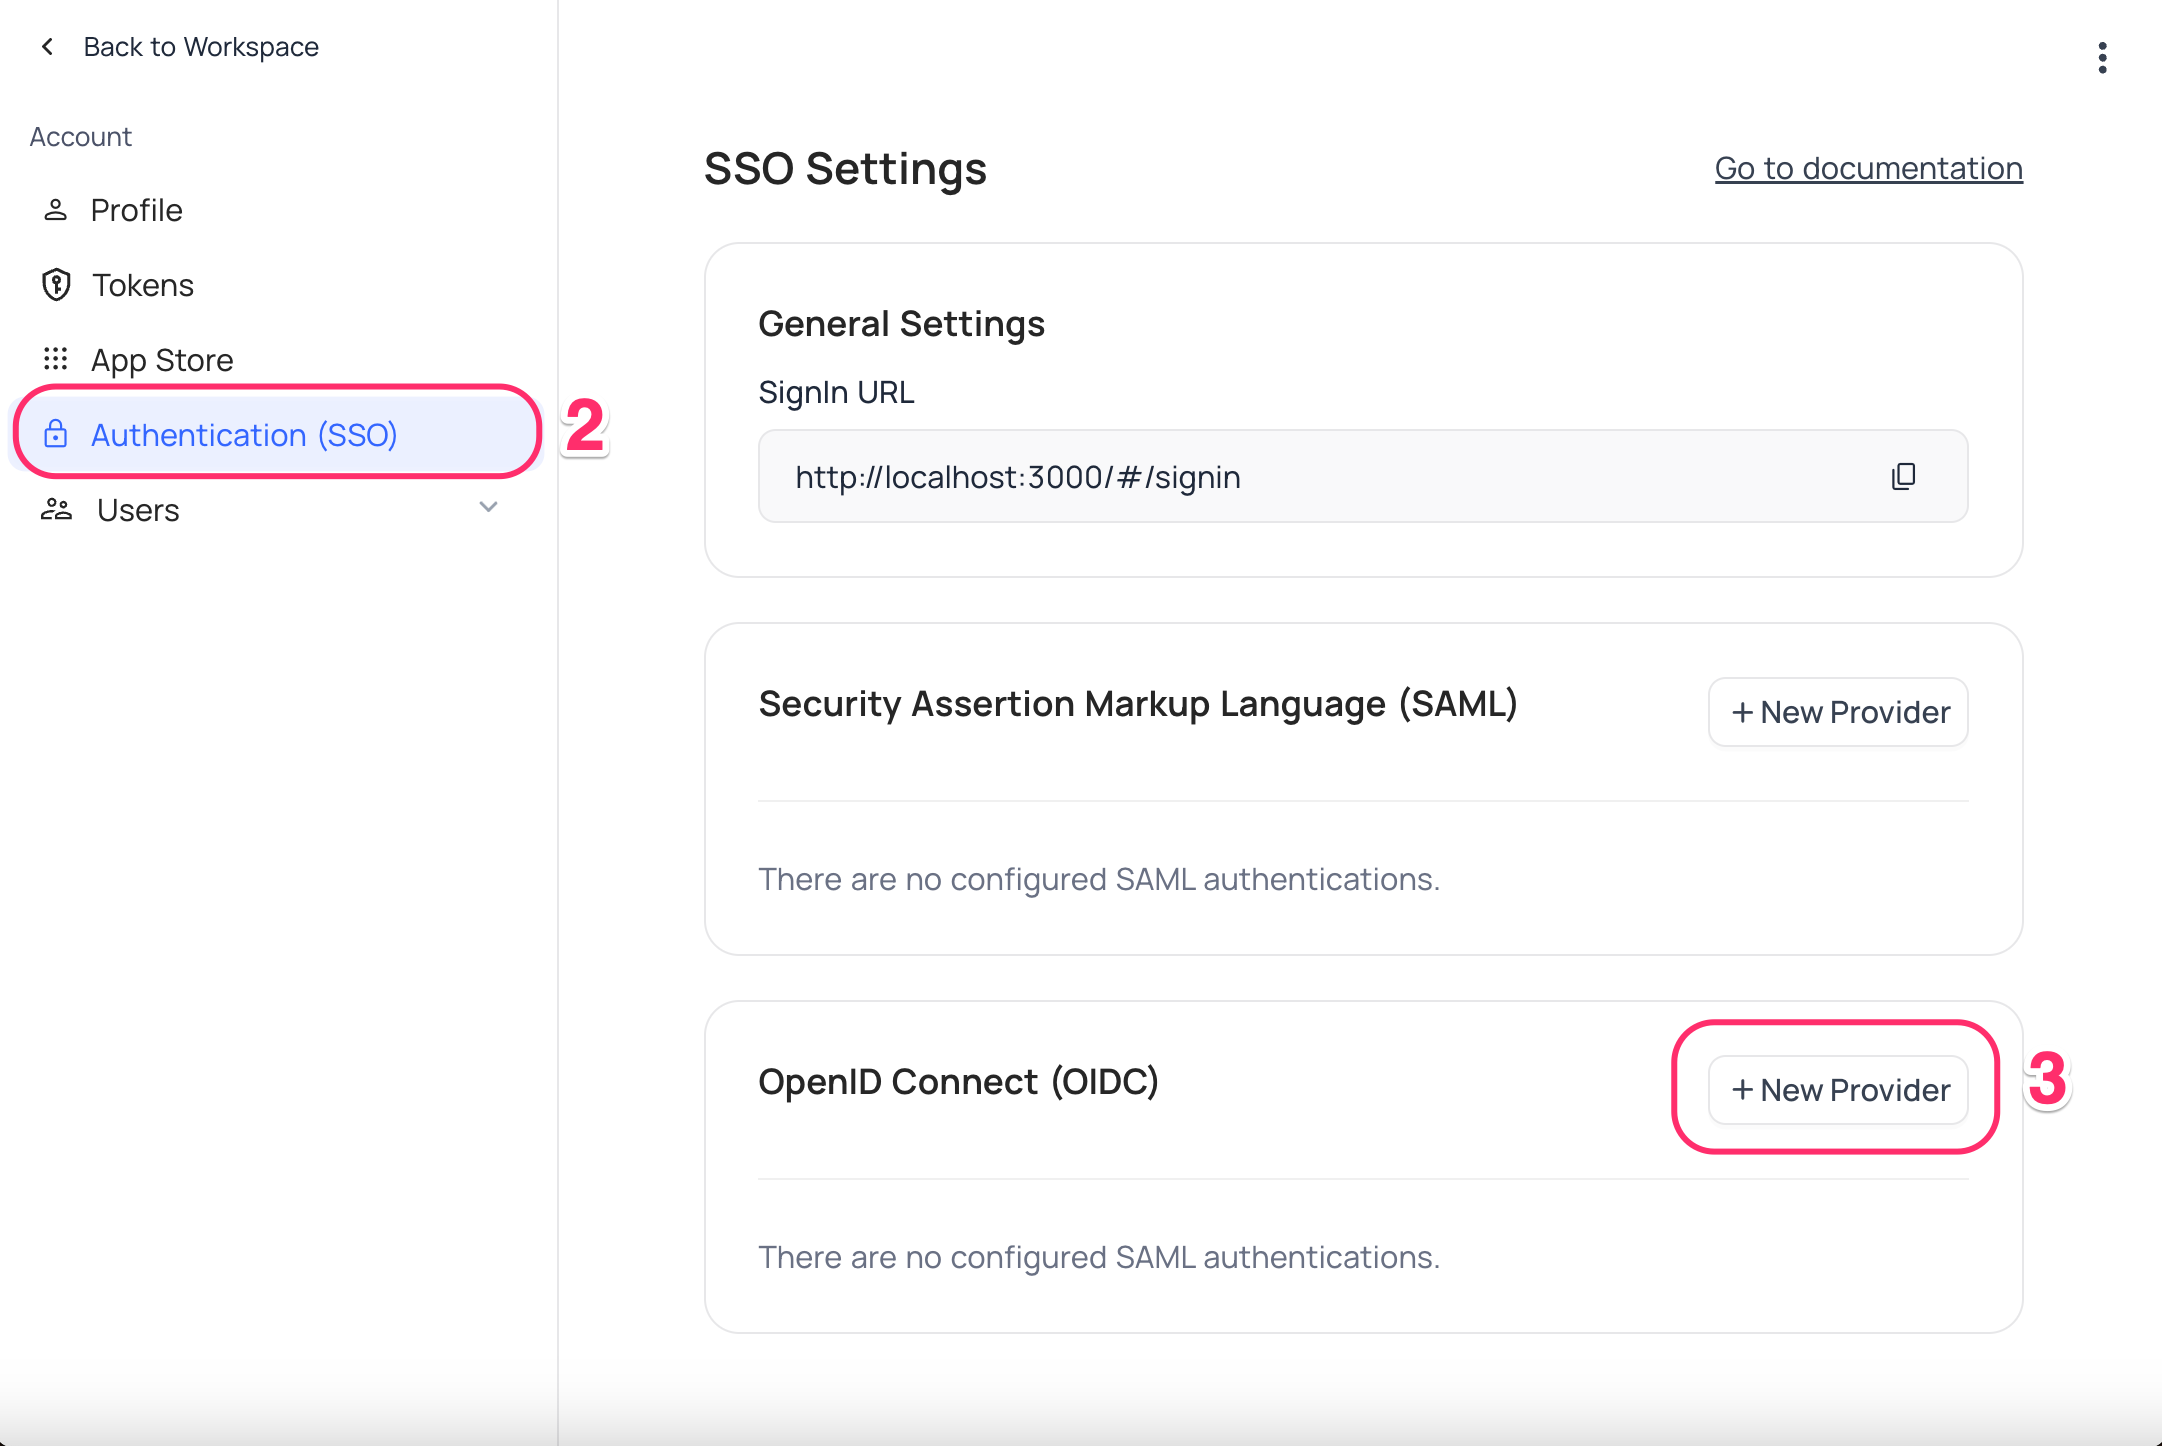
Account Settings - Select
Authentication (SSO) - Click on
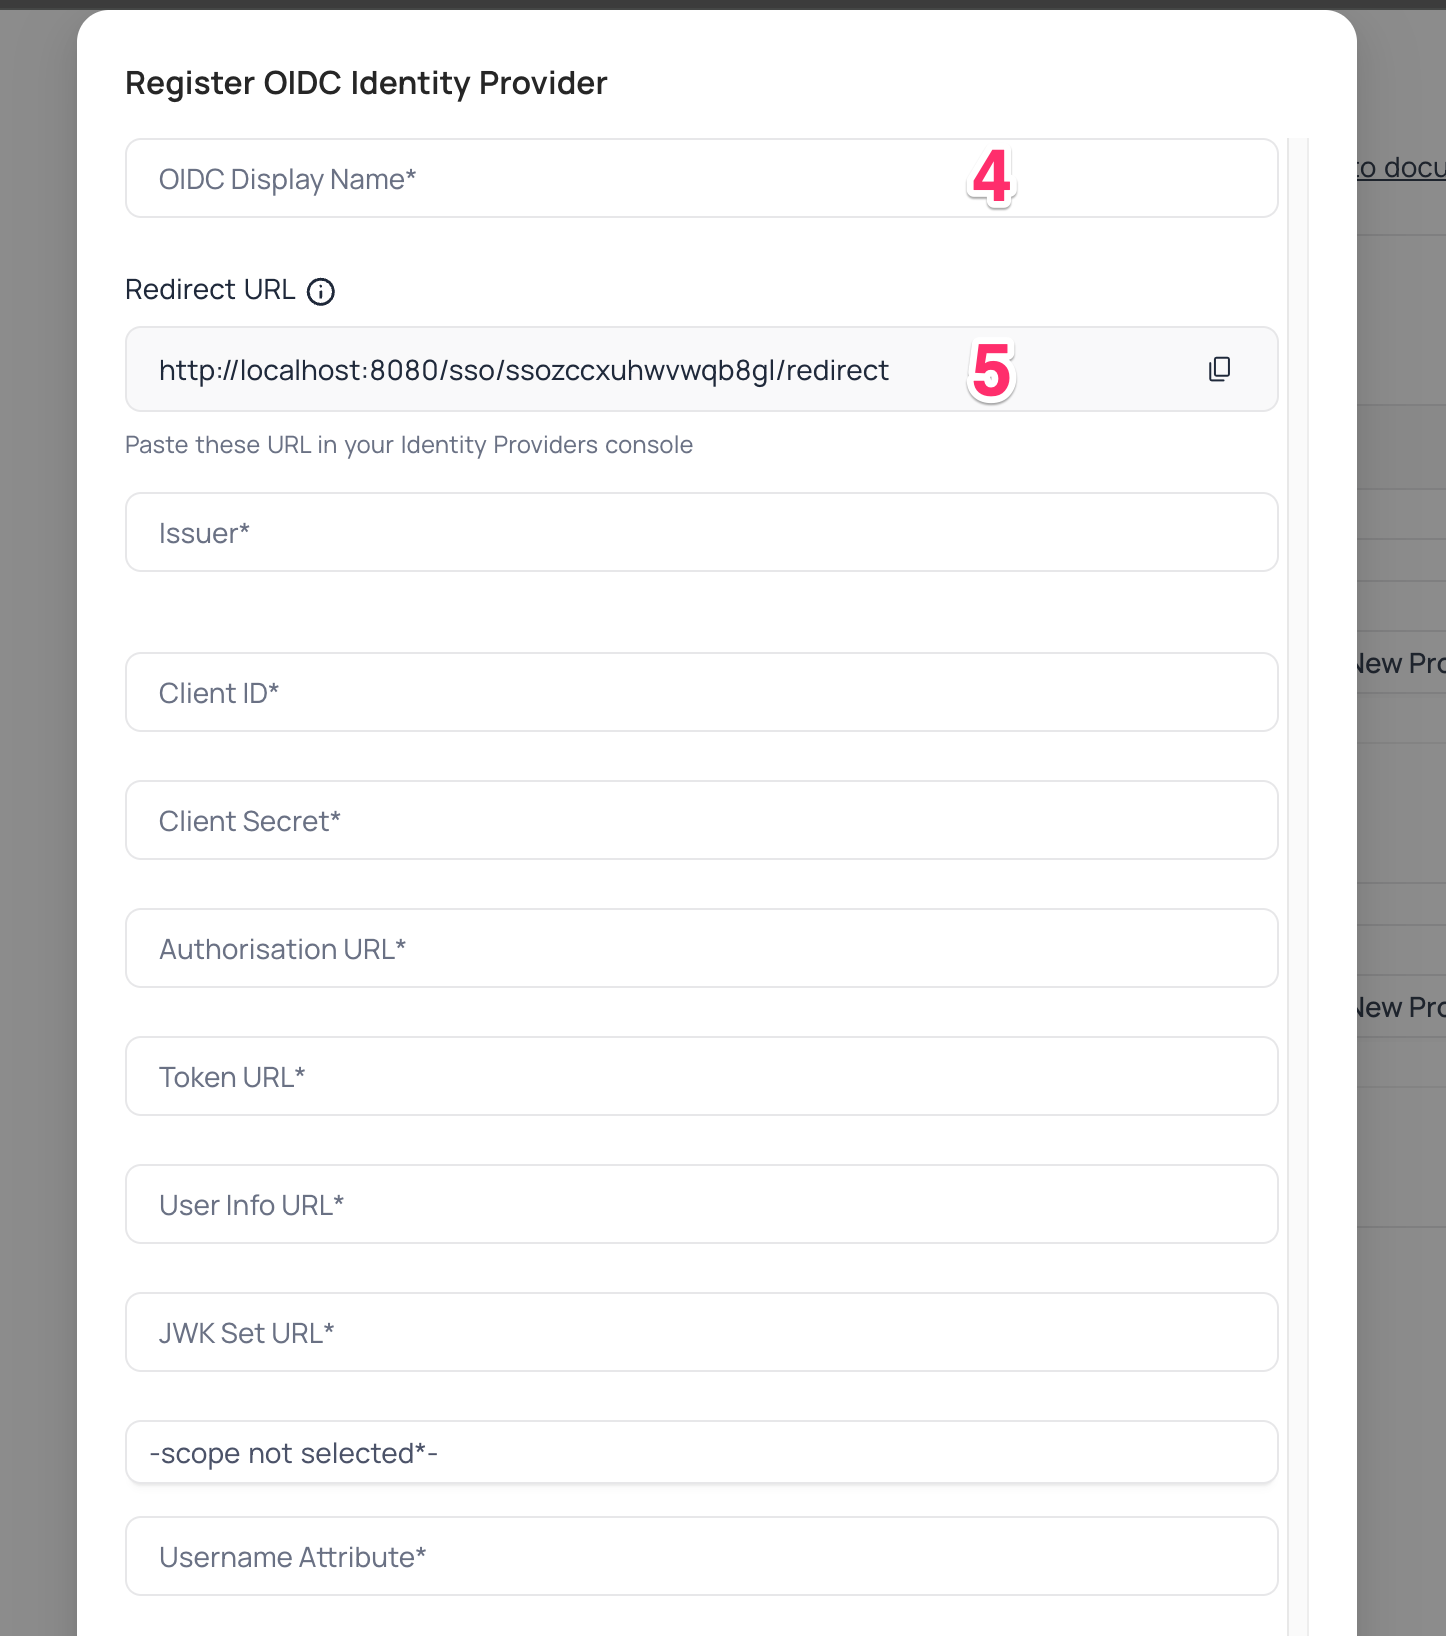
New Providerbutton - On the Popup modal, Specify a
Display namefor the provider; note that, this name will be used to display the provider on the login page - Retrieve
Redirect URL; this information will be required to be configured later with the Identity Provider
Okta, Configure NocoDB as an Application
- Sign in to your Okta account and navigate to the "Get started with Okta" page.
- Click on
Add Appfor the Single Sign-On option. - On the
Browse App Integration Catalogpage, selectCreate New App
- Click on
- In the pop-up with title
Create a new app integration- Choose
OIDC - OpenID Connectas the Sign-in method - Choose
Web Applicationas the Application type
- Choose
- Go to
General Settingson theNew Web App Integrationpage- Provide your application's name.
- From the Options in the
Grant type allowedsection, selectAuthorization CodeandRefresh Token - Add the
Redirect URLunderSign-in redirect URIs. - From the
Assignments section, select an option fromControlled accessto set up the desired accessibility configuration for this application. Save
- On your new application,
- Go to the
Generaltab - Copy the
Client IDandClient Secretfrom theClient Credentialssection.
- Go to the
- From
Accountdropdown in navigation bar- Copy
Okta Domain
- Copy
- Append "./well-known/openid-configuration" to the
Okta DomainURL & access it- Example: https://dev-123456.okta.com/.well-known/openid-configuration
- Copy
authorization_endpoint,token_endpoint,userinfo_endpoint&jwks_urifrom the JSON response
NocoDB, Configure Okta as an Identity Provider
In NocoDB, open Account Settings > Authentication > OIDC. On the "Register OIDC Identity Provider" modal, insert the following information:
- Insert
Client IDretrieved in step (6) above asClient ID - Insert
Client Secretretrieved in step (6) above asClient Secret - Insert
authorization_endpointretrieved in step (8) above asAuthorization URL - Insert
token_endpointretrieved in step (8) above asToken URL - Insert
userinfo_endpointretrieved in step (8) above asUserinfo URL - Insert
jwks_uriretrieved in step (8) above asJWK Set URL - Set
Scopeasopenidprofileemailoffline_access - In the Username Attribute field, indicate the name of the claim that represents the user's email. The default value is set to "email."
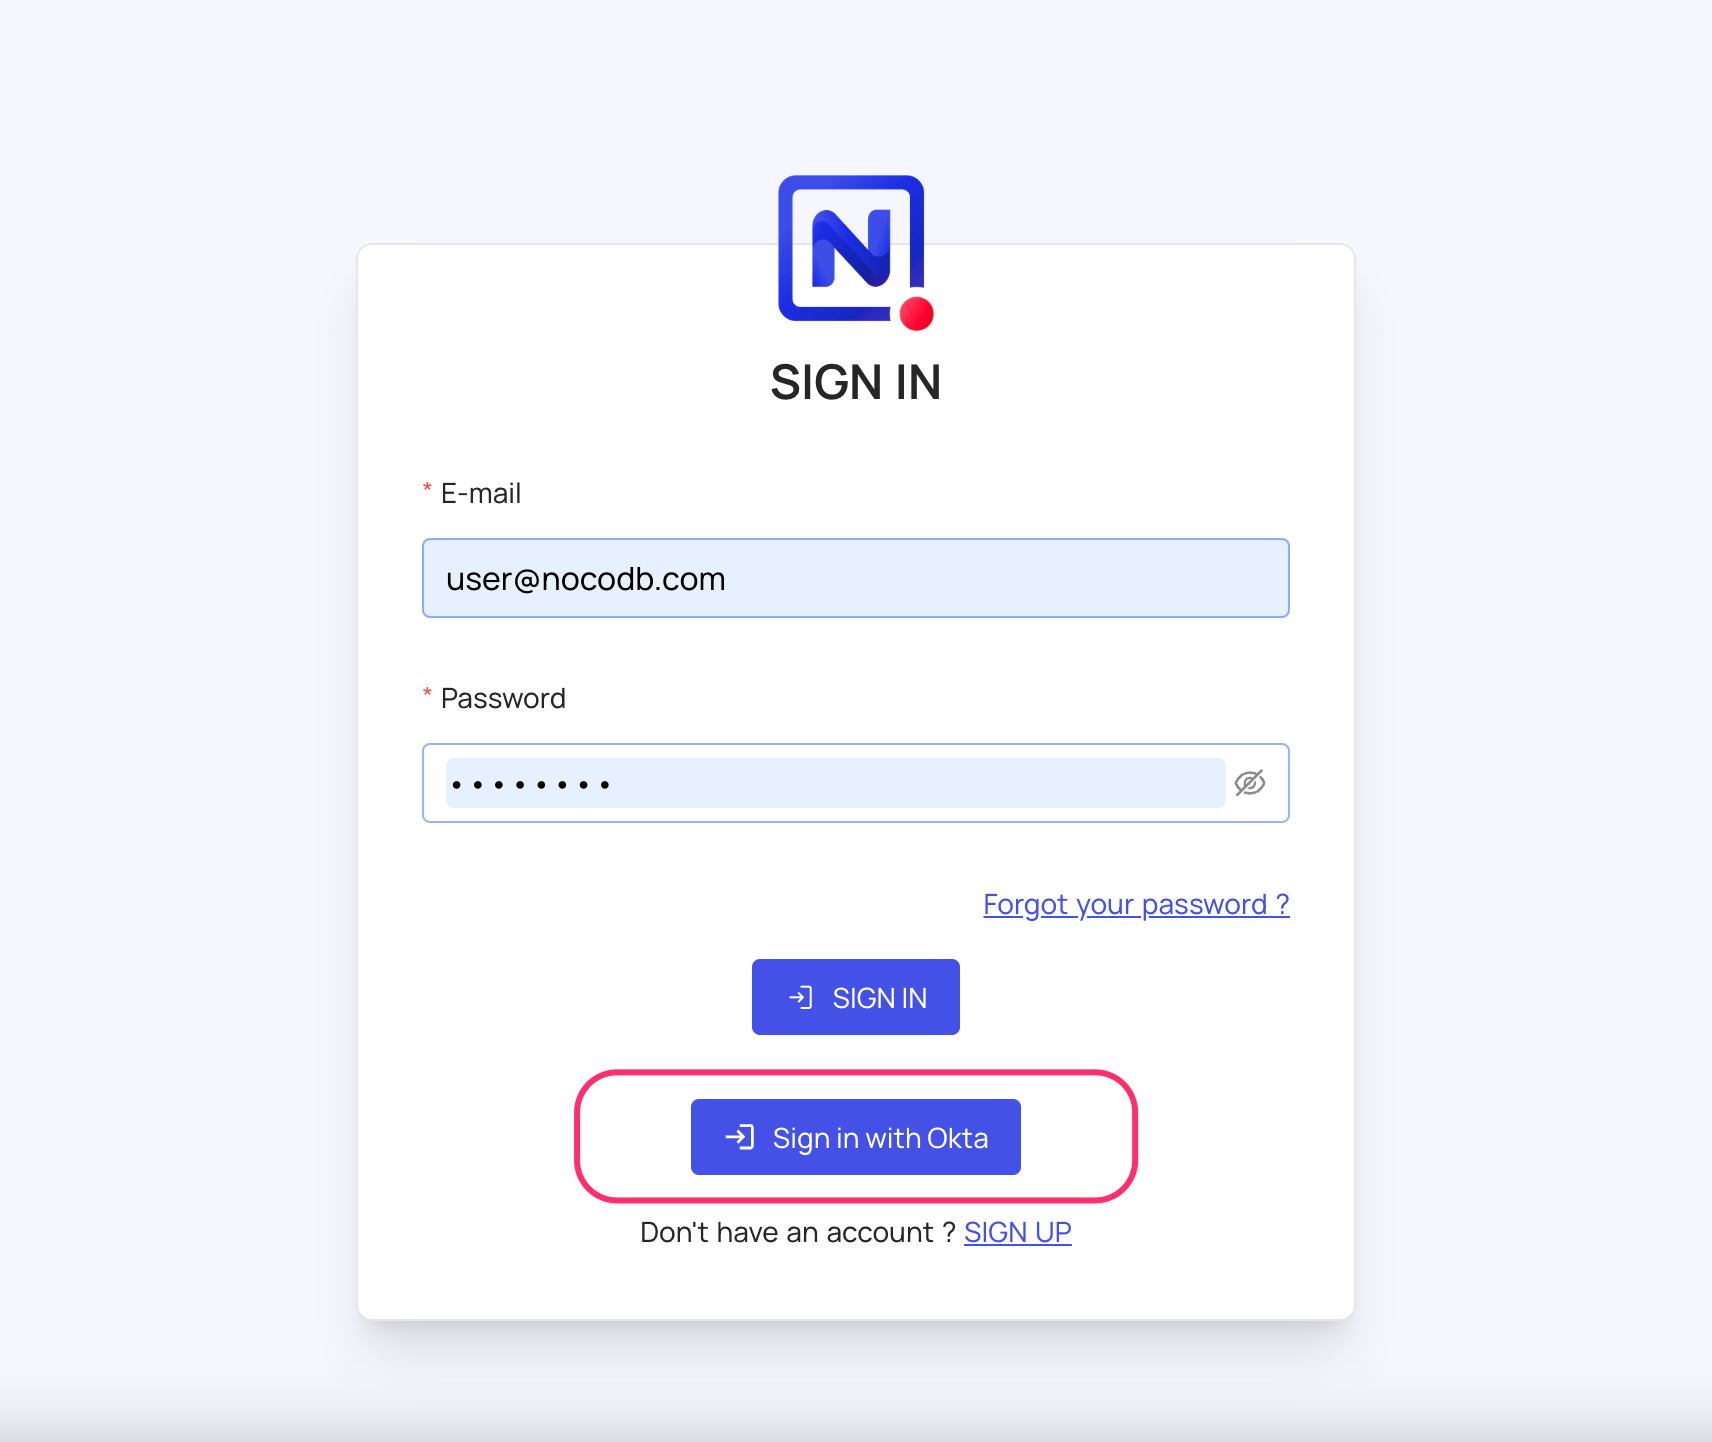
For Sign-in's, user should be able to now see Sign in with <SSO> option.
note
Post sign-out, refresh page (for the first time) if you do not see Sign in with <SSO> option
For information about Okta API Scopes, refer here