Azure AD (Entra)
info
Please reach out to sales for SSO access.
This article briefs about the steps to configure Azure AD as Identity service provider for NocoDB
NocoDB, Retrieve Redirect URL
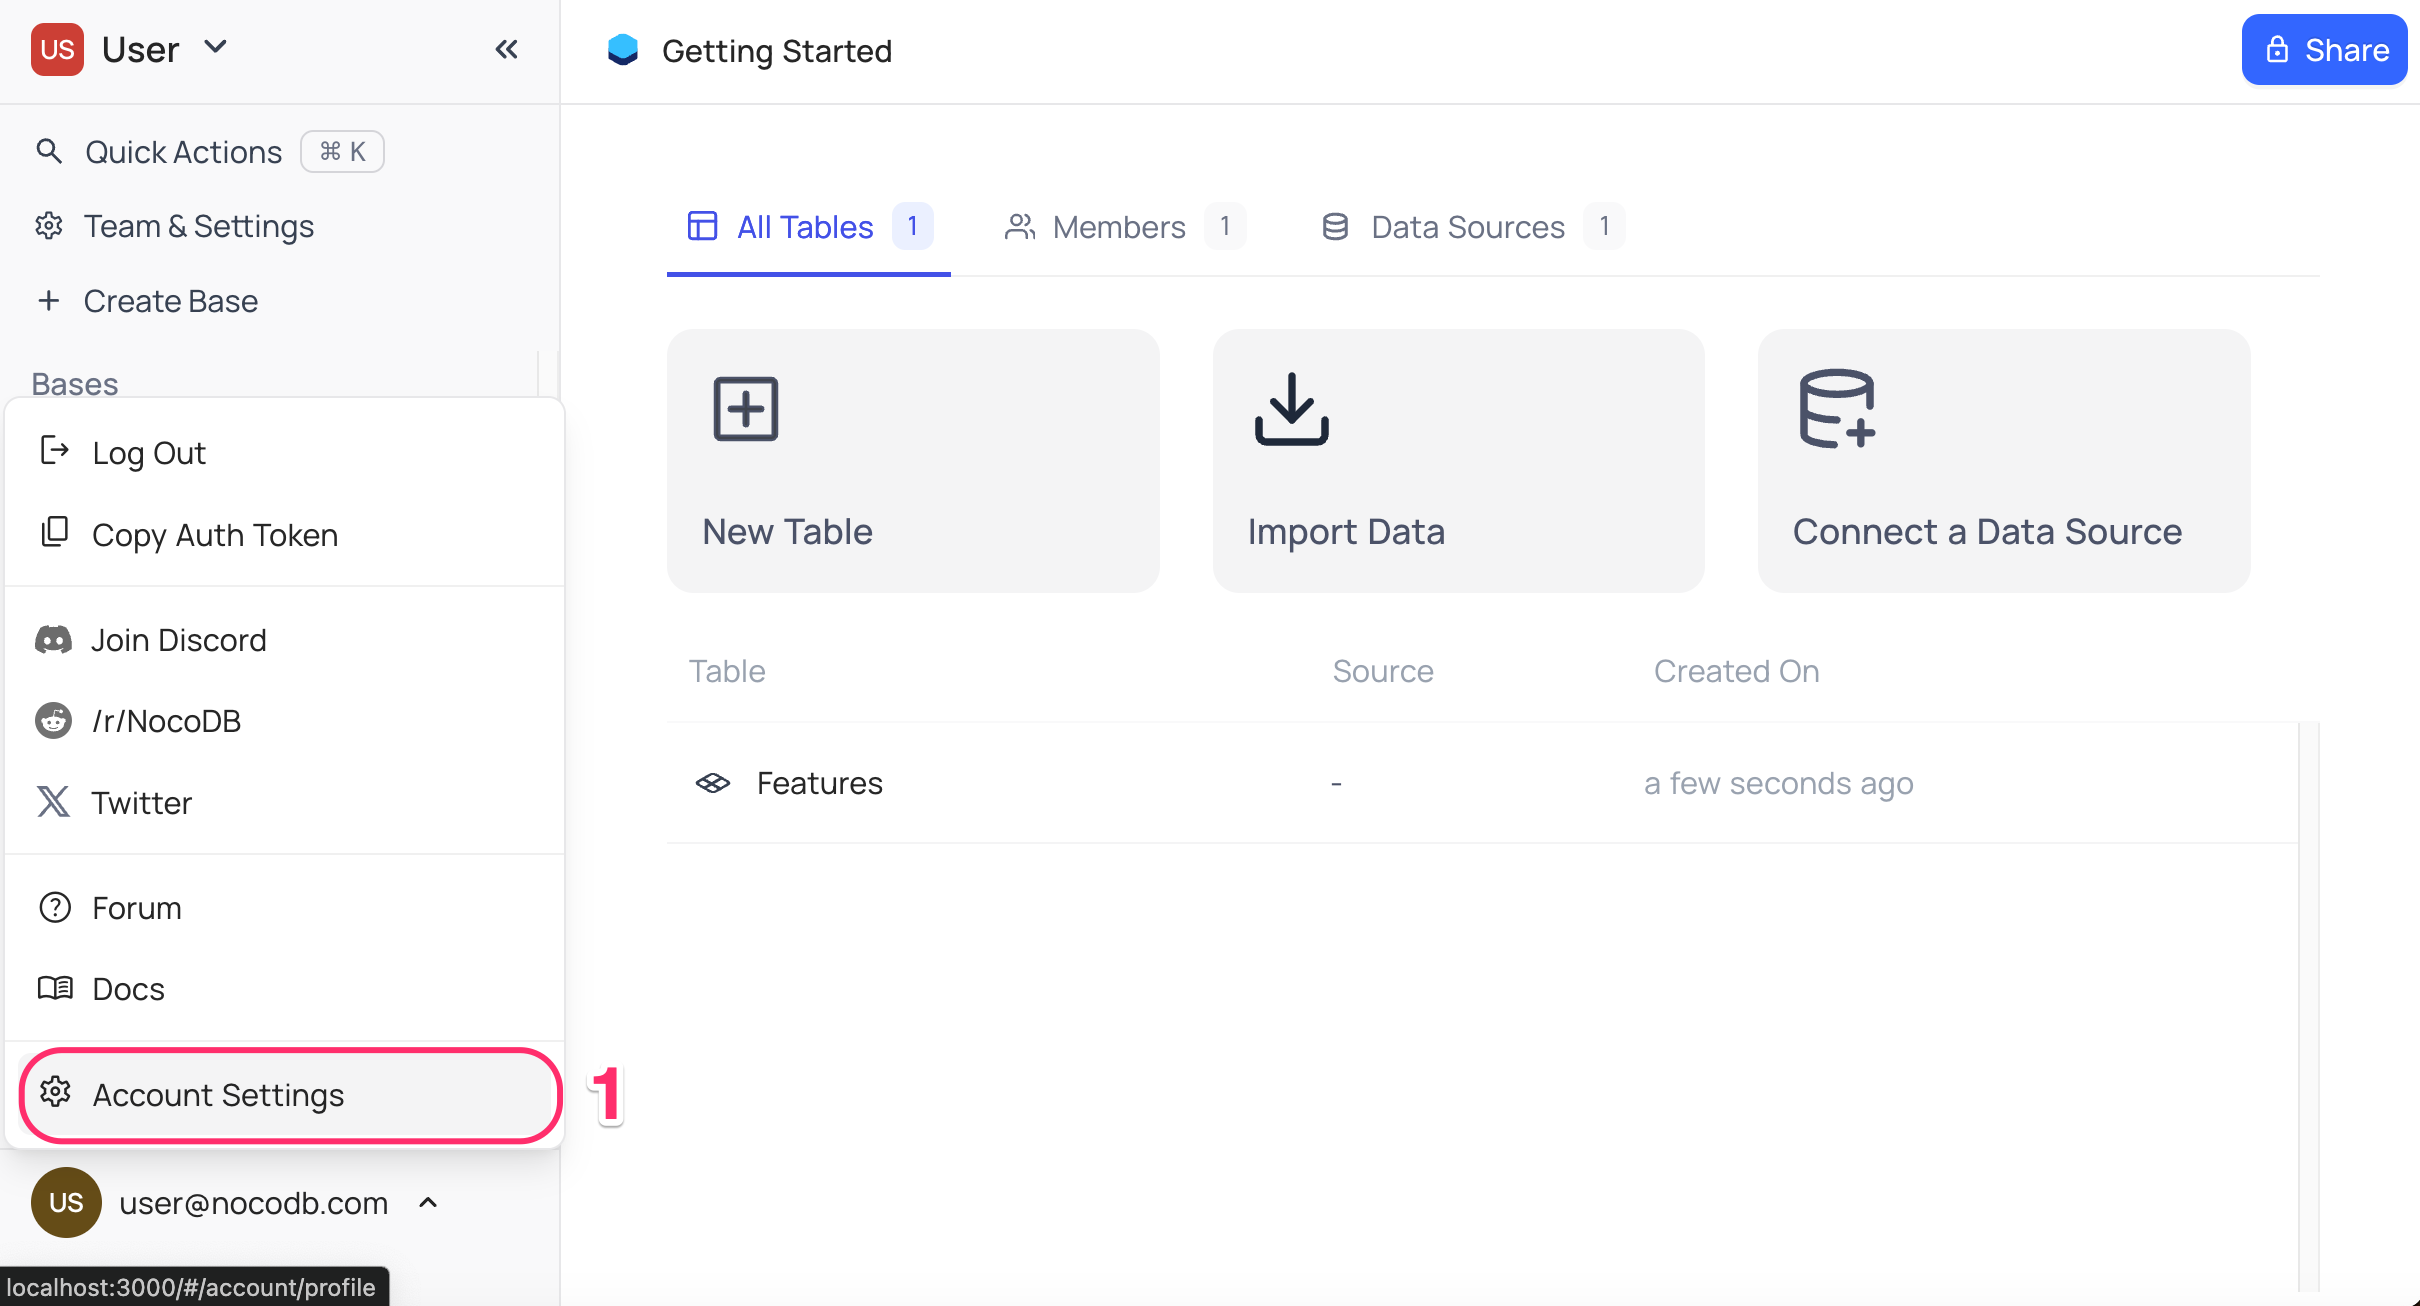
- Go to
Account Settings - Select
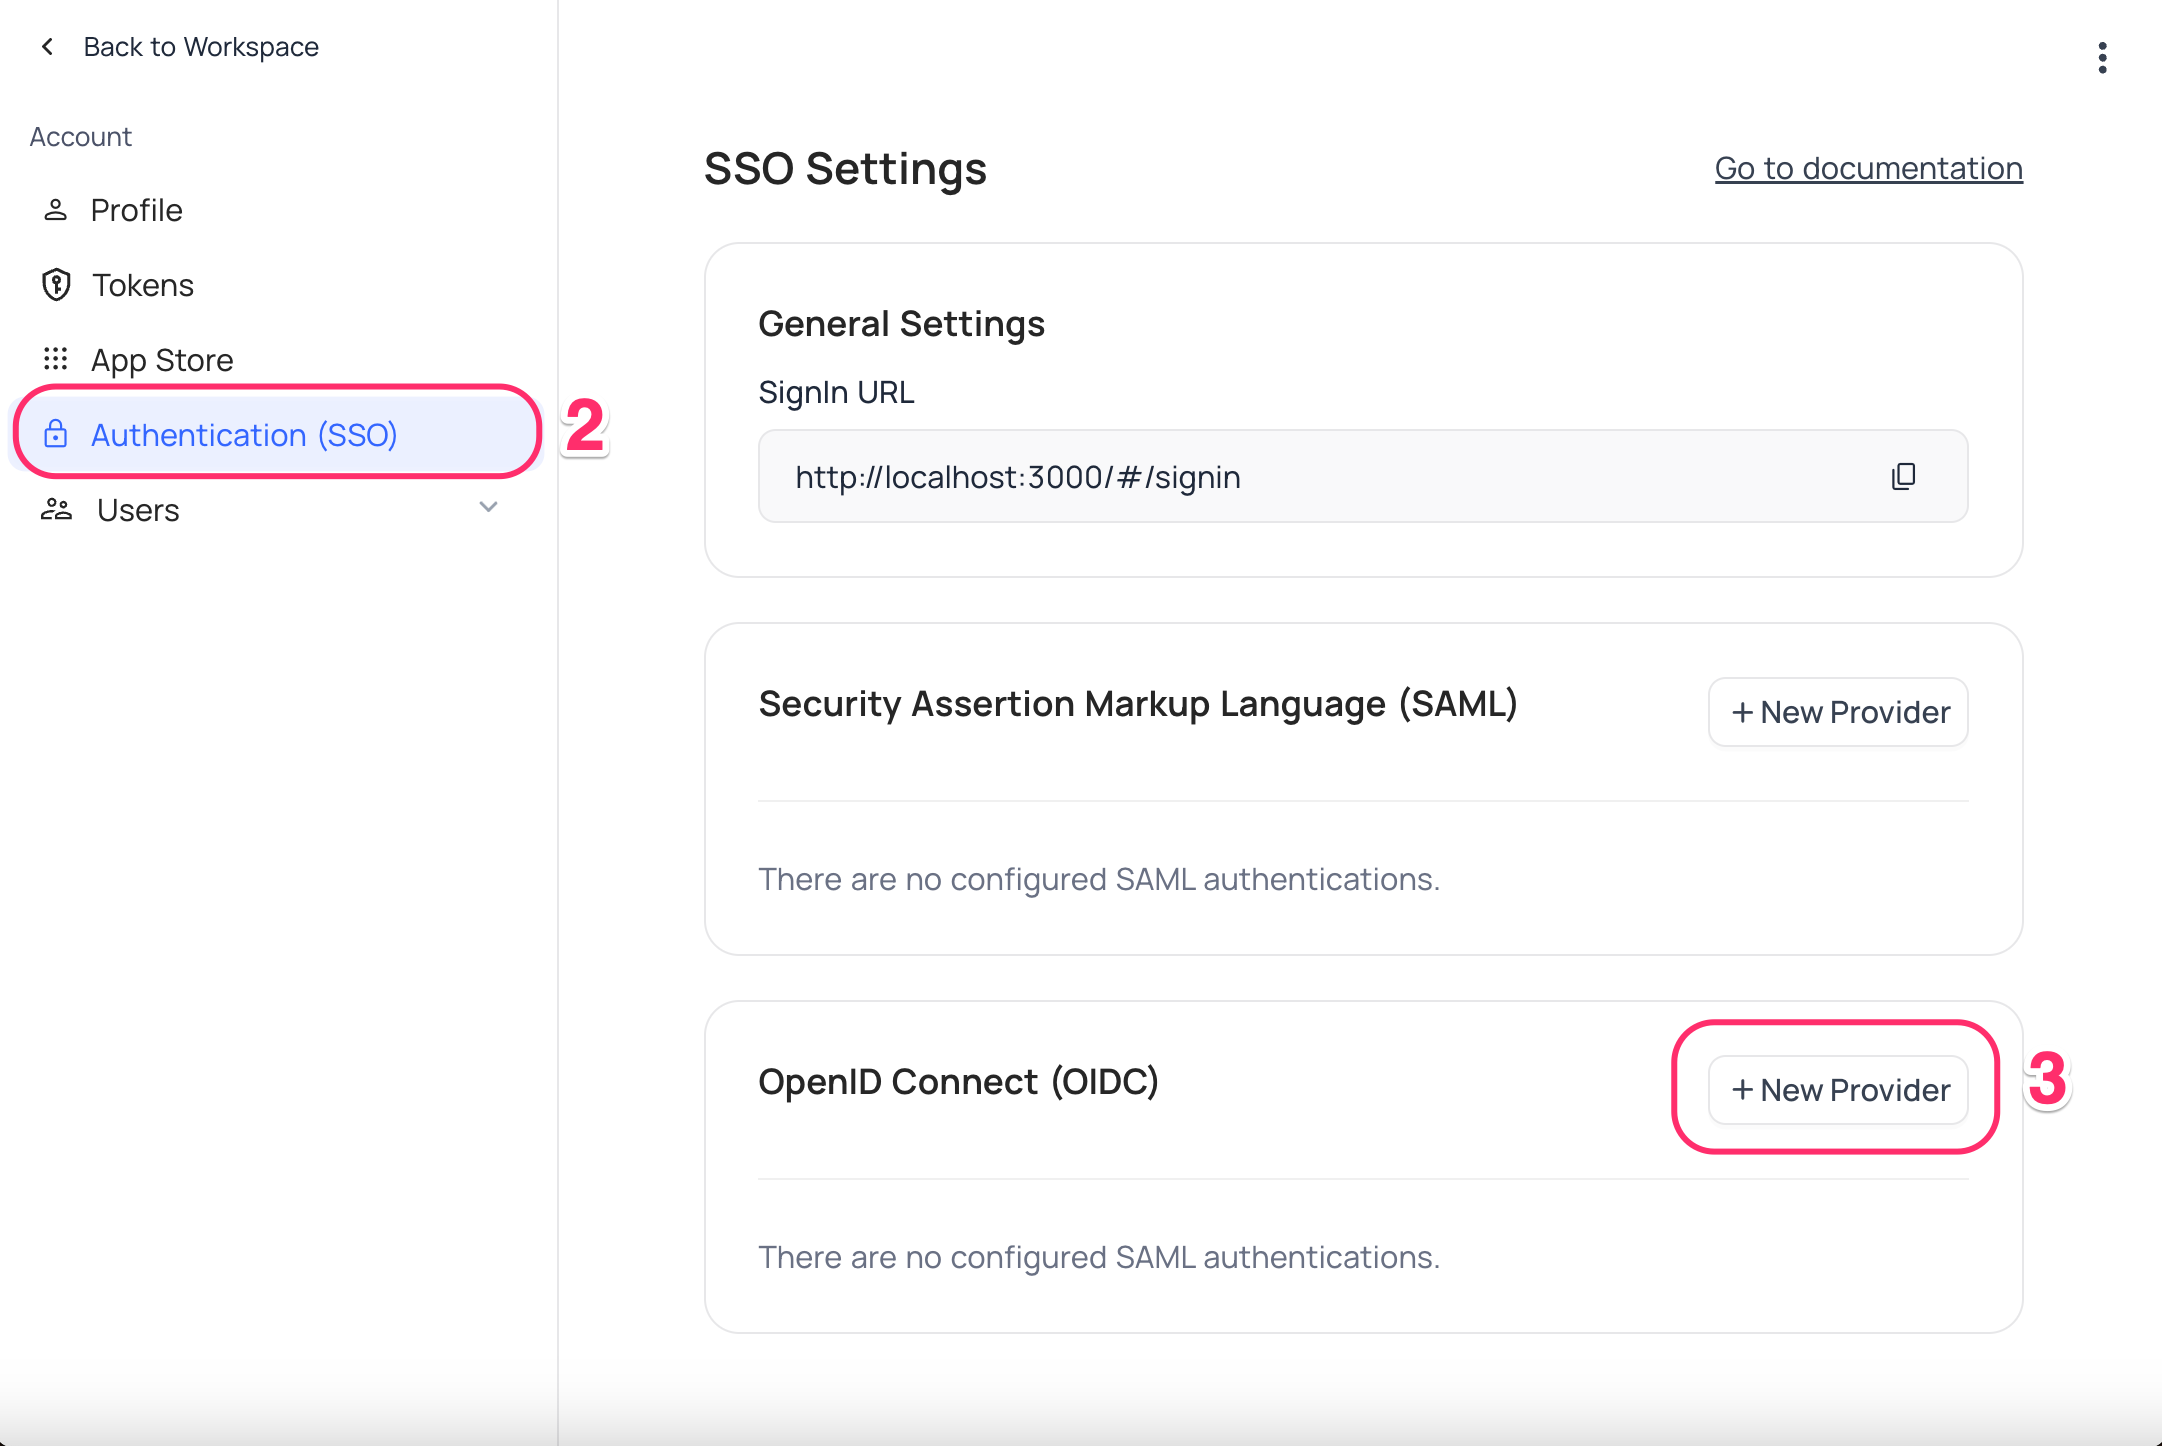
Authentication (SSO) - Click on
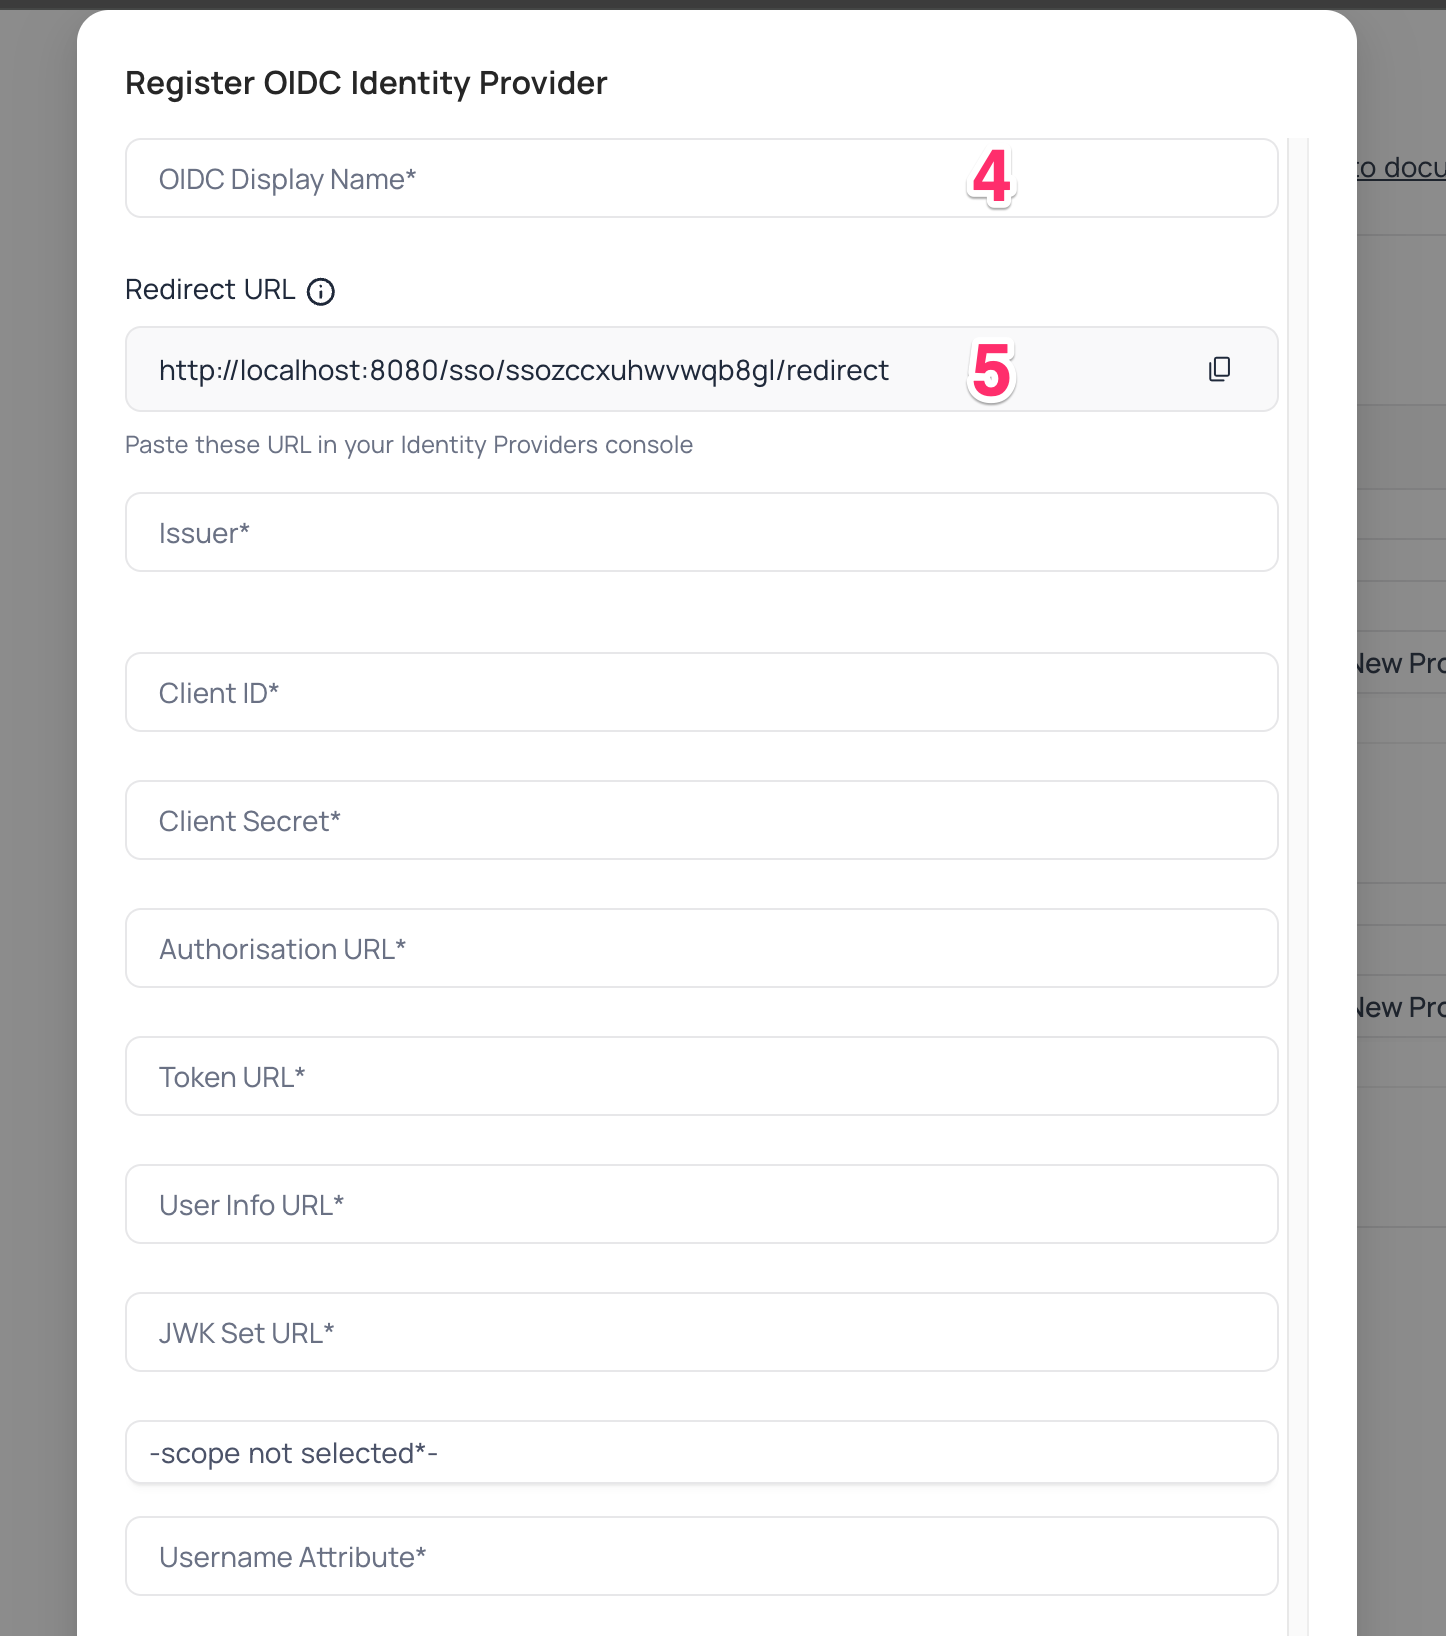
New Providerbutton - On the Popup modal, Specify a
Display namefor the provider; note that, this name will be used to display the provider on the login page - Retrieve
Redirect URL; this information will be required to be configured later with the Identity Provider
Azure AD, Configure NocoDB as an Application
- Sign in to your Azure account and navigate to
Azure Active DirectoryunderAzure Services. - Access
Manage Tenantsfrom the navigation bar, select your directory, and clickSwitch. - On your directory's homepage, click
+ Add>App Registrationfrom the navigation bar. - On the
Register an applicationpage,- Provide your application's name.
- Set
Accounts in this organizational directory onlyas theSupported account types. - Choose
Webas the Application type - Add the
Redirect URLunderRedirect URIs. Register
- On your application's homepage,
- Copy the
Application (client) ID - Click
Add a certificate or secretunderClient credentialssection - On
Certificates & secretspage, go toClient secretssection - Click
New client secret - On
Add a client secretpage,- Add a description for the secret
- Set expiration as required
Add
- Copy the
Valueof the newly created secret
- Copy the
- On your application's homepage,
- Go to
Endpointstab - Open
OpenID Connect metadata documentURL & copyauthorization_endpoint,token_endpoint,userinfo_endpoint&jwks_urifrom the JSON response
- Go to
- Configuring scopes
- Go to
API permissionstab - Click
Add a permission - On
Request API permissionspage,- Select
Microsoft GraphfromMicrosoft APIs - Select
Delegated permissions - Select
openidprofileemailoffline_accessfromSelect permissionsdropdown - From
Usersdropdown, selectUser.Read Add permissions
- Select
- Click
Grant admin consent for this directoryfrom theAPI permissionspage
- Go to
NocoDB, Configure Azure AD as an Identity Provider
On NocoDB, open Account Settings > Authentication > OIDC. On the "Register OIDC Identity Provider" modal, insert the following information:
- Insert
Application (client) IDretrieved in step (7) above asClient ID - Insert
Valueof the newly created secret retrieved in step (7) above asClient Secret - Insert
authorization_endpointretrieved in step (8) above asAuthorization URL - Insert
token_endpointretrieved in step (8) above asToken URL - Insert
userinfo_endpointretrieved in step (8) above asUserinfo URL - Insert
jwks_uriretrieved in step (8) above asJWK Set URL - Set
Scopeasopenidprofileemailoffline_access
For Sign-in's, user should be able to now see Sign in with <SSO> option.
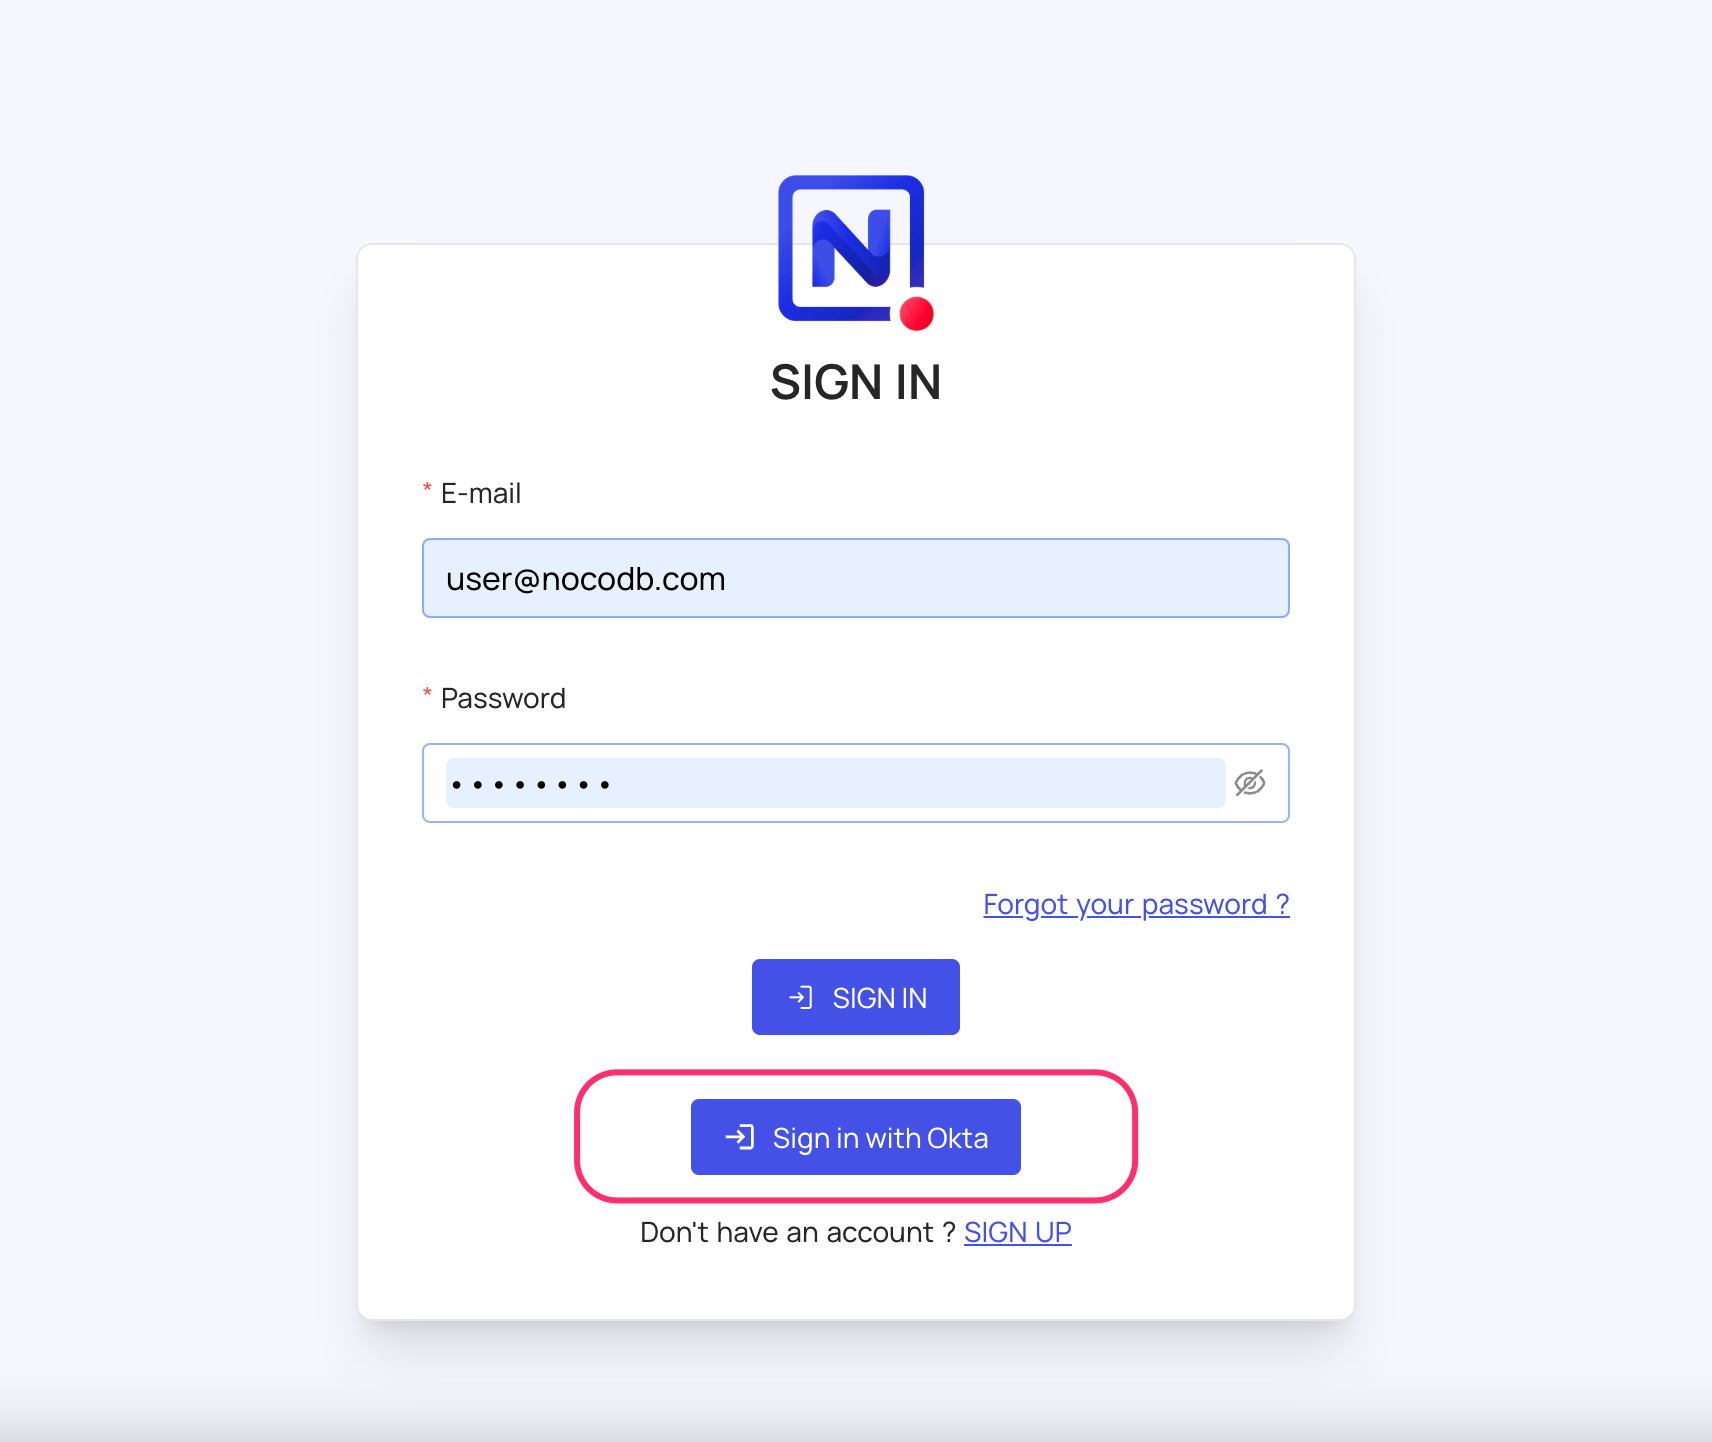
note
Post sign-out, refresh page (for the first time) if you do not see Sign in with <SSO> option
For information about Azure AD API Scopes, refer here