Import data into an existing table
Import data from CSV / Excel
Accessing import modal
- Click on
...context menu from the toolbar. - Click on
Uploadbutton. - Select
Upload CSV/Upload Exceloption.

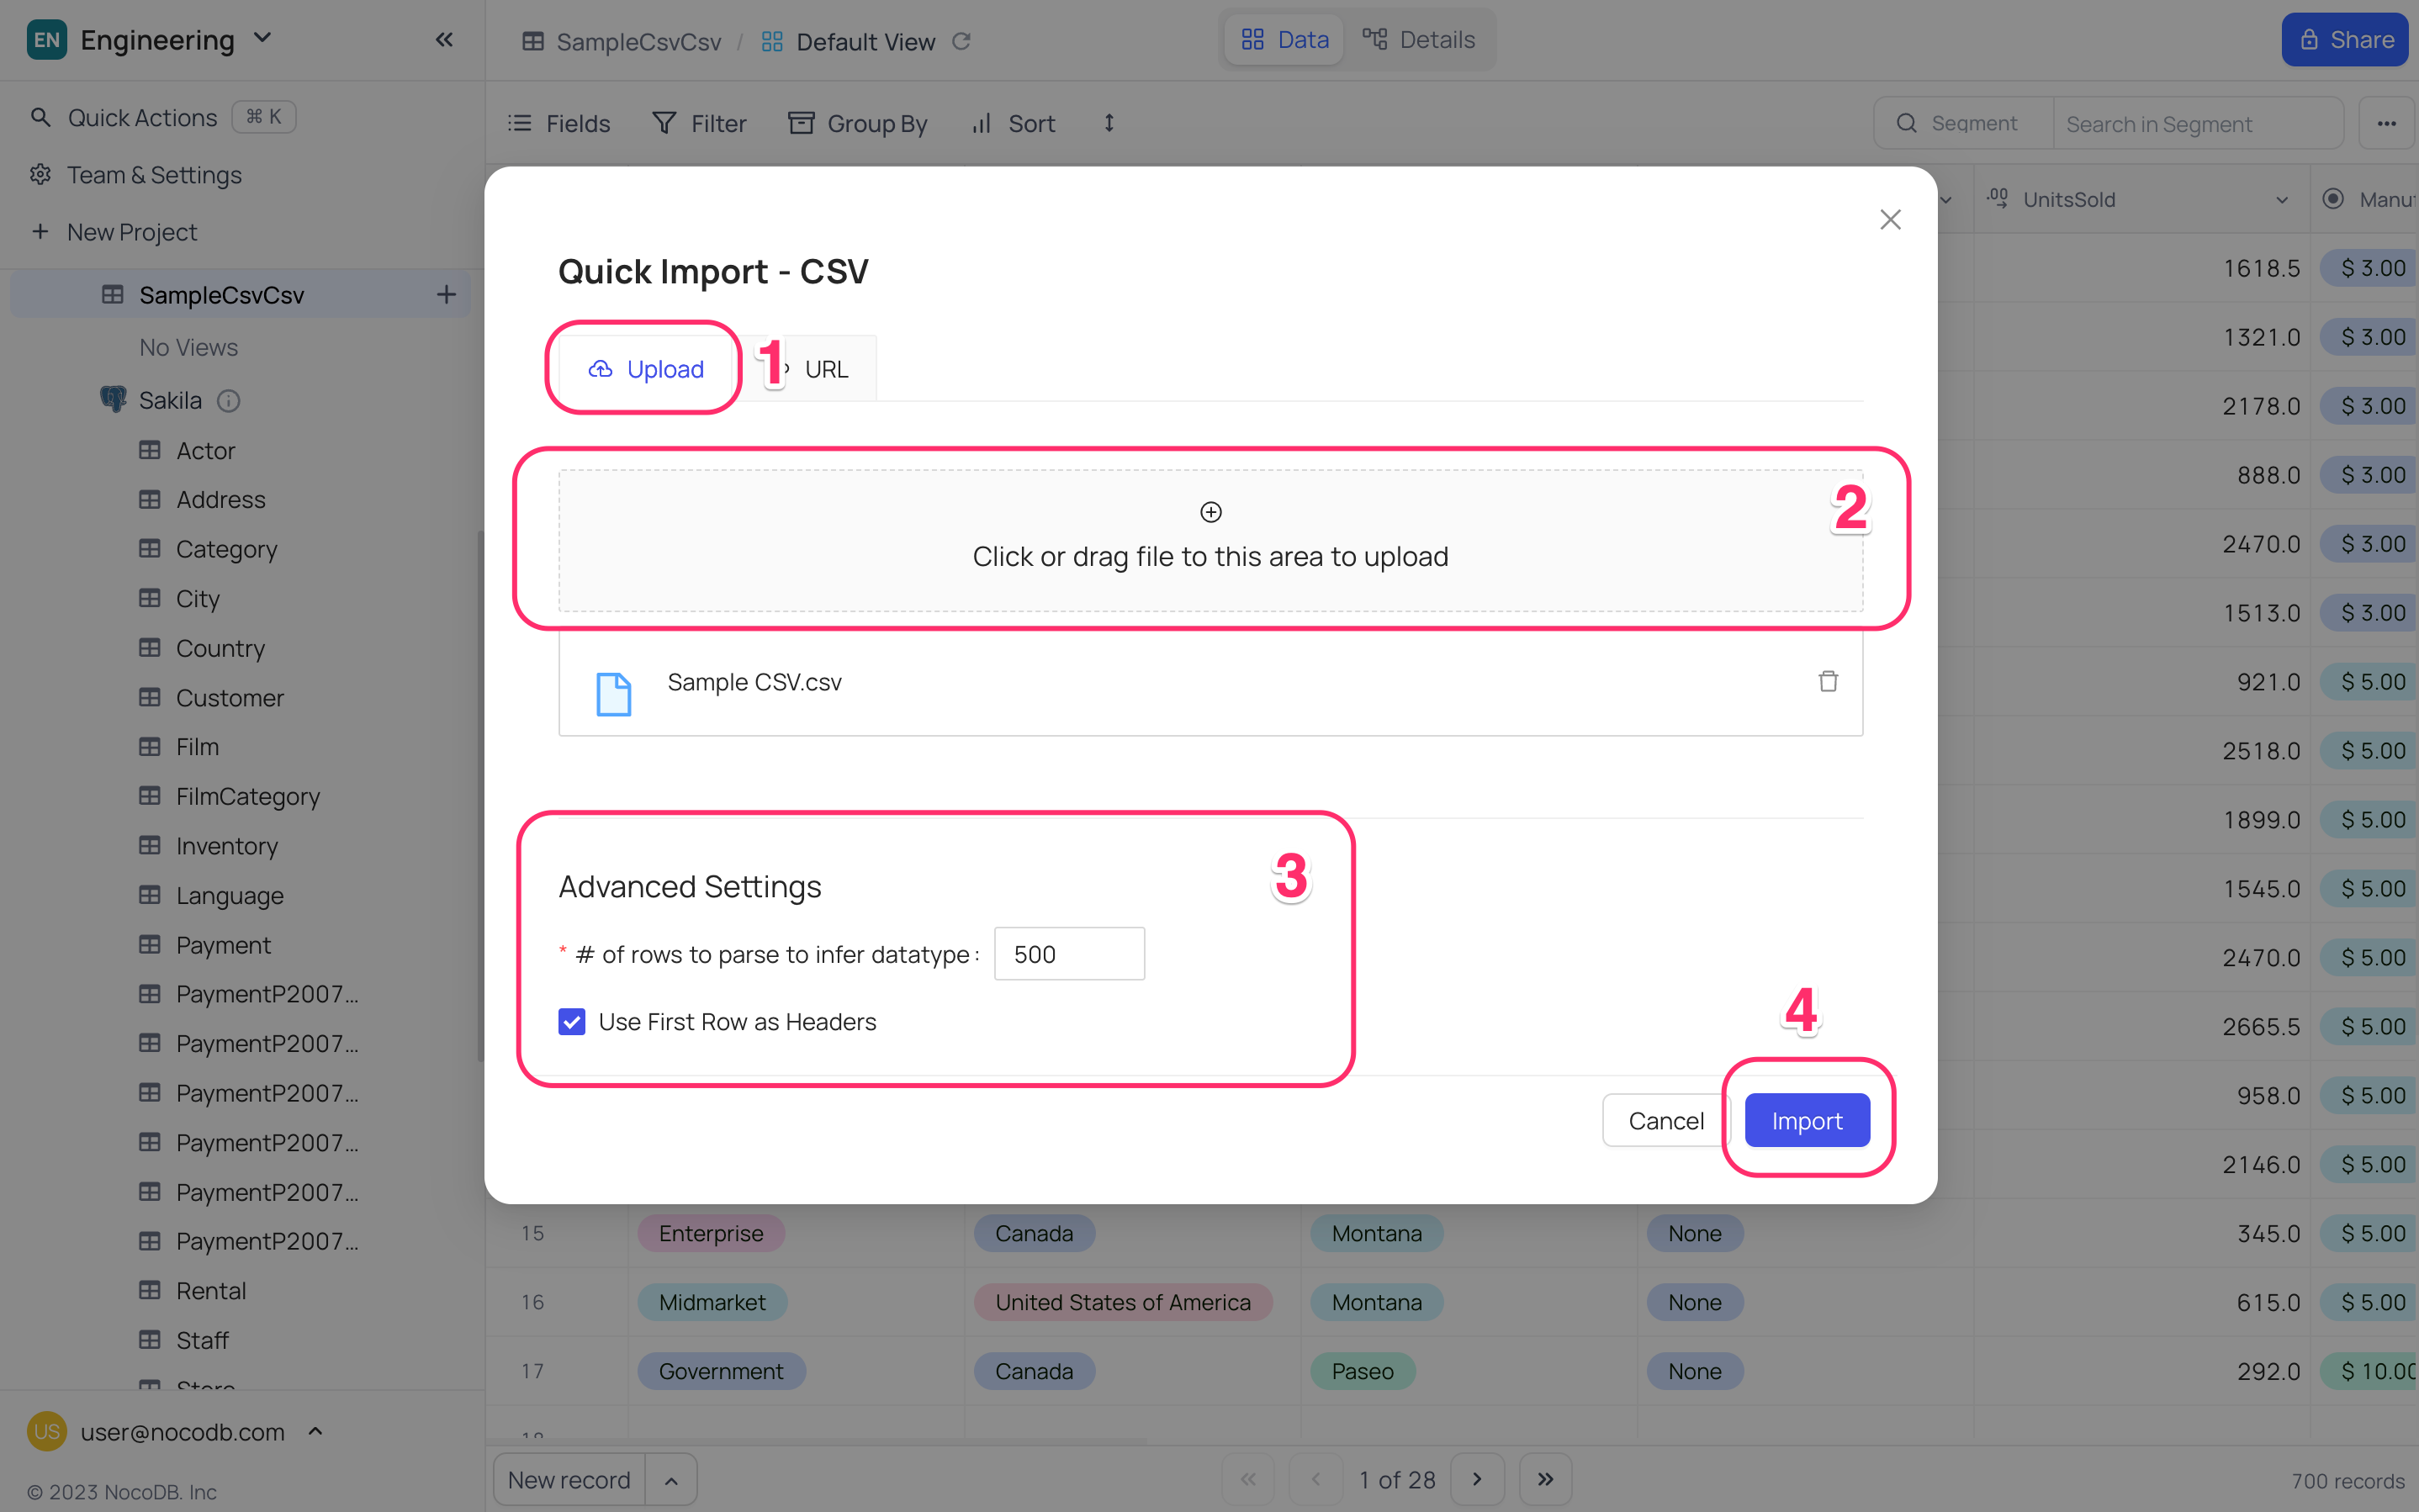
Importing file data
There are two ways to upload source file:
1. Upload from local directory
- Select
Uploadtab from the Quick import modal. - Click on
file uploadbutton or drag and drop file to the modal. - Advance Settings (optional)
- Click on
Importbutton.
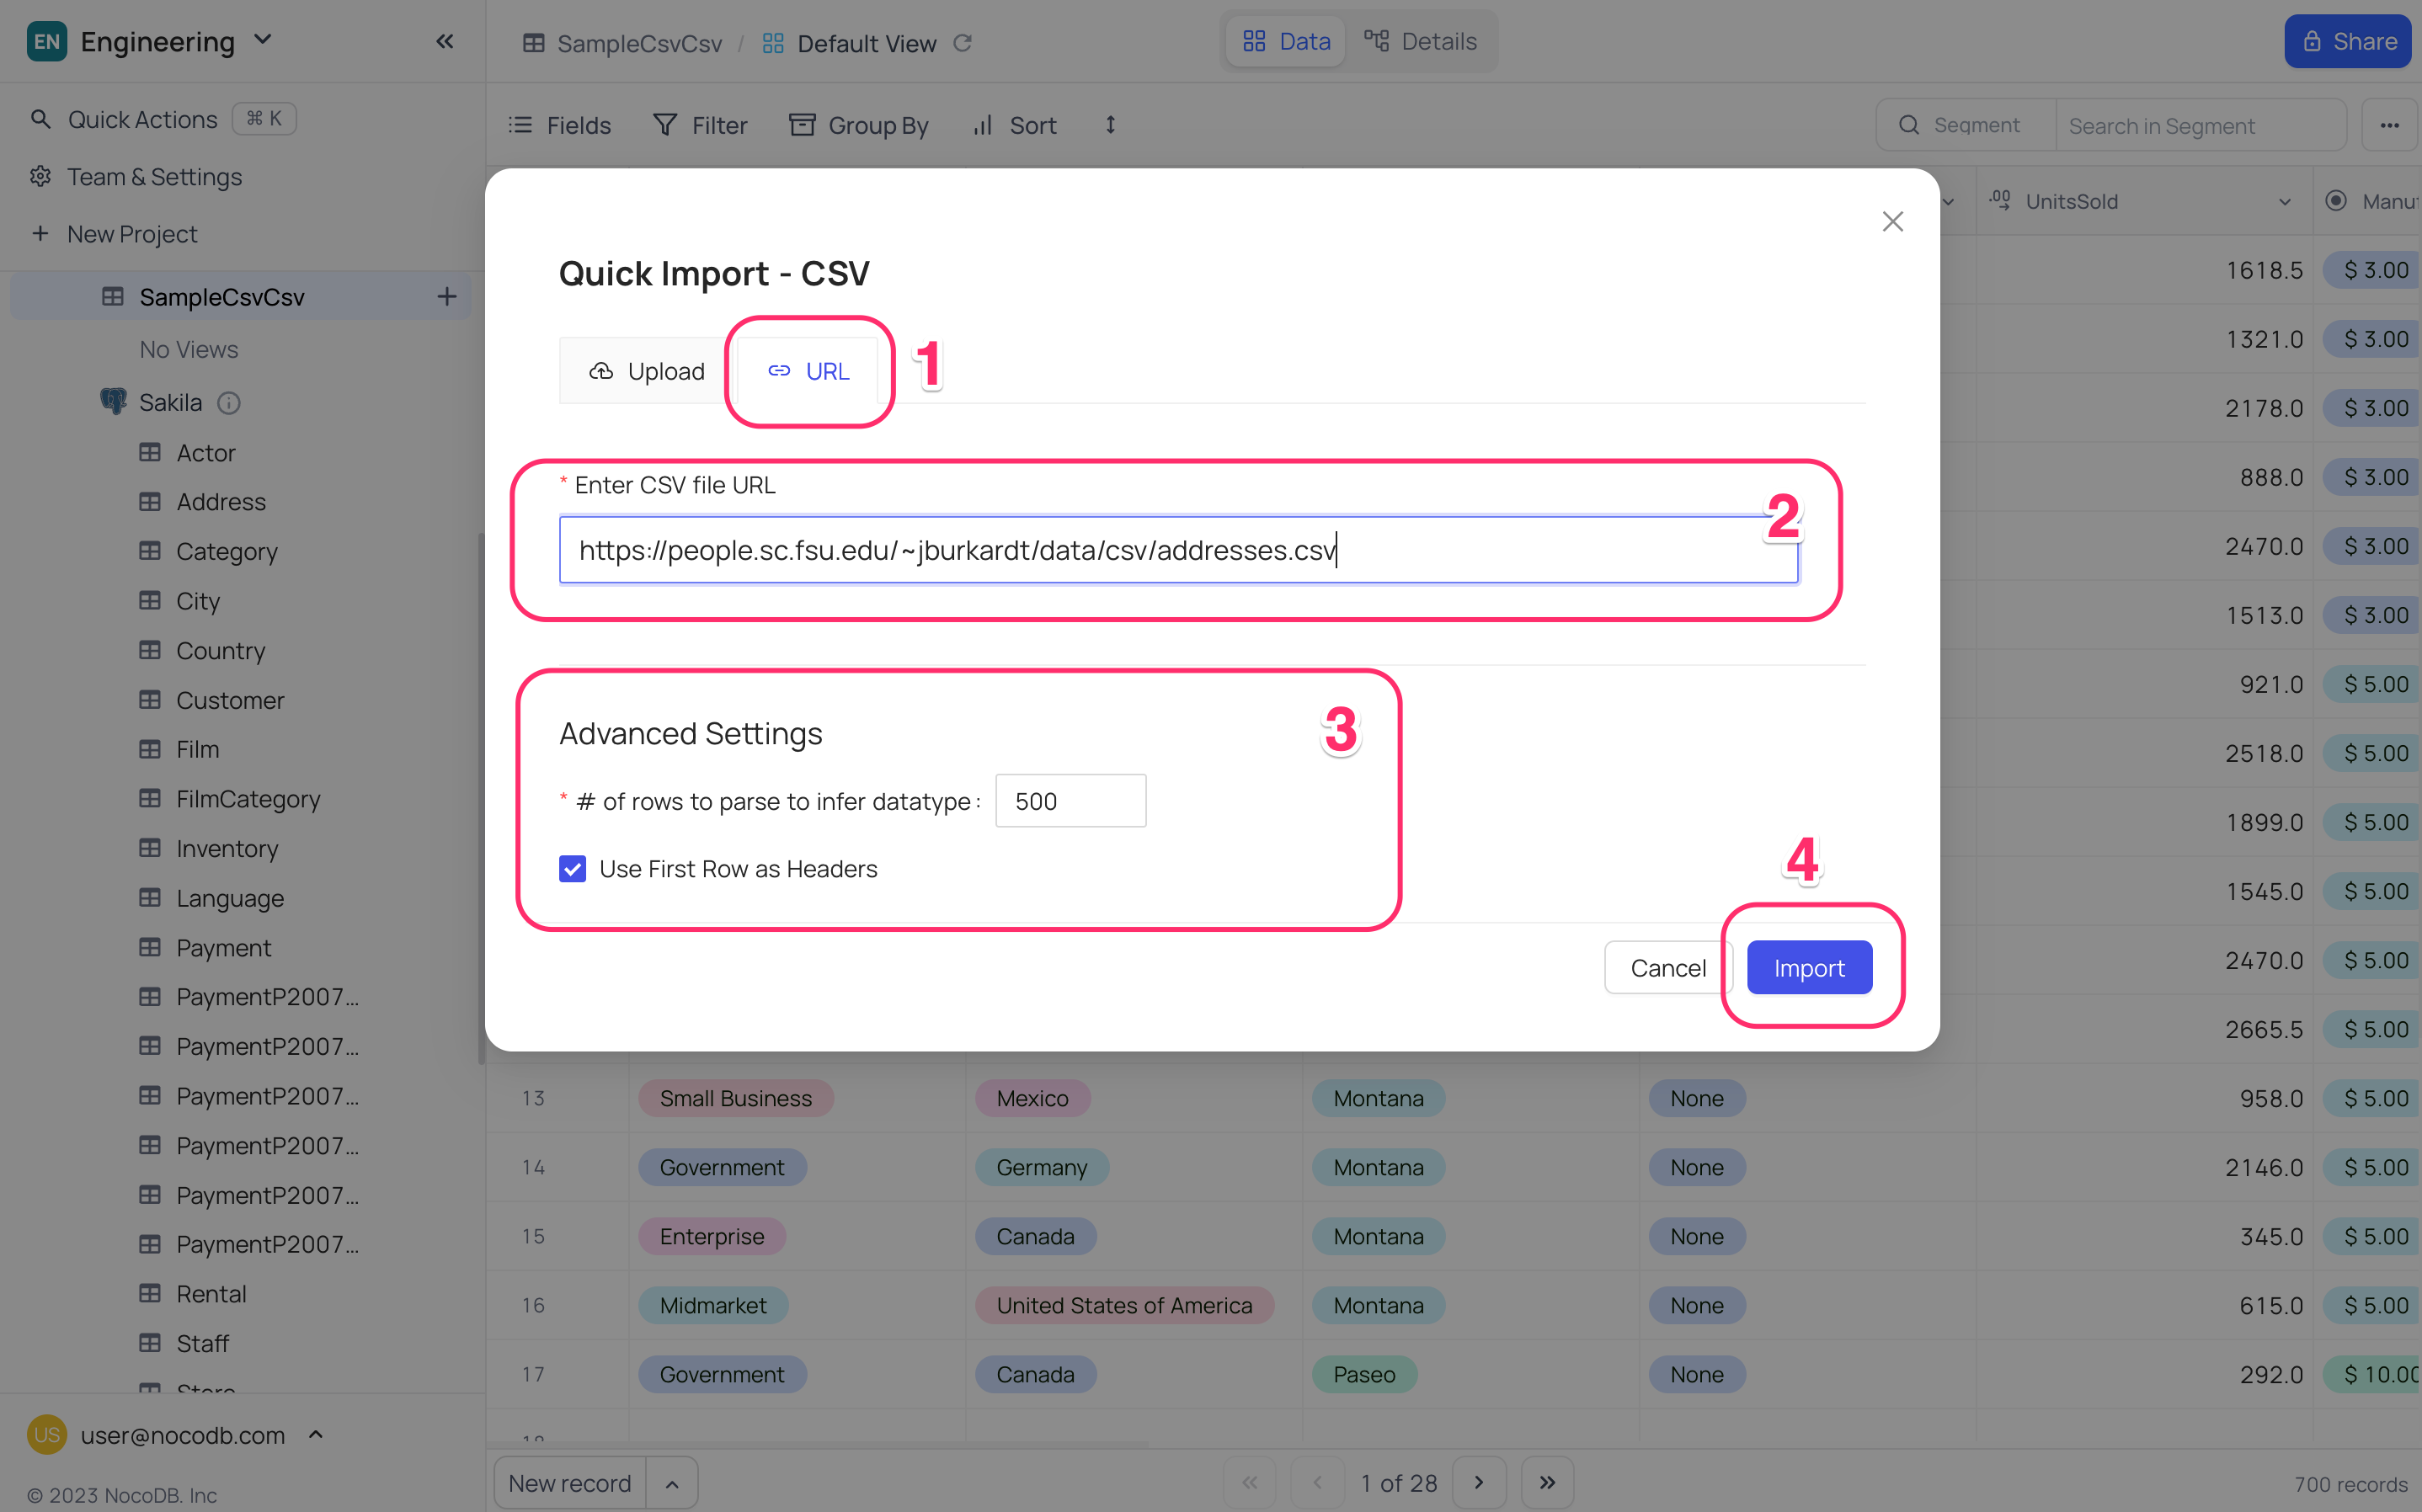
2. Upload from URL
- Select
URLtab from the Quick import modal. - Paste the URL of the file.
- Advance Settings (optional)
- Click on
Importbutton.
Field mapping
-
Table Name (Optional)
- Defaults to the name of the file; double-click to edit.
-
Mapping Fields (Optional)
- Existing field names are listed under
Source field, while new fields identified from the import file are listed underDestination field. - NocoDB automatically maps destination field names based on the source field names.
- You can reconfigure the mapping by utilizing the dropdown menu that appears when you click on the destination field.
- Existing field names are listed under
-
Exclude fields (Optional)
- A checkbox is provided to exclude a field from being imported.
-
Initiate Import
- Click on the
Importbutton to commence the file import process.
- Click on the

Advance settings
# of records to parse to infer datatype- defaults to 500 records.Utilize First Record as Headers**`: Enabled by default. If selected, the first record in the spreadsheet will be treated as the header record and its contents will be used as field names.