Create workspace
Upon signing up to NocoDB, an initial workspace is automatically generated on your behalf. Then you have the ability to either modify its name or creating an entirely new workspace.
In the following section, lets look at the process of creating your NocoDB workspaces.
Create a workspace
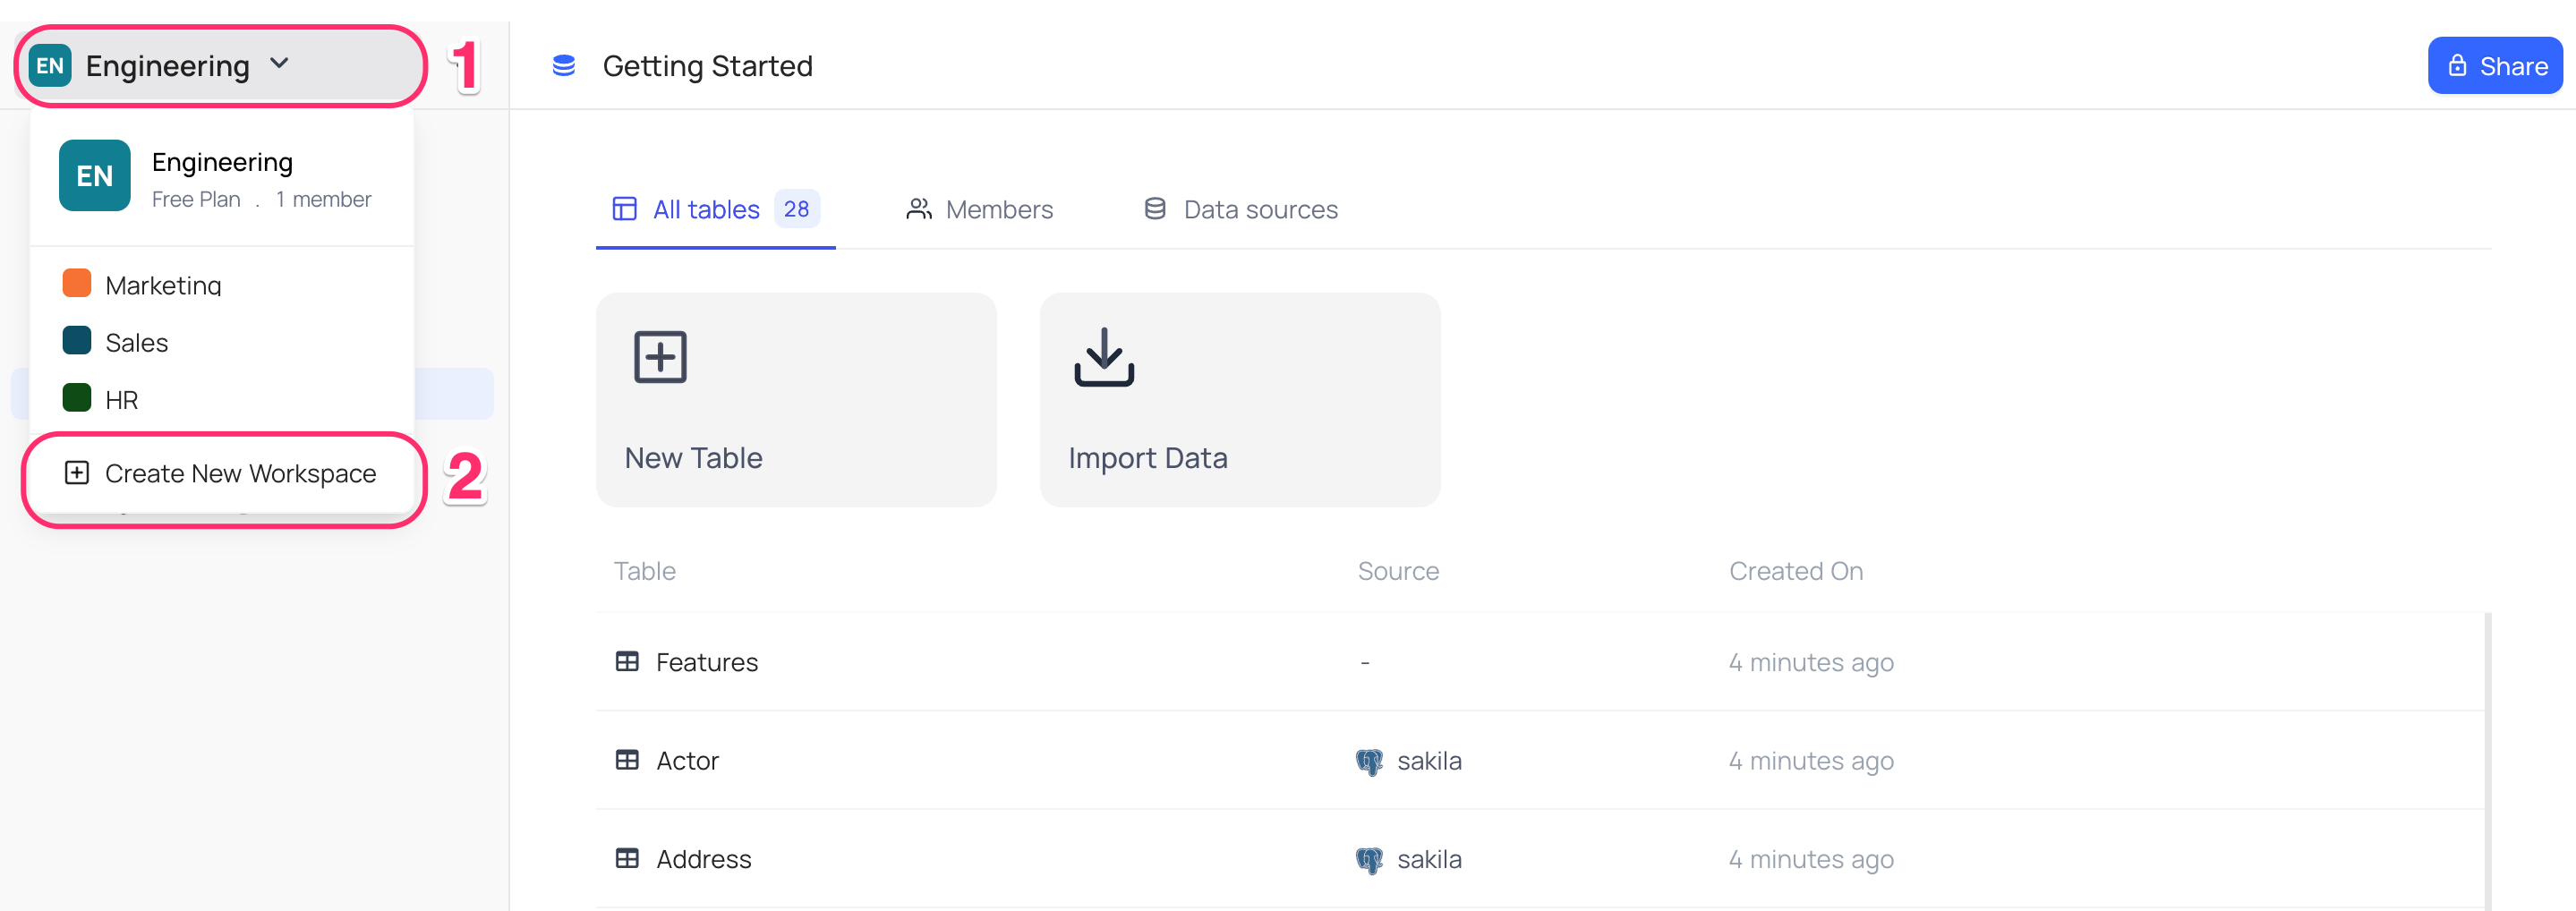
- Navigate to the top-left corner of the sidebar and select the Workspace name to access the Workspace context menu.
- From the Workspace context menu, opt for the Create workspace button.
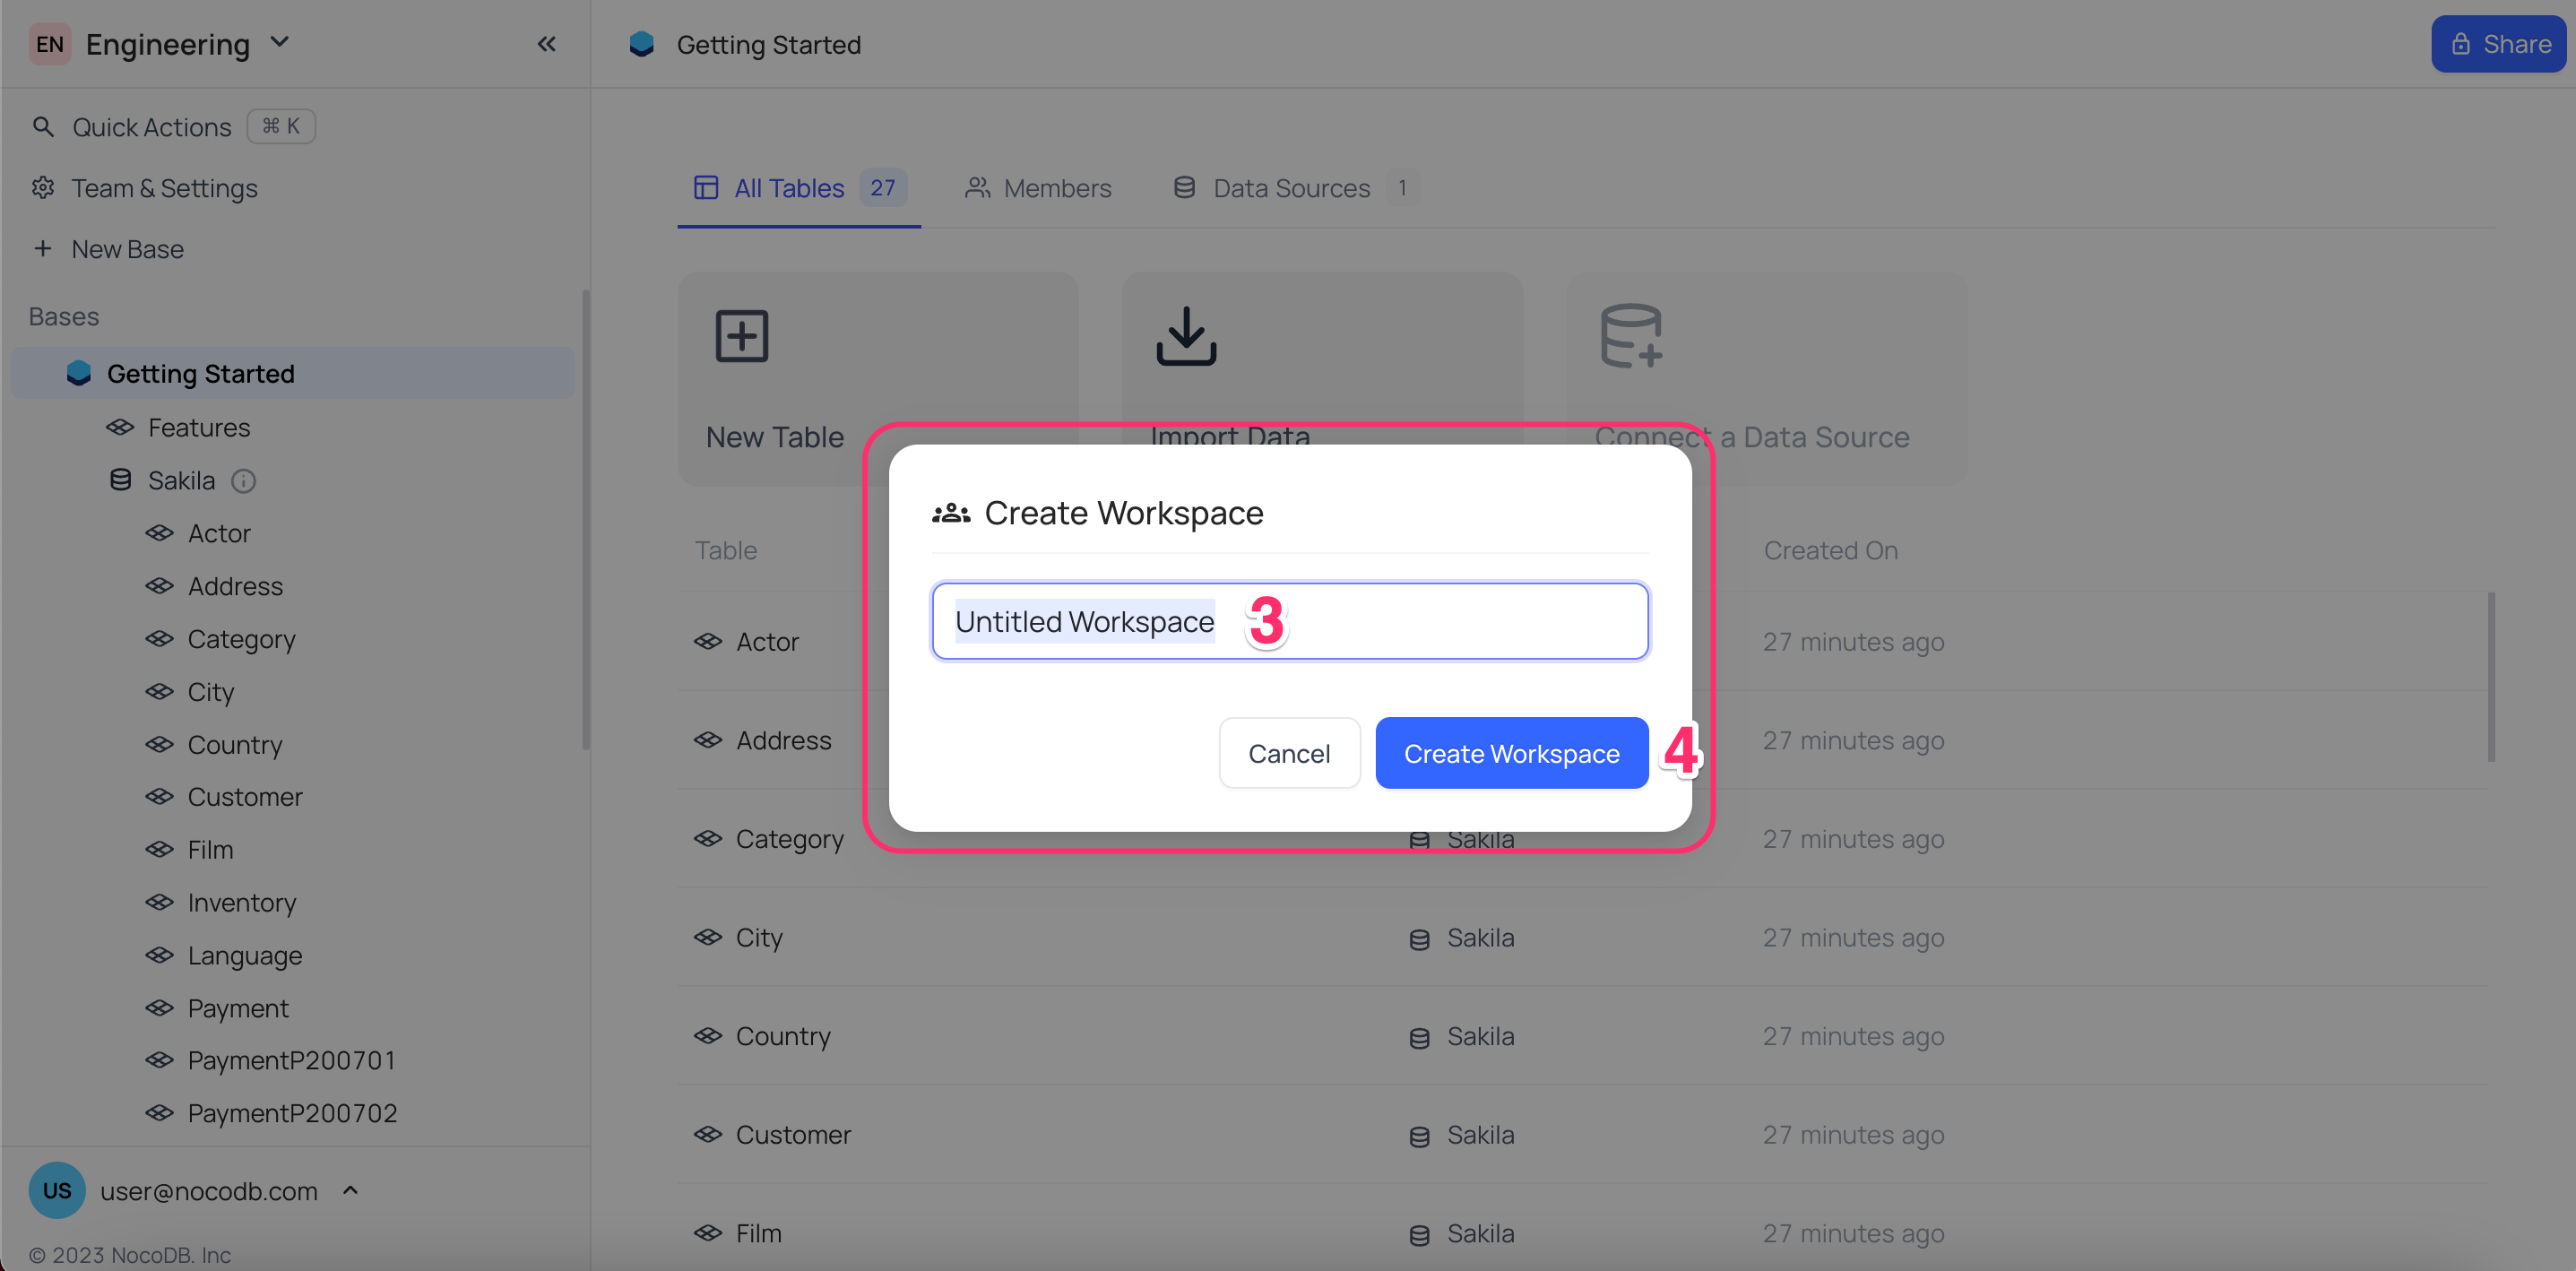
- Provide a name for the workspace
- Proceed by clicking the Create Workspace button.
When you start a new workspace, you automatically become the owner. Once your workspace is set up, you can create tables and invite others to join and work together. You can invite as many people as you want, and you can create as many tables as you need in your workspace. Workspace ownership is transferable, but a workspace must always have at least one owner.
info
The Open Source NocoDB includes a default workspace, and it does not allow the creation of additional workspaces.